Discord is a popular platform among gamers. Discord bots are the automated bots that can do tasks on your Discord profile. It can be used for different purposes with different limitations, as these solely depend upon the user who is creating the bot. You can make Discord Bots in any size you want. To make a discord bot, you don’t need to know all the programming skills. If you are a newbie, you can make a simple discord bot. If you are a pro, you can make a full-fledged discord bot for all your needs.
Contents
Steps to Make a Discord Bot
- Setup a Discord Account
- Download Node.js
- Making the Default Discord Bot
- Developing your Discord Bot
- Integrate the Bot with your server
Setup a Discord Account
Step 1: Open any of the web browsers and go to discordapp.com.
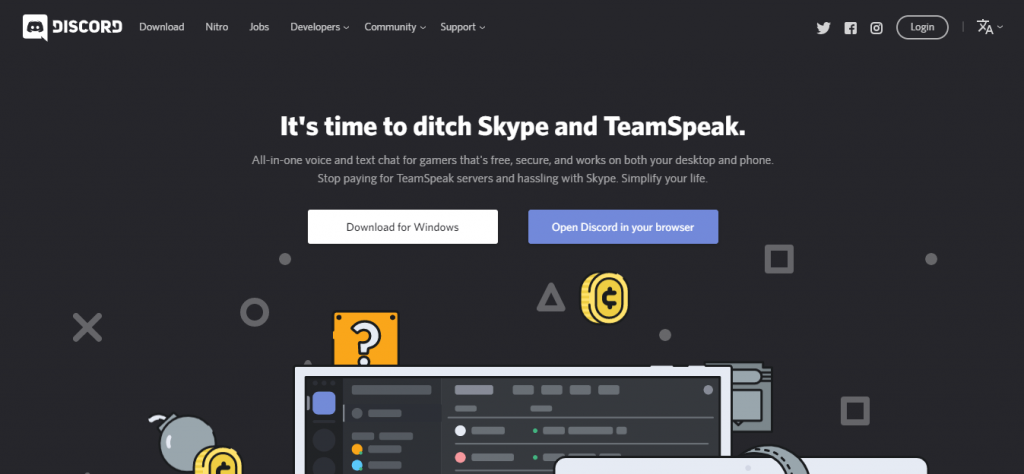
Step 2: Scroll down and click Sign Up Now.

Step 3: Enter the details asked and click Continue.
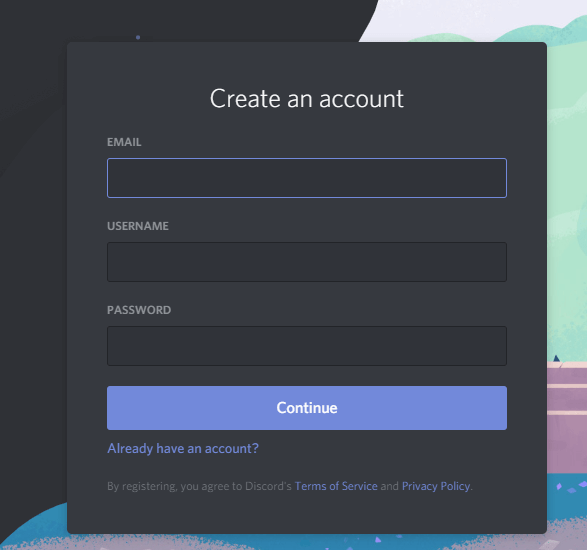
Step 4: You will be asked to verify your email. Follow the on-screen instructions to verify the email.
Step 5: Once you verify your email, you will get the Discord home page.
Download Node.js on your PC
You need to download and install Node.js on your PC to run the Javascript code outside the web.
Step 1: On your web browser, go to nodejs.org/en/download
Step 2: Download the installer file that suits your PC.
Step 3: After the download is complete, install the Node.js on your PC using the on-screen instructions.
Step 4: When the download is complete, open the Command Prompt in Windows PC or open Terminal on macOS.
Step 5: Type node -v and press the Enter key. If the version number is displayed, then your Node.js is installed correctly. If not, reinstall the app.
Techowns Tip: How To Screen Share on Discord [2 Methods]
Making the Default Discord Bot
Now, you have all the things required to make a discord bot. Let’s head to the making process.
Step 1: On your browser, go to discordapp.com/developers/applications. Log in with your Discord account if required.
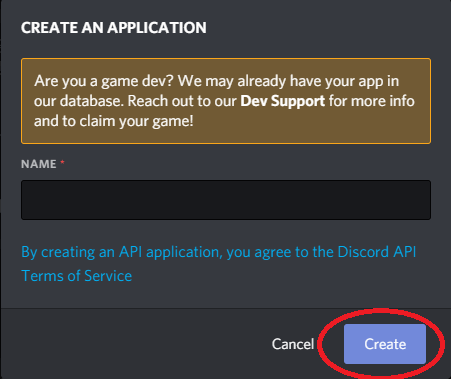
Step 2: Click the New Application on the top left side of the screen.

Step 3: Enter a name and click the Create button.
Step 4: On the right pane, click the Bot option.
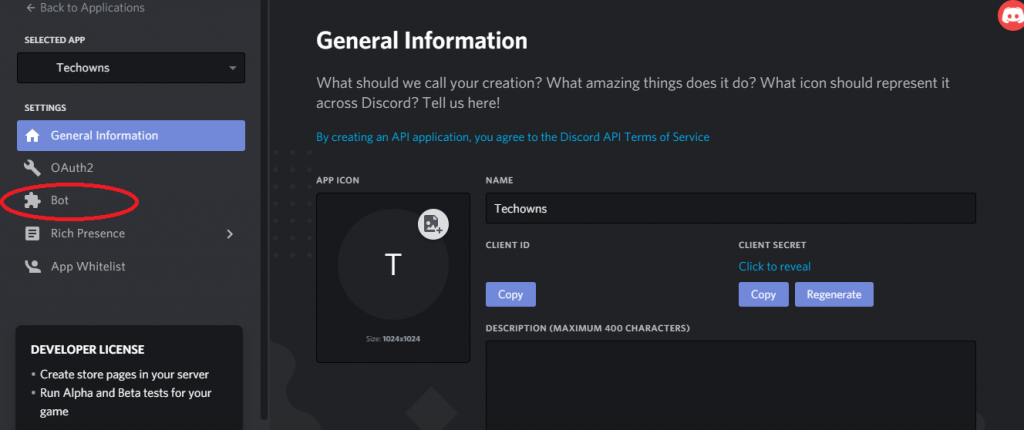
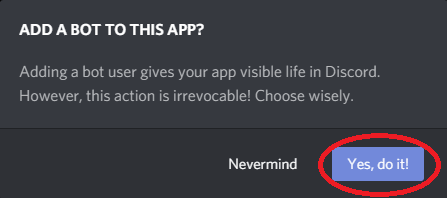
Step 5: On the next screen, click the Add Bot on the right side of the screen.

Step 6: On the confirmation pop-up, click Yes, do it! button.
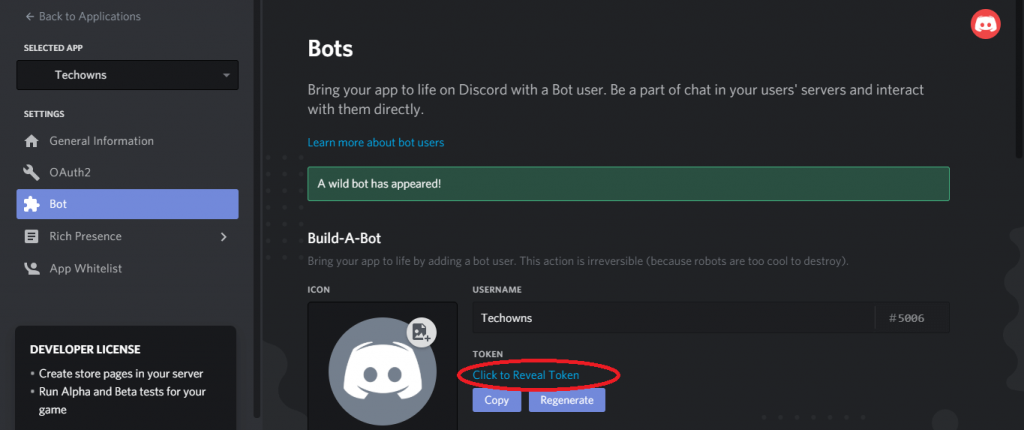
Step 7: A default Discord Bot is now created. Scroll down a little and click the Click to Reveal Token. A long list of characters will be displayed. Click Copy to copy the token.
Step 8: Paste it in the Sticky Notes app or any word processing application and save it.
Developing your Discord Bot
Step 1: Open the Command Prompt on your PC or Terminal on your Mac.
Step 2: Type mkdir discord-test-bot and press Enter.
Step 3: After that, type cd discord-test-bot to get into your bot.
Step 4: Now, you will get a list of codes. Type npm init -y and press Enter.
Step 5: When you run the above code, a folder named package.json should be created. Type npm install –save discord.js and press the Enter button.
Step 6: A list of warning messages will be displayed. Ignore all the messages. In the end, it will say added 8 packages or added 7 packages. Now, type touch auth.json to create the jason authorization file.
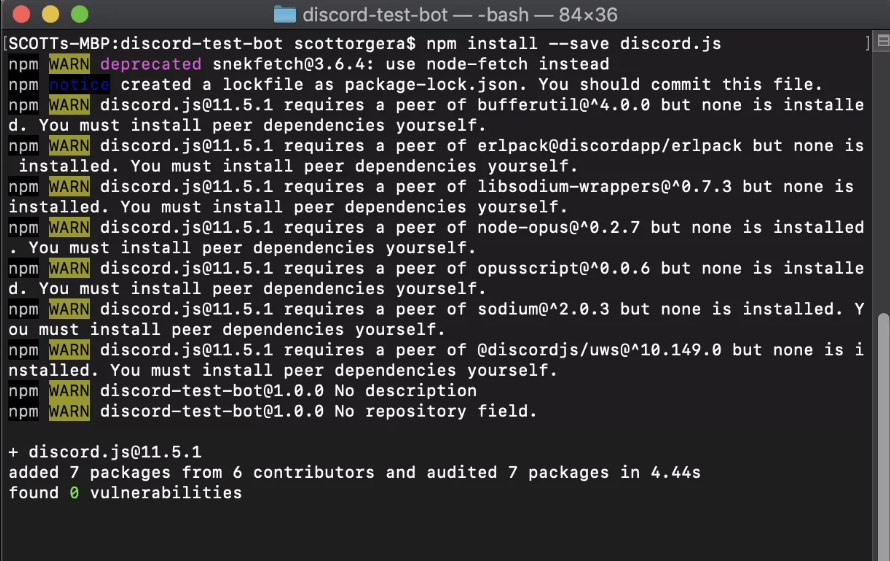
Step 7: After the execution of the code, type dir and press Enter to check if the jason authorization file is installed or not.
Step 8: Now, open any of the text editors like Notepad or Atom.
Step 9: Open the jason authorization file (auth.json) on your text editor. You will get the following screen. Replace the AUTH-TOKEN with the token that you have copied.
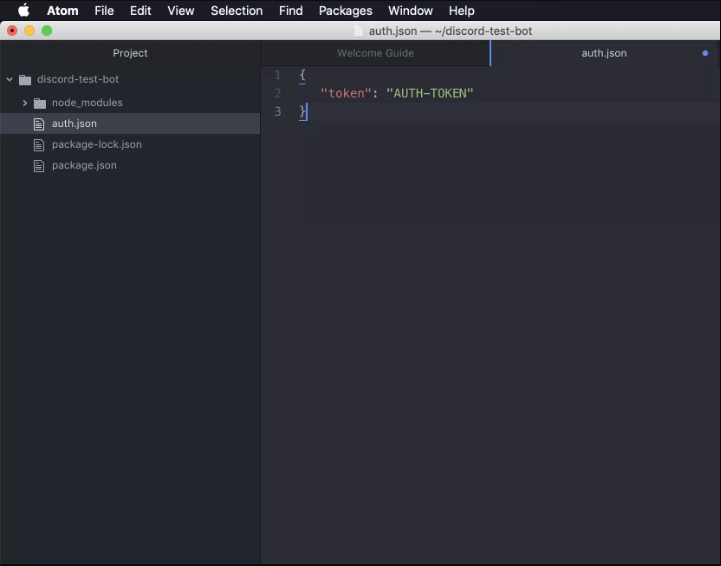
Step 10: After that, save the file using the command or shortcut key.
Step 11: Now, create a new file in your project with the name bot.js
Step 12: The bot.js file will have all the codes of your bot’s behavior. Here your coding skills are the only limitation you have.
Below is the sample code that will send simple automated messages. If any user sends hello, the discord bot will reply hi.
const Discord = require(‘discord.js’);
const client = new Discord.Client();
const auth = require(‘./auth.json’);
client.on(‘ready’,() => {
console.log(‘Signed in as ${cilent.user.tag}!’);
});
client.on(‘message’, msg => {
if (msg.content == ‘hello’) {
msg.reply(‘hii’);
}
});
client.login(auth.token);
Step 13: Save the code and return back to Command Prompt. Type node bot.js to run the code that you have written in the text editor.
Step 14: If it returns Signed in as discord-test-bot#<client tag>, you have done everything correct.
Integrate the Bot with your server
You have almost finished your Discord Bot making process. Now, you need to integrate the Bot with your server.
Step 1: Open your Discord account and go to the Developer Portal discordapp.com/developers/applications.
Step 2: Click the My Application that you have created earlier.
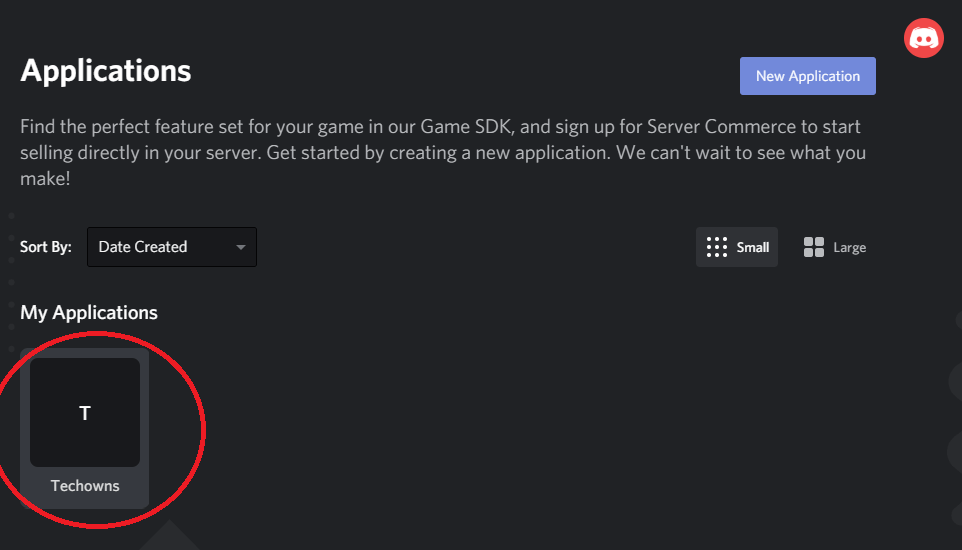
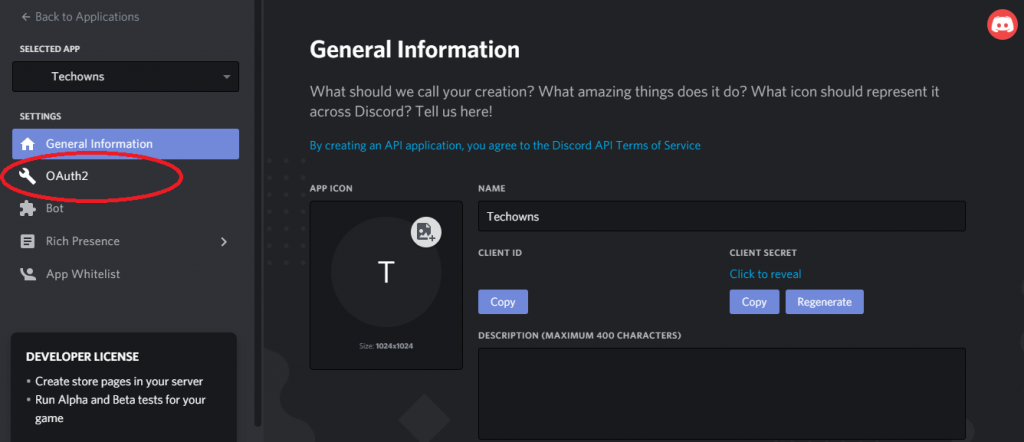
Step 3: On the next screen, click the OAuth2 on the left side of the screen.
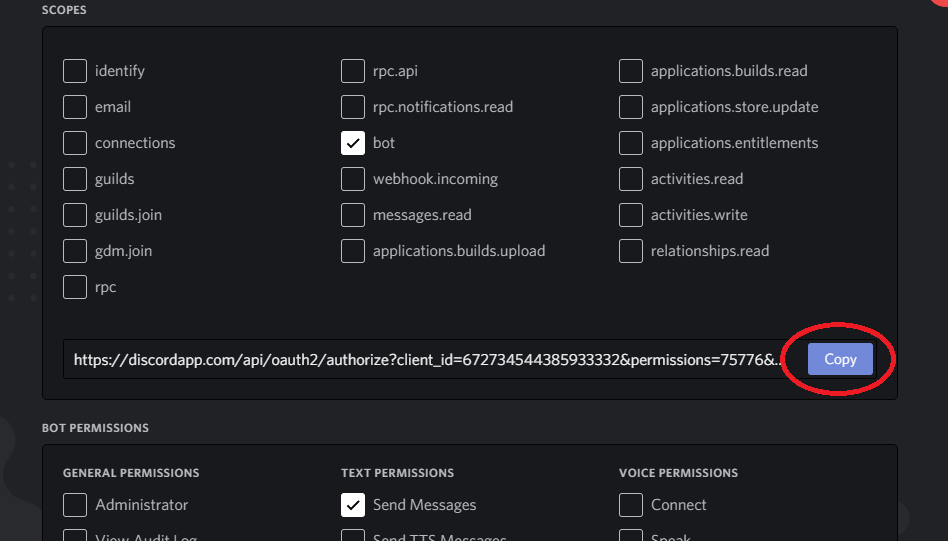
Step 4: Scroll down until you find the Scope option. Under that, tick the Bot option.
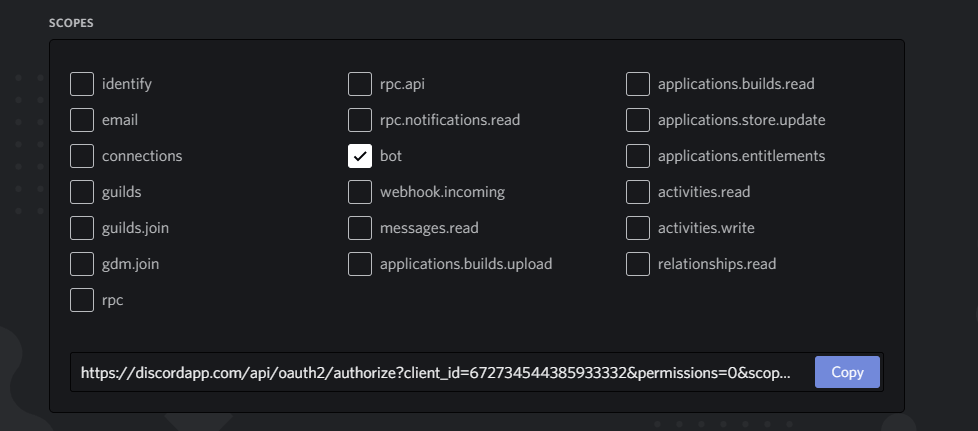
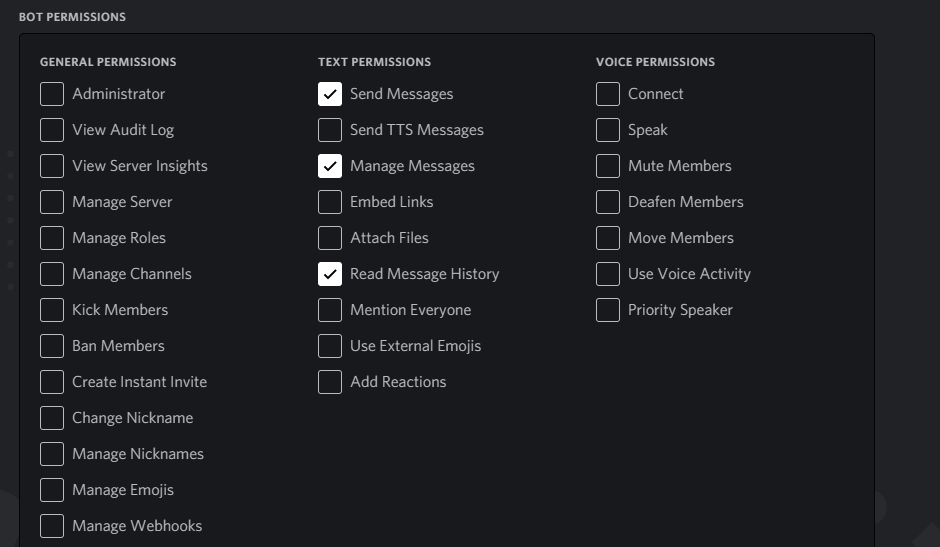
Step 5: Scroll down again to see the Bot Permissions. Tick all the necessary checkboxes. For the bot, we developed, tick Send Messages, Manage Messages, Read Message History.
Step 6: Now, click the Copy button placed between the Scope and Bot Permission, to copy the URL.
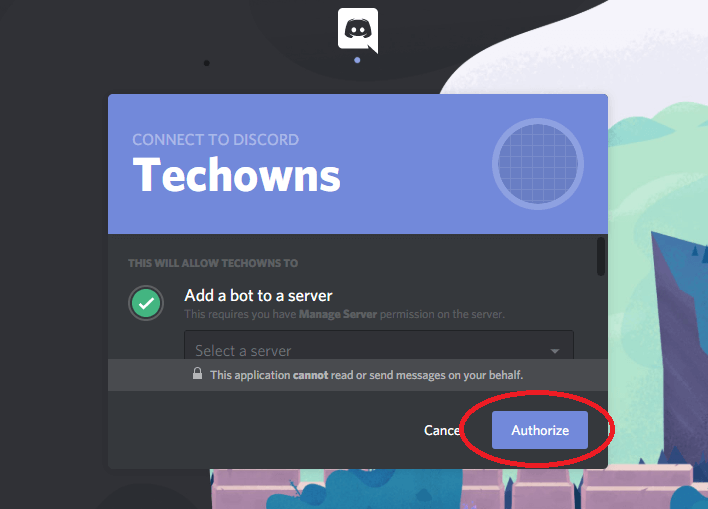
Step 7: Open the URL on a new tab. You will get Connect To Discord Window. Click the Select a Server drop-down option and choose your server. Now, click Authorize.
Step 8: Within a few seconds, you will get the confirmation screen that your bot is authorized.
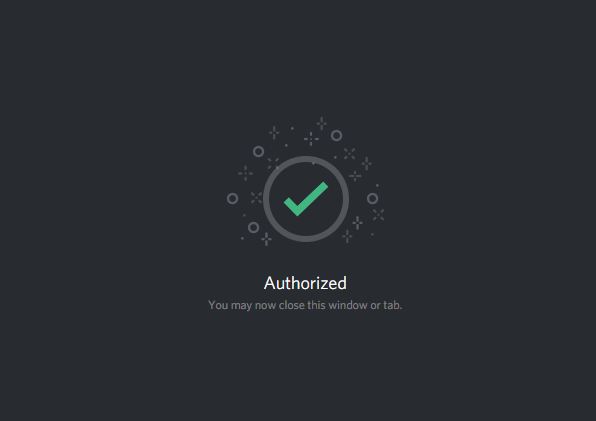
After you get the authorization screen, check whether your bot is working properly.
In this article, we showed you how to make a Discord Bot that can message Hi. You can customize and add many features if you know how to do it. If you want any specific features for your Discord Bot, tell us in the comments section. Follow us on Twitter and Facebook for more updates.

