YouTube has a lot of features to explore. It was launched on 14th February 2005 and the first video was uploaded on 23rd April 2005. The first video was titled Me at the zoo and it is still available on the platform. Over the fifteen years, the platform has seen many new features and updates. YouTube allows every one of its users to upload videos. If you are new to YouTube and wondering how to upload a video to your YouTube channel. Well, it is one of the easiest things to do.
Contents
Ways to Upload Videos to YouTube
There are two ways to upload videos on YouTube platform.
- Using the Smartphone app
- Using the Website (PC)
How to Upload a Video to YouTube using the Smartphone app
The YouTube app is available for both Android and iOS smartphones. The steps required to upload a video on YouTube is the same for both Android and iOS smartphone.
(1) Open the YouTube app on your smartphone and log in with your Gmail account if you are not logged in.
(2) Click the Camcorder icon on the top of the screen.

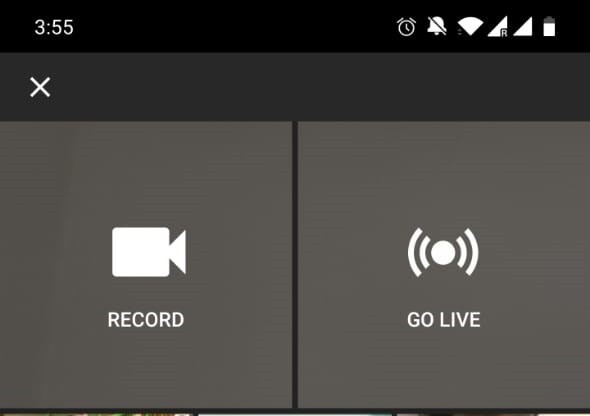
(3) Three options will appear. RECORD, GO LIVE, and your offline video files. Choosing RECORD will allow you to record a new video, choosing GO LIVE will allow you to make a live video on YouTube. Choose any of the offline video files that you want to upload.
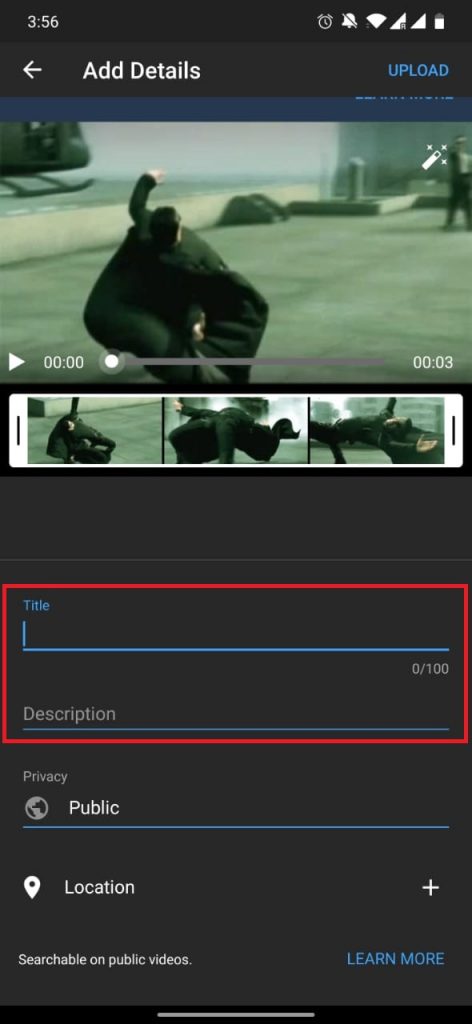
(4) When the video file is added, you need to specify the Title, Description, Privacy options. Location is optional.
(5) When you are done with it, click the UPLOAD button on the top right corner.
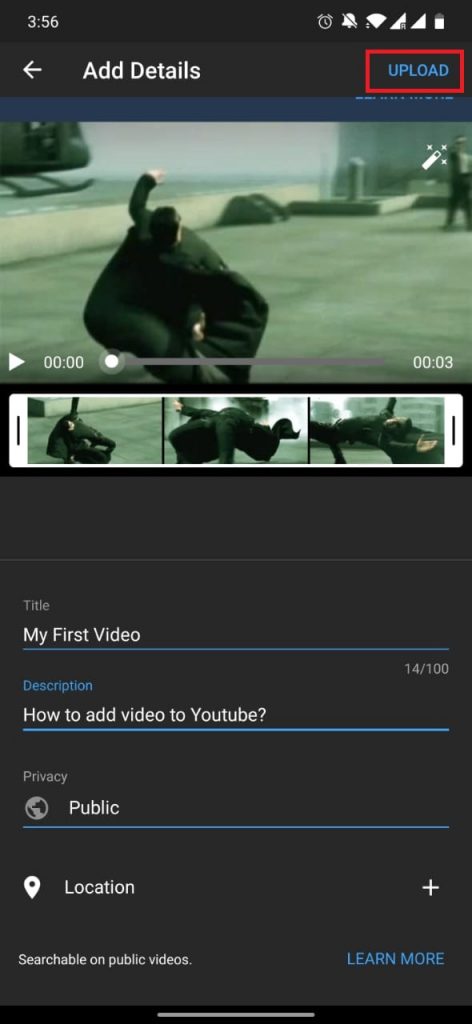
(6) It will be uploaded to your channel in a while, depending on the video length and video quality.
How to Upload a Video to YouTube using the website
(1) On your PC, open any of the web browsers and go to youtube.com
(2) Log in with your account if asked.
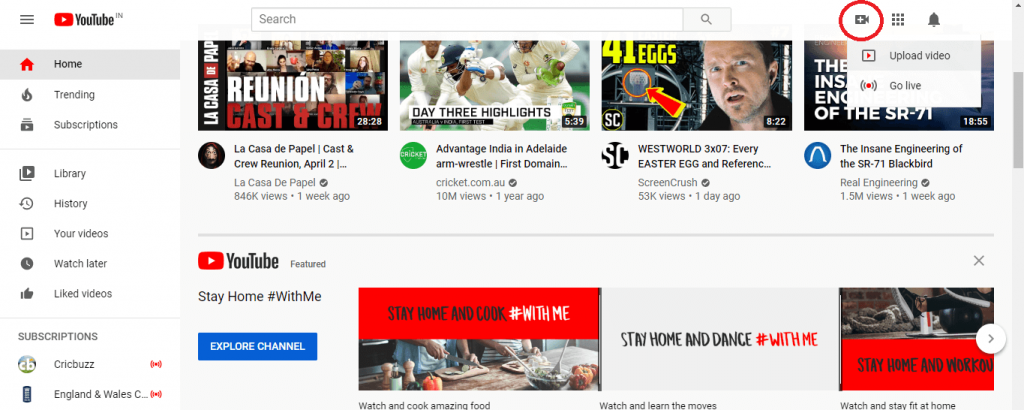
(3) Click the Create icon on the top right of the screen.
(4) Two options will appear. Upload video and Go live. Click the Upload video to upload your offline video file.
(5) On the next screen, drag and drop the video file or click the SELECT FILES button to choose thevideo file that you want to upload.
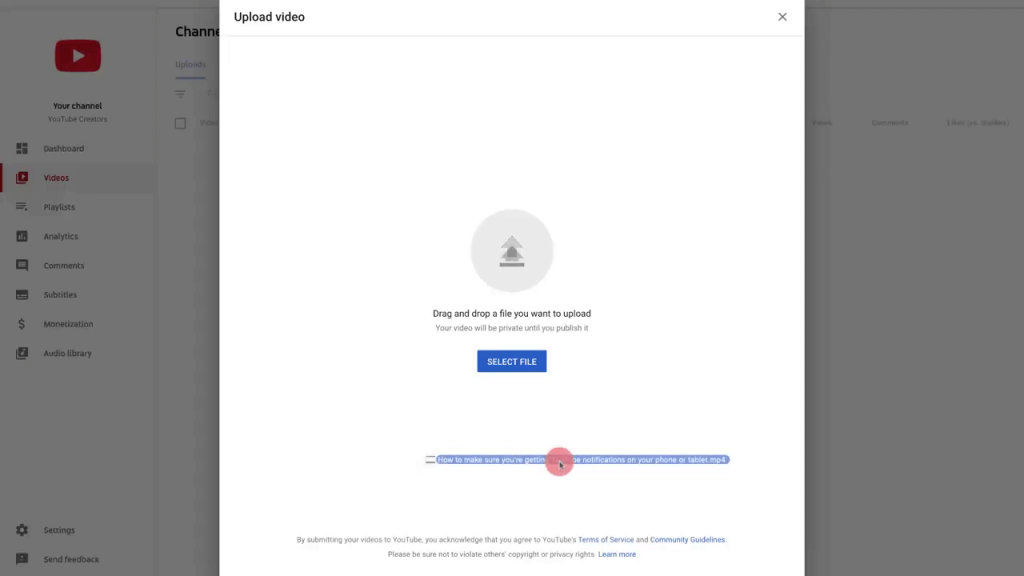
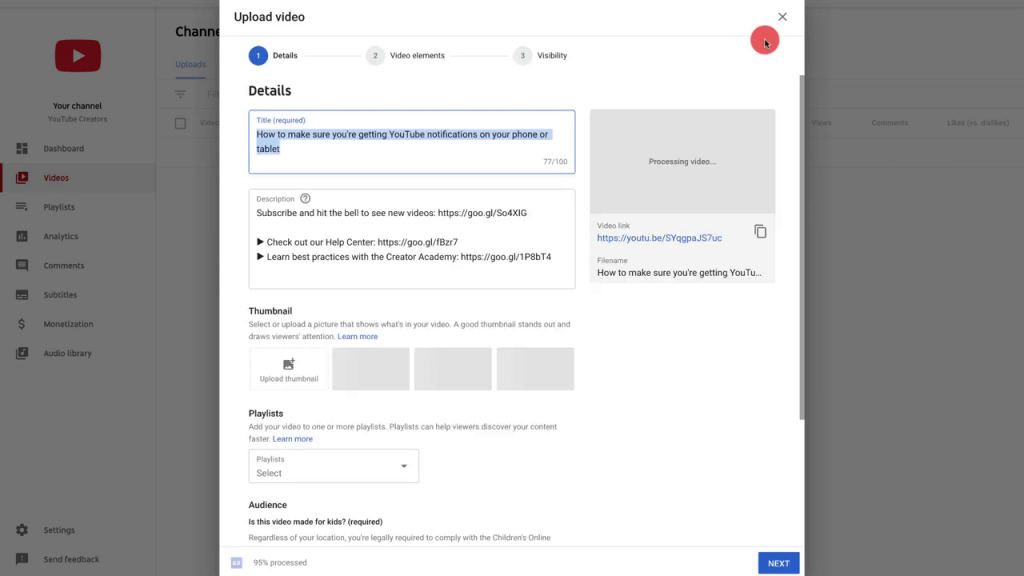
(6) Now, on the Upload video screen, specify the Title, Description, and Audience. The other optional things are Playlists and Thumbnails. You can add them if you want. Click on MORE OPTIONS button for Paid Promotions, Tags, Subtitles, Customize Comments features. After that, click the NEXT button.
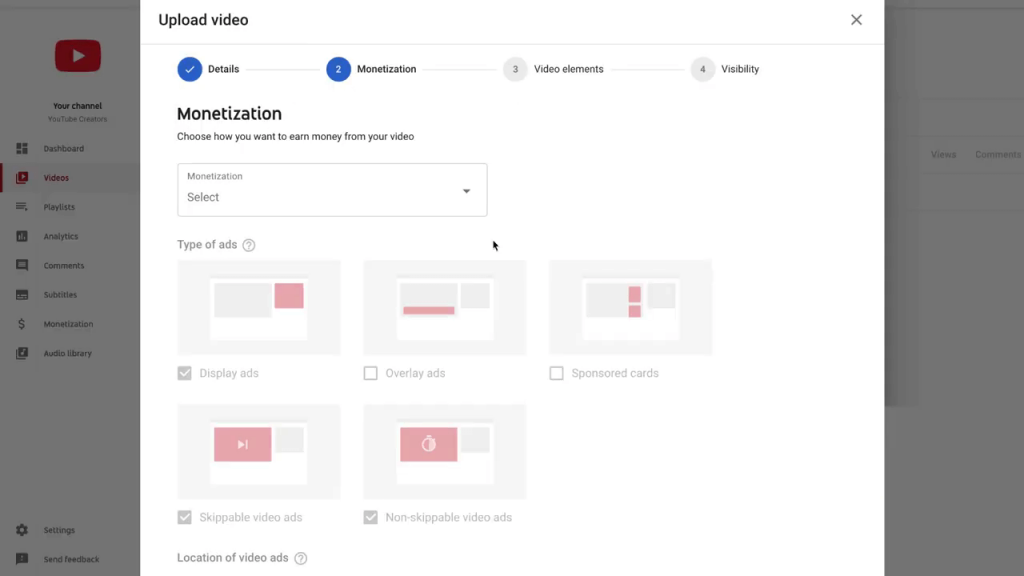
(7) If your channel is authorized of monetization, enter the monetization details on the next screen and click NEXT.
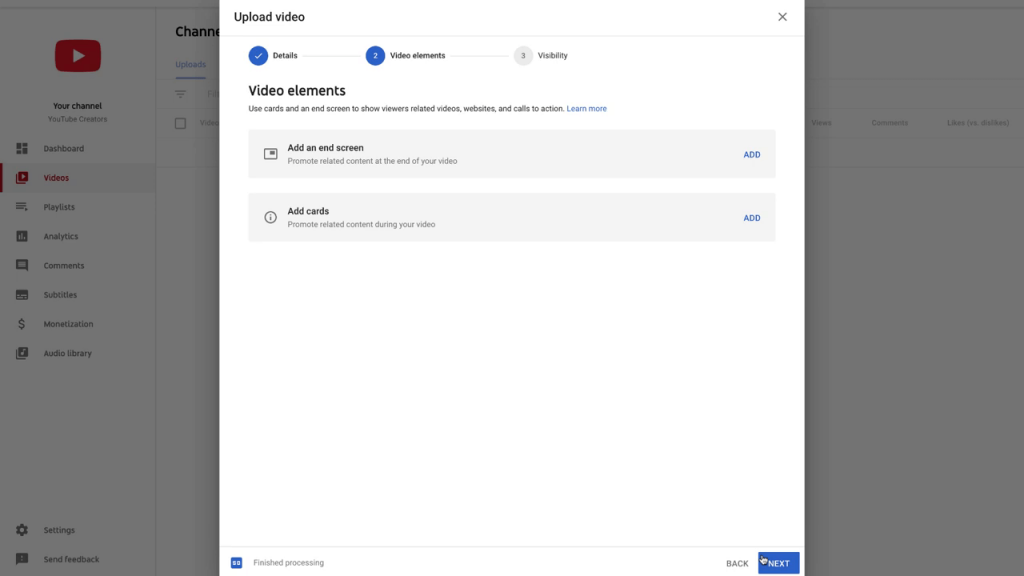
(8) On the next screen, add end screens and cards. These are optional things. Click NEXT.
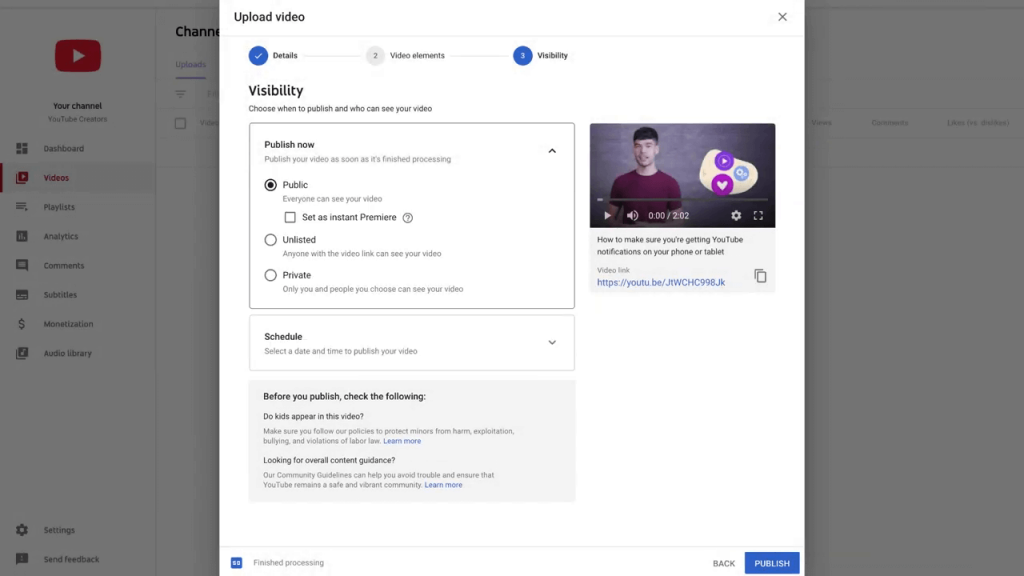
(9) Now, choose the Visibility of the video. Choose between Public (everyone can watch the video), Unlisted (user with the link can watch), and Private (only you can watch). You can also schedule your video for a specific time and date.
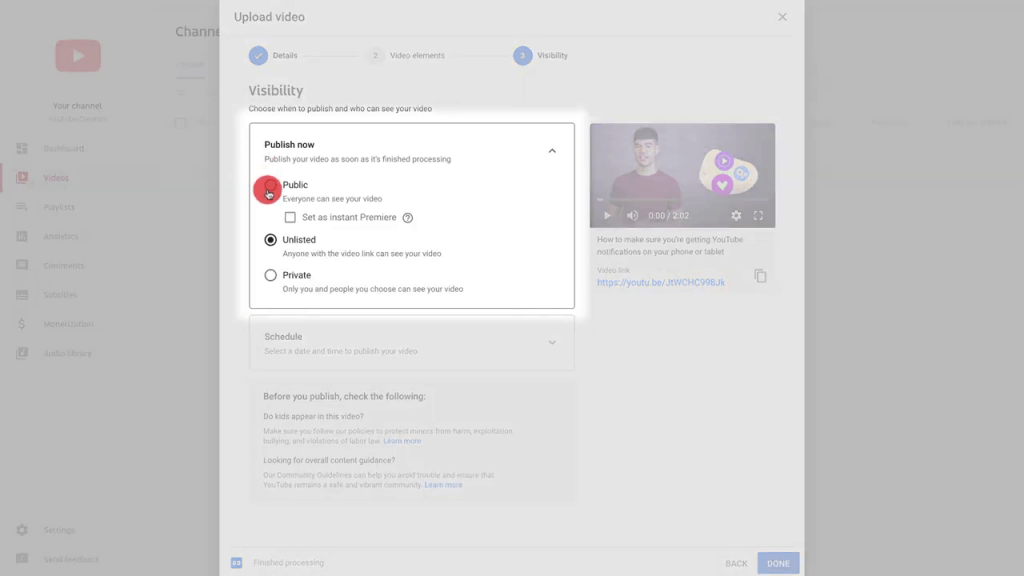
(10) Click the PUBLISH button to publish the video. Click SCHEDULE, if you choose to schedule the video for a specific time.
Note: At a time, you can upload 15 videos simultaneously.
By posting creating videos on Youtube, you can make money on YouTube when you get subscribers.
YouTube Supported Formats
Apart from video files, you can’t upload any other files like audio, music, MP3, and PowerPoint files. You can use editors like iMovie to change the format of the file. The supported file formats on YouTube are MOV, MP4, MWV, AVI, MPEG, MPEG4, 3GPP, FLV, HEVC, WebM, ProRes, CineForm, and DNxHR.
When you upload a video, it will be imported to your YouTube Channel. If you leave YouTube at this time, the video will be available in the Draft. When you click the PUBLISH button, the video will be available to all the other YouTube users. Don’t confuse with UPLOAD and PUBLISH.
If you are going to make a live video on YouTube, make sure that your channel meets the YouTube Live Video Requirements.
This is how you upload a video to your YouTube Channels. If you have any doubts about YouTube or any of its features, tell us in the comments section.
Follow our social media pages like Facebook and Twitter to get more updates.


