The combination of owning a Chromebook and an iPhone is quite hard for users to cope up. Chromebooks run with Chrome OS, an operating system exclusively created by Google. iTunes is a media player accessible on macOS and Windows PC. But there are users out there owning an iPhone along with a Chromebook, and they sometimes find it difficult to connect those devices. Here is the complete step-by-step guide on how to set up iTunes on your Chromebook device.
To run iTunes on Chromebook, you need to enable Linux and set up wine 5.0. The below steps will guide you through setting up iTunes on Chromebook with necessary screenshots.
Contents
Setup iTunes on Chromebook
Setting up iTunes on Chromebook is a tedious one, but if you managed to installed iTunes, you could do whatever you wish between Chromebook and iTunes. The setup involves three important milestones to be done.
- Enable Linux on Chromebook
- Set up Wine 5.0 on Chromebook
- Install iTunes on Chromebook
Enable Linux on Chromebook
[1] Tap the Profile icon on the top right corner of your Chromebook.
[2] Click on the Settings icon.
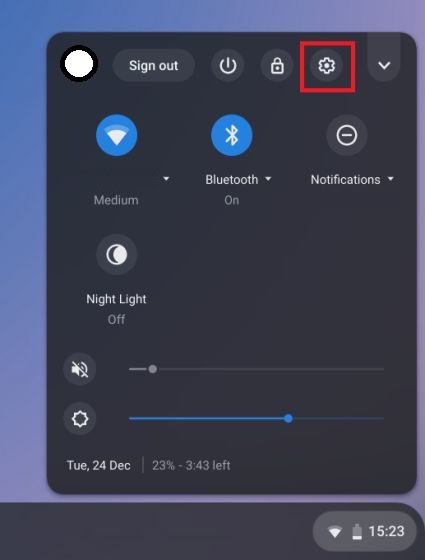
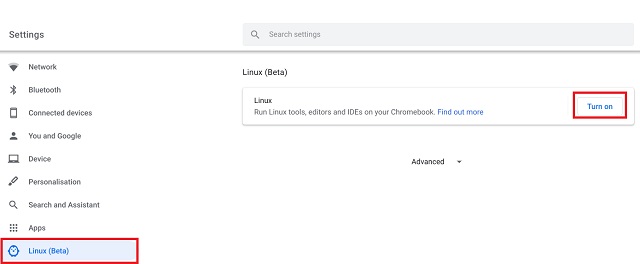
[3] From the Settings tab, choose Linux (Beta) from the left panel.
Note: If you don’t find Linux (Beta) in the left panel, then update Chromebook to the latest version.
[4] Click on Turn on to run Linux tools, editor, and IDEs on Chromebook.
[5] Once turned on, a setup dialogue box will appear on the screen.
[6] Click on the Install button to get the necessary files to run Linux on your Chromebook device.
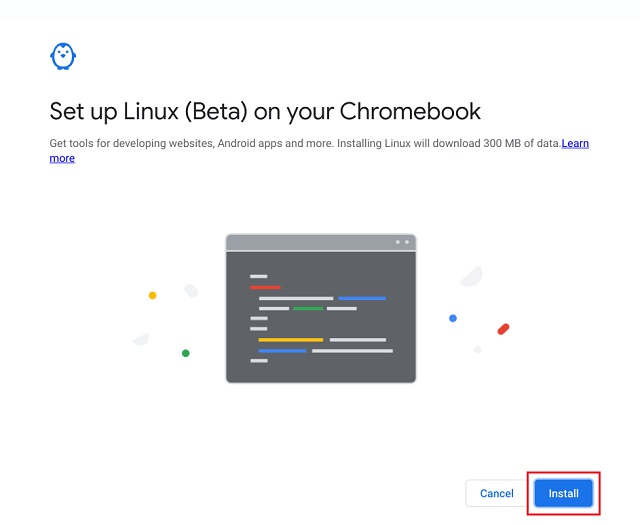
Note: Installing Linux will download 300 MB of data, and this may take some time to complete the process.
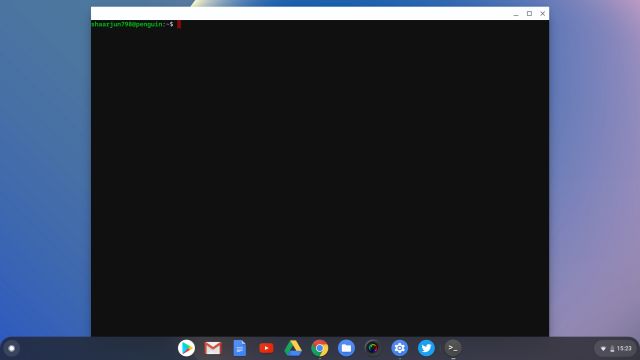
[7] Now, you have installed Linux successfully on your Chromebook device and got access to the Linux terminal.
Set up Wine 5.0 on Chromebook
After installing Linux on Chromebook, you need to set up Wine 5.0 to install the Windows version of the iTunes app. Wine acts as a bridge between Linux, Windows, and Chromebook. Here are the steps to set up Wine 5.0 on Chromebook.
[1] Open Linux Terminal on your Chromebook.
[2] Run the following command to provide support for 32-bit apps.
sudo dpkg --add-architecture i386

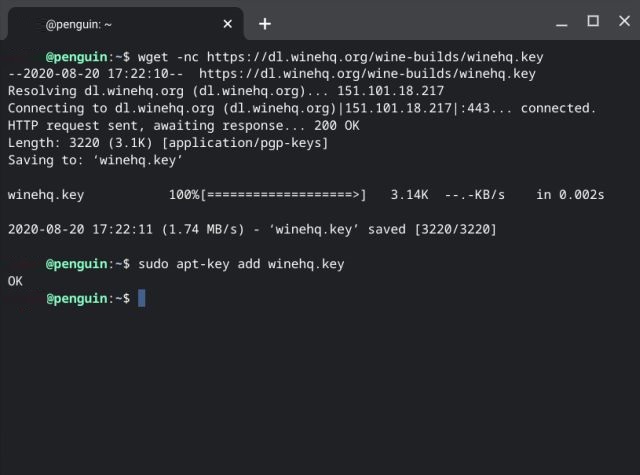
[3] Now, type the following command to download & install the winehq.key and click on enter.
wget -nc https :/ /dl.winehq.org/wine-builds/wine-builds/winehq.key
[4] Run the following code
sudo apt-key add winehq.key
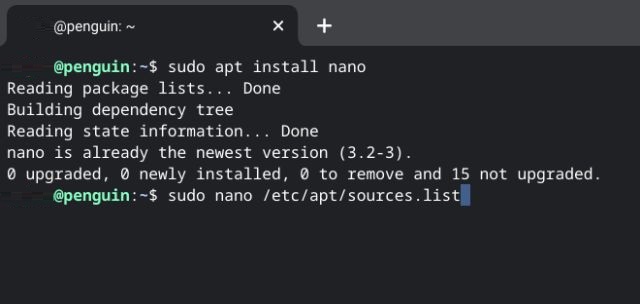
[5] Enter the following command to install Nano editor.
sudo apt install nano
[6] Run the following command to open and edit the source list in the Nano editor.
sudo nano /etc/apt/sources.list
[7] Here in the Nano editor, copy and paste the following line of command below.
deb https://dl.winehq.org/wine-builds/debian/ buster main
deb https://download.opensuse.org/repositories/Emulators:/Wine:/Debian/Debian_10 ./
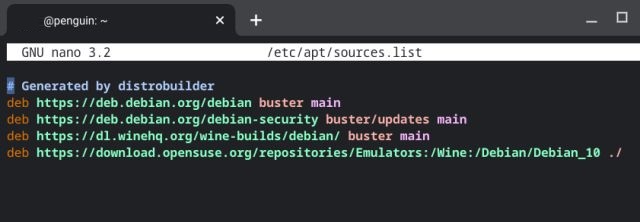
[8] Once the command was added in the editor, press Ctrl + X on your keyboard, followed by Y.
[9] Finally, hit the enter button to save the modified buffer and then exit the nano editor.

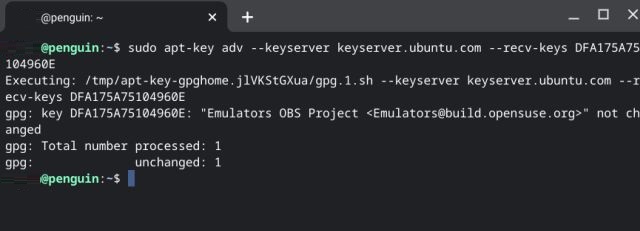
[10] Now, add the following command to add Ubuntu Keyserver.
sudo apt-key adv --keyserver keyserver.ubuntu.com --recv-keys DFA175A75104960E
[11] Enter the following command for Update in the terminal.
sudo apt update
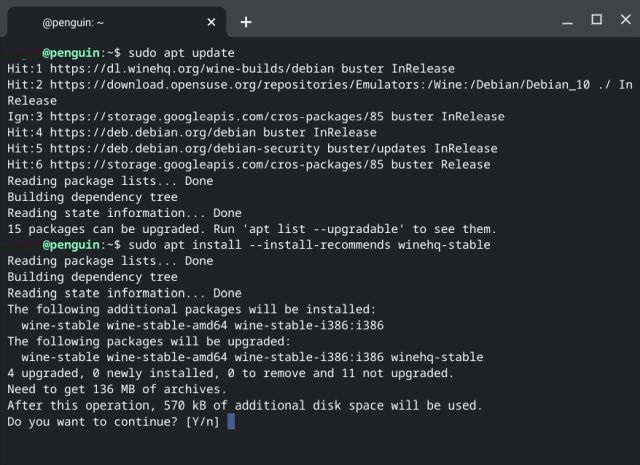
[12] At last, enter the following line of command to install Wine 5.0 on your Chromebook device.
sudo apt install --install-recommends winehq-stable
[13] Press Y and hit enter to install Wine 5.0.
[14] Now, you have successfully installed Wine 5.0 on your Chromebook and check that by entering the command given below. It will open the Wine Configuration tab, and in the About tab, you can check the installed version.
winecfg
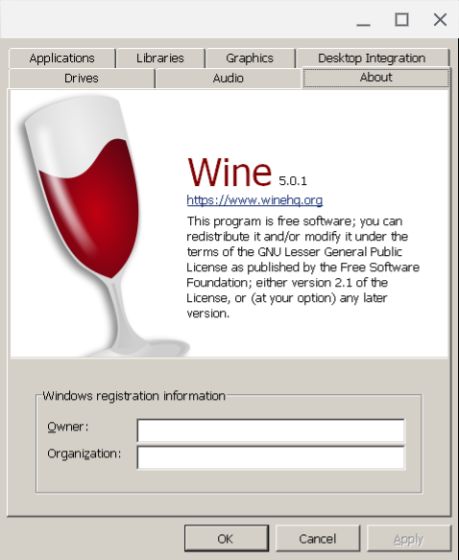
[15] From the Wine configuration pop-up, go to the Graphics section.
[16] Set the screen resolution dpi to any value that fits you the best and click on OK.
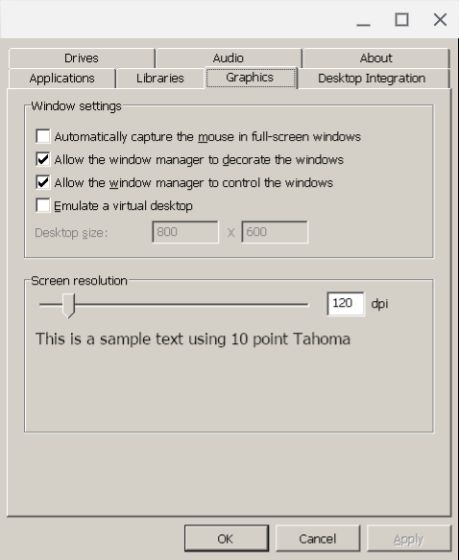
[17] That’s it. You have installed and set up Wine 5.0 on your Chromebook.
Install iTunes on Chromebook
Now that you have enabled Linux and installed Wine on your Chromebook, you are ready to install the iTunes Windows version on your Chromebook PC.
[1] Download the 32-bit version of the iTunes Windows App (.exe) from the Apple official site.
Note: You can also install 64 bit, but the 32-bit version is ideal for error-free usage.
[2] Move the iTunes software file to the Linux section and rename it to something that is easy to recall, like iTunes.exe.
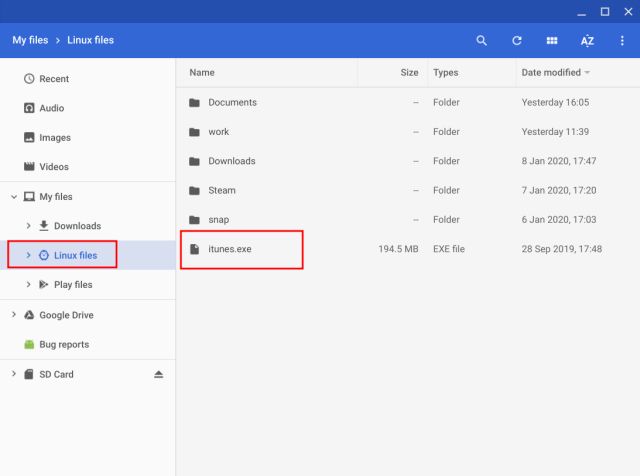
Note: After enabling Linux, you will have a separate file system to access files for Linux on your Chromebook.
[3] Launch Linux Terminal and enter the following command to update Linux firmware.
sudo apt-get update && sudo apt-get upgrade -y
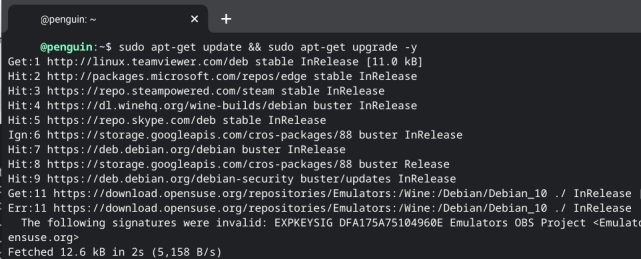
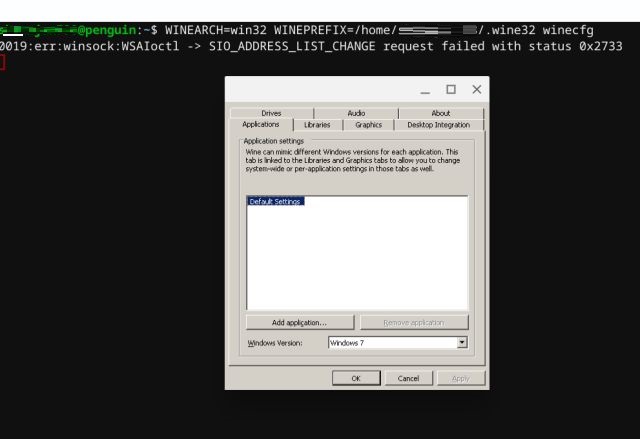
[4] Run the command below to change Wine architecture to 32 bit.
WINEARCH=win32 WINEPREFIX=/home/yourusername/.wine32 winecfg
Note: Make sure to change the username to your Chromebook username.
[5] Click on OK.
[6] Run the following command to install iTunes 32-bit version on your Chromebook.
WINEARCH=win32 WINEPREFIX=/home/yourusername/.wine32/ wine itunes.exe
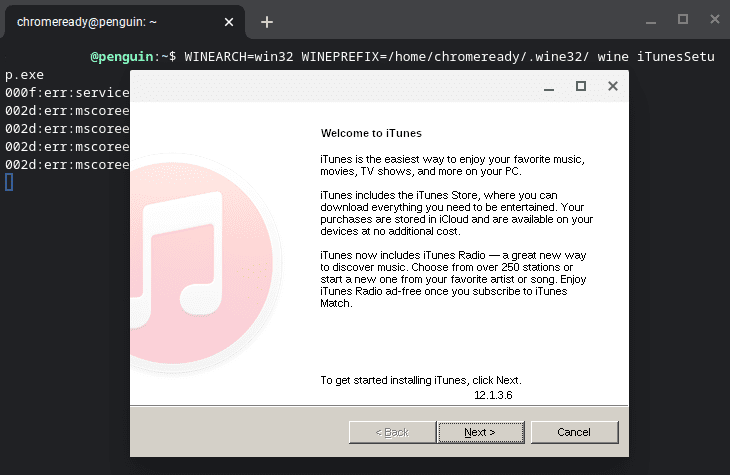
Note: Change the username with your Chromebook name as done before. Also, make sure to change the itunes.exe to the file name of your iTunes Windows App file. If it is the same as itunes.exe, leave it as it is or change it to the available file name.
[7 Windows version of iTunes installation will open on the screen. Click on Next.
[8] Follow the setup guide to complete the installation of iTunes and click on Finish to complete the installation process.
[9] Now, you have successfully installed iTunes on your Chromebook device, and you are ready to connect your iPhone or iPad instantly.
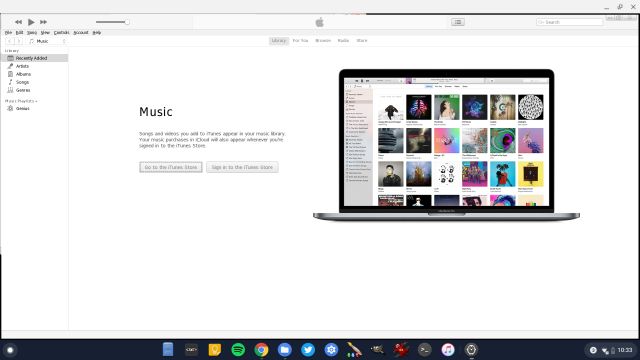
This is how you can set up iTunes on your Chromebook device. Even though the process involves some commands, we have made that simple for you by providing detailed guidance on it. Hope this guide helps you install iTunes on Chromebook. You can also try installing any of iTunes alternatives like Copytrans, WALTR 2, MusicBee, etc. If you have any queries or difficulties on installing iTunes on your device, let us know in the comments section below.
