Password protection is the process of securing data or information with a unique password. All the operating devices are equipped with high-end protection tools to secure the data. It also applies to Windows 10. The interesting thing about Windows 10 is that the native file manager app has a built-in feature to protect the files and folders with a password. You don’t need to search for any third-party password-protect software for folder any other info stored on Windows 10 computer. Get into the section to know the methods of protecting a folder on Windows 10 with a password.
There are three different methods available to password protect a folder on your Windows 10 computer or laptop
- Using built-in protection tool.
- Using the Locker folder.
- Using Add to Archive option.
By using these methods, you can keep your personal information, business documents, memorable pictures, and many more with password protection.
Contents
Method 1: Password Protect a File using Built-in Encryption Tool
#1: Open File Explorer on your Windows 10 device.
#2: Open the folder and locate the file you want to protect.
#3: Right-click on that particular file. If you want to protect the folder, right-click the folder that you want.
#4: Select Properties option.
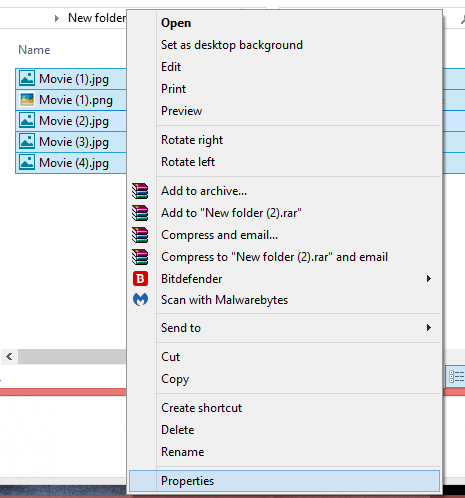
Alternative Way: Highlight the desired file or folder and then press Alt + Enter keys to open the properties window.
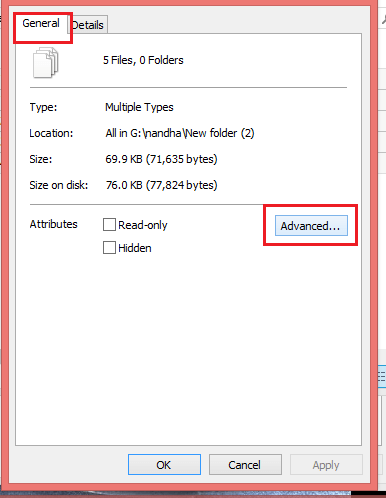
#5: Under the General tab, select the Advanced option.
#6: An Advanced Attributes window will open. Click on the Checkbox assigned to Encrypt contents to secure data option.
#7: After that, click the OK button and followed by click Apply.
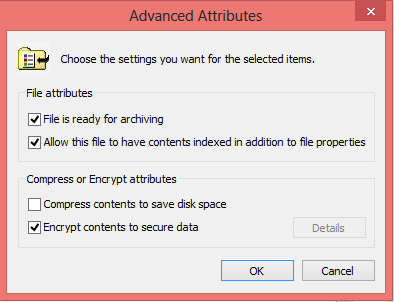
#8: Click OK. It will open the confirm Attribute changes popup window.
- If you have selected the folder, you have to choose either Apply Changes to this folder only or Apply changes to this folder, subfolders, and files.
- If you have selected a file from any folder, you will need to choose either Encrypt the file and its parent folder or Encrypt the file only.
#9: Upon completing, Windows will prompt you to back up your encryption key. Select the notification that appeared on your screen and go through the steps to back up the key.
Now, your files are secured and encrypted with a secured key. If anyone tries to access those files from a different user account, they will be displayed with plain text.
Method 2: Password Protect a file using Locker Folder
This method is applicable only to encrypt the files. It will not work on folders.
#1: Open the File Manager app.
#2: Go to the folder which contains the files you want to protect.
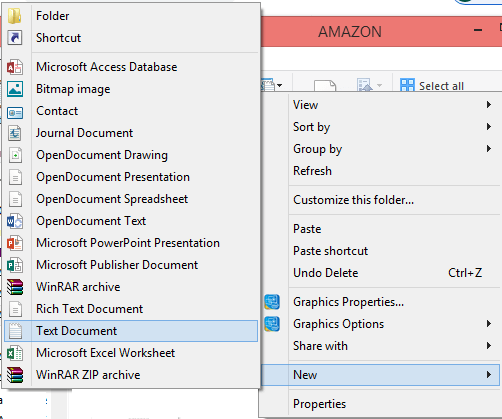
#3: Right-click inside the folder and select New.
#4: Select Text Document (Notepad).
#5: Double click on the newly created Text Document to open it.
#6: Copy and paste the following commands on the text document and save it.
cls
@ECHO OFF
title Folder Locker
if EXIST Control Panel.{21EC2020-3AEA-1069-A2DD-08002B30309D} goto UNLOCK
if NOT EXIST Locker goto MDLOCKER
CONFIRM
echo Are you sure u want to Lock the folder(YN)
setp cho=
if %cho%==Y goto LOCK
if %cho%==y goto LOCK
if %cho%==n goto END
if %cho%==N goto END
echo Invalid choice.
goto CONFIRM
LOCK
ren Locker Control Panel.{21EC2020-3AEA-1069-A2DD-08002B30309D}
attrib +h +s Control Panel.{21EC2020-3AEA-1069-A2DD-08002B30309D}
echo Folder locked
goto End
UNLOCK
echo Enter password to Unlock folder
setp pass=
if NOT %pass%==Enter-Your-Password-Here goto FAIL
attrib -h -s Control Panel.{21EC2020-3AEA-1069-A2DD-08002B30309D}
ren Control Panel.{21EC2020-3AEA-1069-A2DD-08002B30309D} Locker
echo Folder Unlocked successfully
goto End
FAIL
echo Invalid password
goto end
MDLOCKER
md Locker
echo Locker created successfully
goto End
End
#7: After saving, find ENTER-Your-Password-Here on the document and replace it with a new secured code.
#8: Save the file and close it to get back to the folder.

#9: Change the file extension from .txt to .bat.
#10: After changing the extension, double-click the file. It will create a new folder called Locker.
#11: Move the files to that locker folder.
#12: Now, again double-click the .bat file. It will open a small black window.
#13: Type Y and press the enter key.
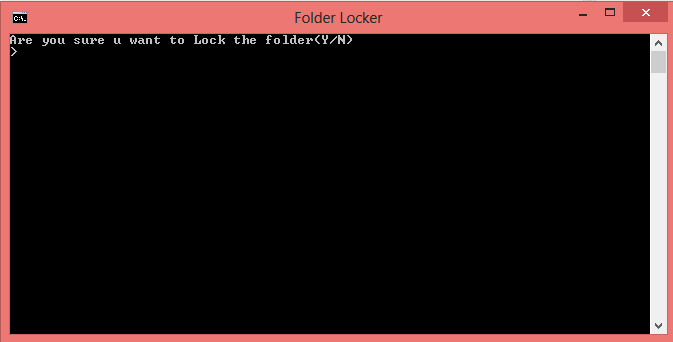
That’s it. The locker folder will be hidden automatically.
#14: When you want to unlock those files, just double-click on the .bat file and enter the password (provided in step #7).
Method 3: Using Add to Archive method
#1: Go to the File manager app on your Windows computer.
#2: Locate to the folder or file and right-click on it.
#3: Select the Add to Archive option.
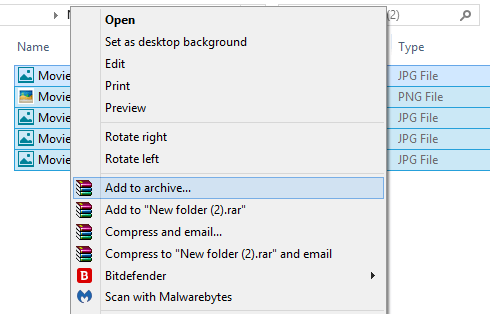
#4: An Archive name and parameters dialog box will open. You need to provide a name, select the Archive format, and then click the Set Password option.
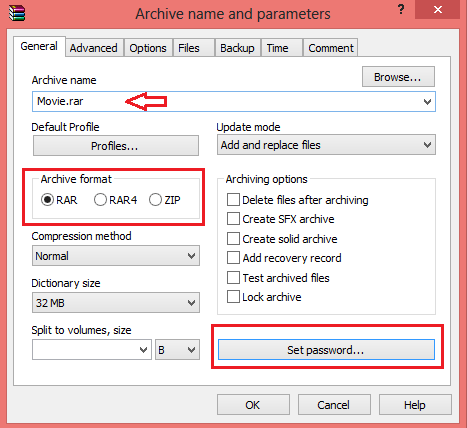
#5: Enter your Password in the appropriate fields.
#6: Click on the Encrypt file names checkbox and click OK.
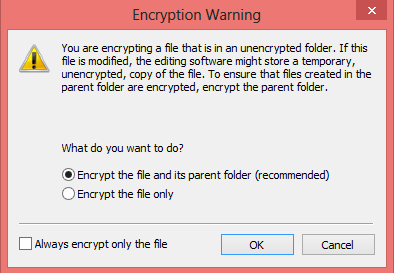
#7: Click OK.
That’s it. Your selected folder or file has been protected with the password. Whenever you want to open the protected files, it will ask you to enter the password to open. Make sure to enter a secure password.
These are the three ways you can use to password protect a file or folder on Windows 10 computers or laptops. Even though there are plenty of third-party apps available for password protection, they are not advisable due to privacy issues.
Shout all your queries and feedback in the comments section. Meanwhile, stay connected with us by hitting the Follow button on our Twitter and Facebook profiles.


