If you are an app Developer or curious about the new Roku channel you find, but you couldn’t get any way to install the channel on your Roku device, then you will choose to set it up. Roku is not like any other Android-based streaming device. It runs on a dedicated Roku OS, so there is no other way to sideload any apps to your streaming device. With Developer Mode enabled, you can do some modifications to UI or apps, which is technically customizing in accordance with your needs. Now let us see more about the Roku Developer Mode in this writeup.
Contents
What is Roku Developer Mode
It is simply like your Android Developer Mode to test new apps, screen mirror testing, etc. It is mainly used to debug apps, errors, and other features to make them work efficiently. In many instances, the apps that aren’t available on the Channel Store work better than the official apps. In such cases, you may want to sideload those apps. The channels that are under development can be added to your streaming device. Let us begin with the prerequisites.
Prerequisites:
The following are some of the important requirements before you start using the developer mode.
- A Roku Streaming device
- A Roku account
- Enrollment in Roku developer program
- A code editor like Roku plug-in for Eclipse IDE or BrightScript extension for the Visual Studio Code IDE.
Roku Developer Mode
Follow the below steps to complete the set-up of the development environment.
- Enable developer settings on your Roku.
- Development application installer to upload or install sample access.
- Run the sample channel on your streaming device.
- Examine the channel with the developer settings.
1. Enable Roku Developer Mode
Step 1: Turn on your Roku streaming device.
Step 2: Follow the combination of keys from the Roku remote to enable the Roku Secret Menu. Press the keys in the given order:
- Home button – 3 times
- Up button – 2 times
- Right button – 1 time
- Left button – 1 time
- Right button – 1 time
- Left button – 1 time
- Right button – 1 time
Step 3: Once you enter the secret menu, a dialog window will appear.
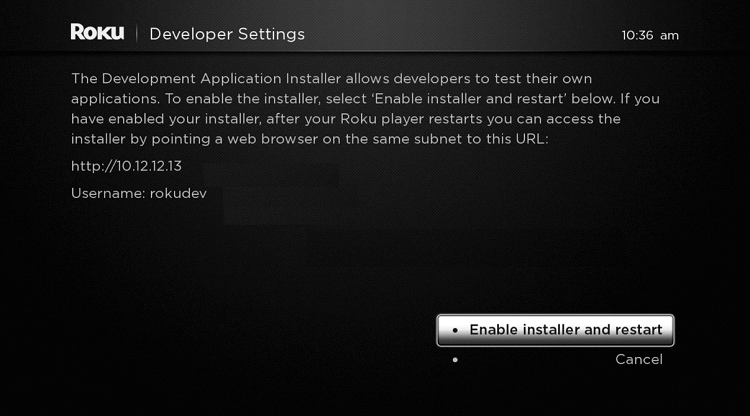
Step 4: Note the IP address and Username for the developer Settings description. Click on the Enable Installer and Restart button.
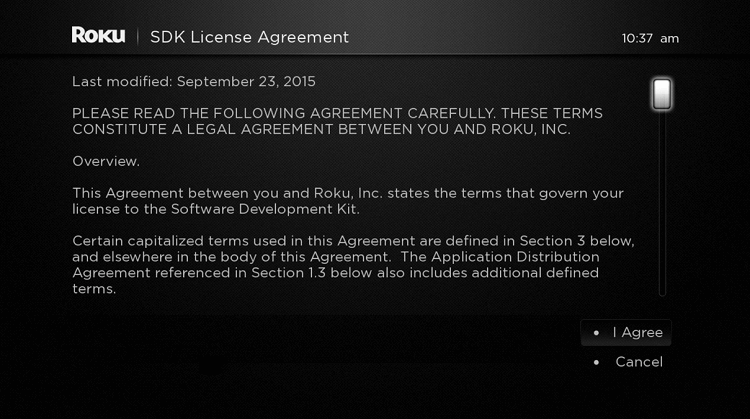
Step 5: On the next screen, it will ask you to confirm the SDK License Agreement. Click on the I Agree button.
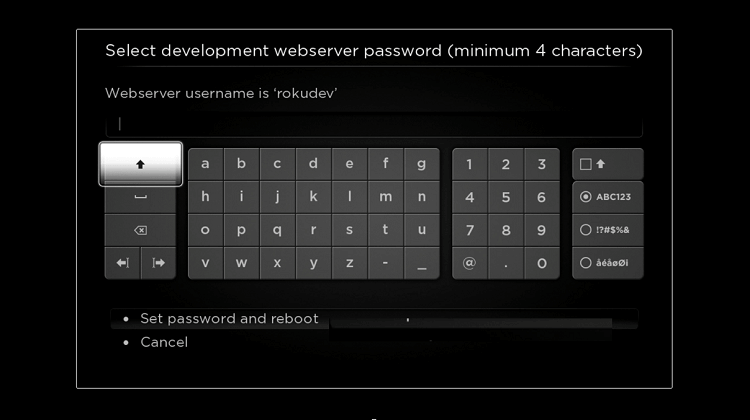
Step 6: Enter the Development Webserver or web developer mode password. Create a password and make sure to remember it.
Step 7: Now, click Set Password and Reboot. Now your Roku device will restart, and you are now on the Developer mode.
2. Access the Roku Developer Mode
Step 1: On your PC or smartphone, open a Web Browser. Visit the IP address that you noted earlier.
Step 2: Enter your Roku Username and Password. Click on the Login button.
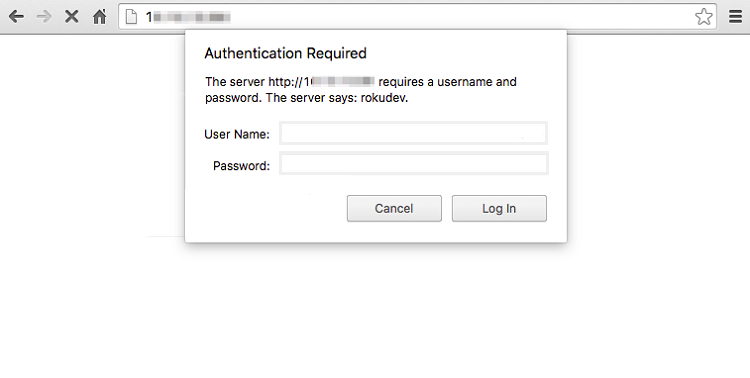
Step 3: Now, the Roku Development Application Installer Screen will open.
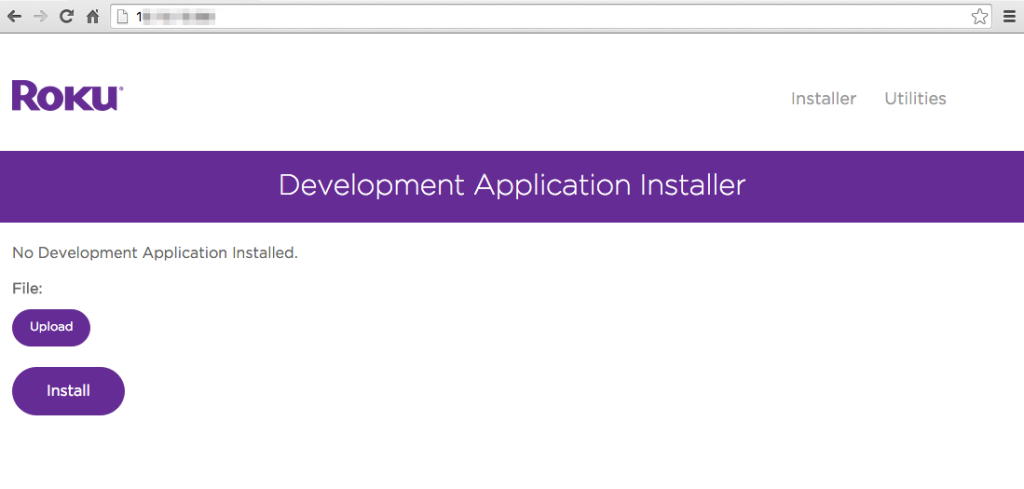
3. Install or Update Apps on Roku and Running Samples
You have to save the file on your PC or smartphone in ZIP format. You can use any zipping software to save the file in a zip format.
Step 1: On the Development Application Installer screen, click on the Upload option.
Step 2: Browse the Zip file on the folder you saved it. Select the file to upload it.
Step 3: Wait until the file starts to upload. The file name that you upload will appear near the upload button.
Step 4: Now, click on the Install button. Make sure that the PC is on the same WiFI network as that of your Roku streaming device.
Step 5: Launch your Roku, and you can find the installed file under the My Channel section.
Step 6: Open the app on your Roku device and test it.
4. Examine the channel with the Developer Settings.
1. Package Inspector: It will analyze the developer ID used and the creation date to ensure that the same developer ID is used when updating the pack. It will help any channel registry data remain intact. If you use a different developer ID, all the channel data will not be available.
2. Rakey Utility: With the Rakey Utility feature, you can replace the signing key with a key from an existing pack on your Roku device. When you are developing multiple channels on the same Roku device, it will be helpful.
3. Screenshot Utility: You can screenshot the apps which can be submitted along with the app in your Roku Channel Store. Just click on the Screenshot button on the screen you want to capture. No screen recording is allowed.
4. BrightScript Profiler: It will collect important metrics like CPU usage, well-clock time, number of times the functions are called during the execution of your channel.
All the above-mentioned features and utilities will help you to submit a channel for publication on the Roku Channel Store. The process is called Packaging a Channel, which uses cryptographic hardware to build into Roku devices, and it will create an encrypted package. Thus, it can be easily and securely distributed on Roku devices.
Points to Remember
While using the Roku Developer Mode, one should remember the following points.
- One can upload only Zip files while sideloading your channel. To publish, the file should be in the format of (.pkg).
- You must ensure that the channel should be a maximum size of 4 MB.
- Mainly, you can sideload only one app at a time. While trying to upload another file, the first file will be replaced by the second.
That is all about the Roku Developer mode and sideloading an app. Most probably, Roku software is very complicated and not as easy as that of your Android. So you must make sure that you are not bringing any barm to the device’s firmware or software as it is a very delicate one like iOS.
Did we miss something? Let us know in the comments section below. Also, keep in touch with us on our Facebook and Twitter accounts.


