Visual Studio is an exclusive software development application created by Microsoft. It is used to develop different types of software applications for PC, Android, iOS, web, and cloud services. By default, Visual Studio comes with light color, but it also supports dark mode. The dark theme provides a black background with brighter text. Enabling dark mode will help you to make your eyes more comfortable, especially when you’re working for long hours, and also makes your battery lasts longer. In this article, we will show you a step-by-step guide to enable dark mode on Visual Studio.

How to Enable Dark Mode on Microsoft Visual Studio
[1] Open Visual Studio on your computer.
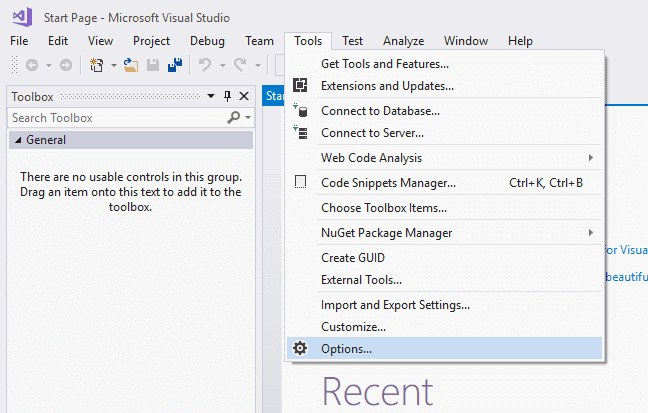
[2] Go to the Tools tab in the top menu.
[3] Click Options from the drop-down list.

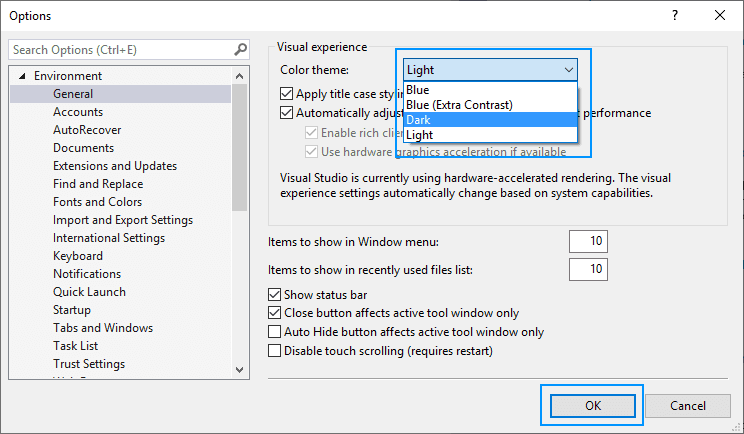
[4] In the left menu, select the General tab under the Environment option.
[5] Under Visual Experience, click the down arrow next to the Color theme.
[6] Microsoft offers three default themes to choose from: Blue, light, and dark. Here, select the Dark mode.

[7] Once done, tap OK to apply the changes.
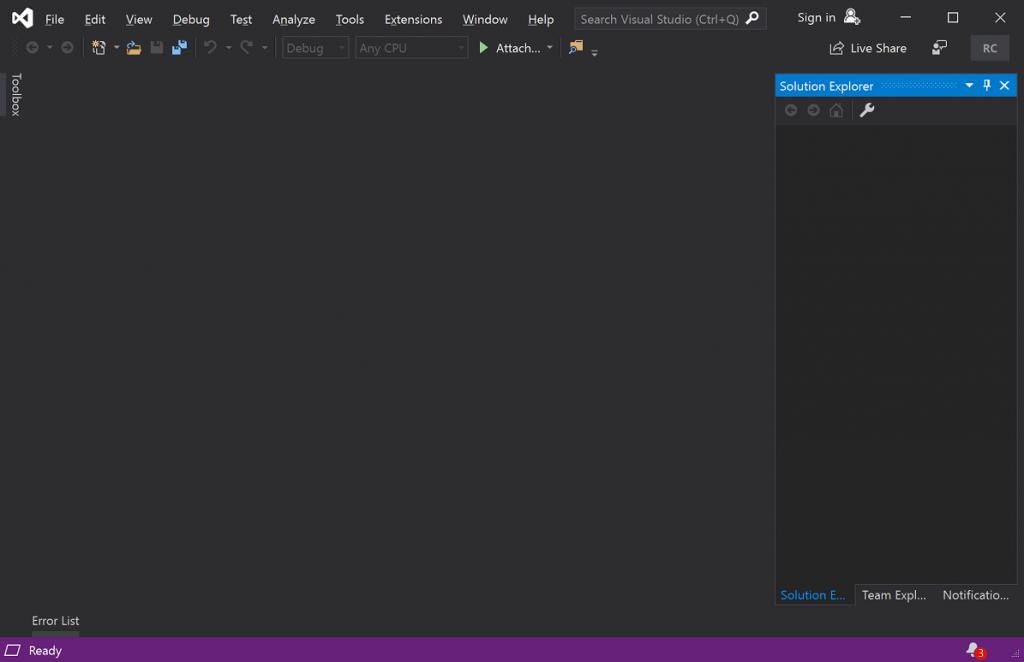
[8] Finally, you have enabled the new Dark theme. Now, you can experience Visual Studio with black background along with brighter text.

Related: Simple guide to enable dark mode on Microsoft Office
Note: Besides the pre-installed themes, you can also install external dark themes from Visual Studio Marketplace. Some of the best dark themes for Visual Studio are One dark pro, Vsc Material Theme, Dracula Official, Noctis, Vscode Theme Onedark, Vscode Winteriscoming, Shades of Purple Vscode, Vsc Community Material Theme, Vscode One Monokai, Dark Plus Material, and much more.
It is the only possible way to turn on dark mode on Visual Studio. If you know any other way, tell us in the comments section. For the latest guide and updates, follow our social media profiles: Facebook and Twitter.


