Dual boot Windows and Linux on the same PC help you in many situations. Your PC is more powerful than you think it is. Your PC can hold more than one OS at a time. If you are using Windows OS on your PC, you can install Linux OS easily. It is like installing an extra app to your PC. Have more than one OS can be useful in situations like you can use the Linux platform for your coding related works and can use Windows 10 for watching movies.
There are three ways to Dual Boot Windows and Linux.
- Install Linux alongside Windows
- Using a Live Linux Version
- Using Virtual Machines
Contents
- Preliminary Things
- Method 1: How to Install Linux alongside Windows?
- Part 1: Create a live USB for Linux
- Part 2: Creating Partition for Linux
- Part 3: Ready to Boot Linux
- Part 4: Installing Linux on Windows PC
- Method 2: How to Dual Boot Windows and Linux using Live Linux Version?
- Method 3: How to Dual Boot Windows Linux using Virtual Machines?
Preliminary Things
Before dual booting Windows and Linux, you need to set some things on your PC.
Backup the data: The first and foremost thing in dual booting is to backup your data. On the dual booting process, if any error occurs you may end up losing all your data stored on your system. So, it is better to backup your data as a precautionary measure.
Software: Download Ubuntu 19.10 or any other Linux ISO version. Download and install Etcher or Universal USB Installer to create a live version of Linux.
Method 1: How to Install Linux alongside Windows?
This is time-consuming process but it won’t reduce your system’s speed and performance.
Part 1: Create a live USB for Linux
(1) Plugin a USB drive on your PC. Make sure that the USB drive is formatted. 32 GB drive is preferred.
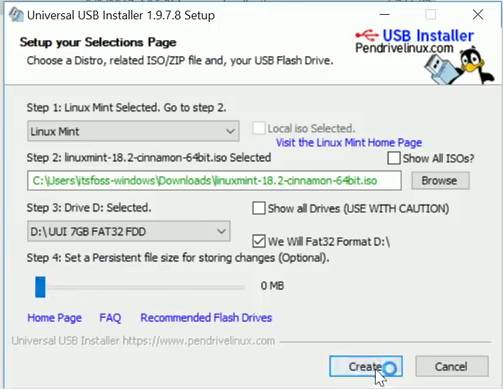
(2) Open the Universal USB Installer or Etcher. We are using the Universal USB Installer here.
(3) Choose the Linux Distribution that you have downloaded. In our case, it is Linux Mint.
(4) Click the Browse button to upload the Linux IOS image.
(5) In Step 3 box, choose your USB drive and choose the Fat32 Format option.
(6) After finishing the above steps, click the Create button.
(7) When a pop-up appears, click Yes.
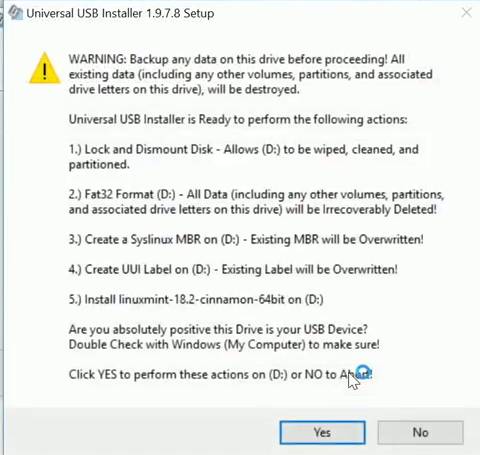
(8) Now, the installation will begin. It will take up to 10 minutes based on your PC.
Part 2: Creating Partition for Linux
At this point, you have created a live USB drive for Linux. To boot the Linux, you need to make space or memory.
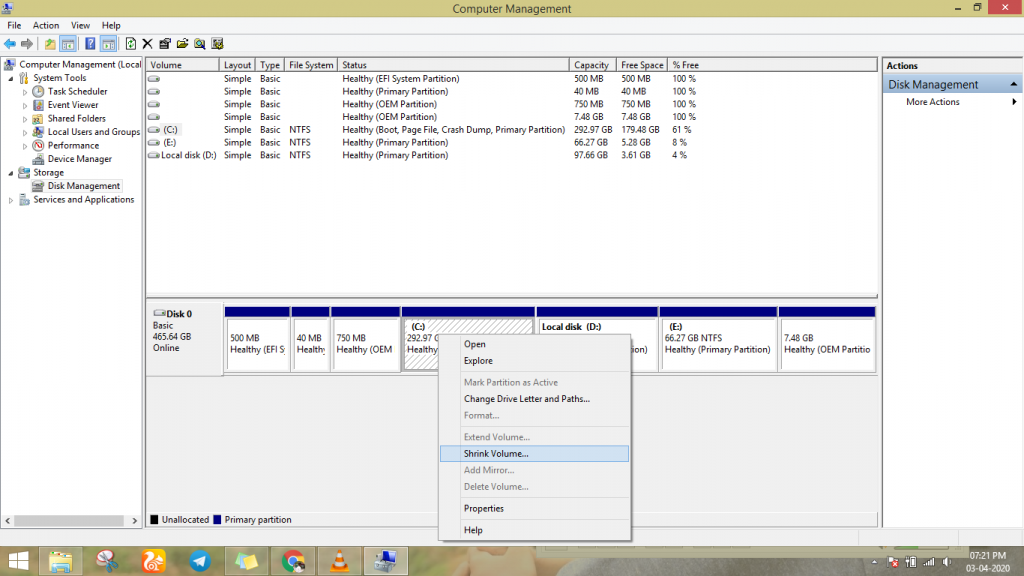
(1) Open the Disk Management settings. (Right-click on
This PC –> Manage –> Disk Management).
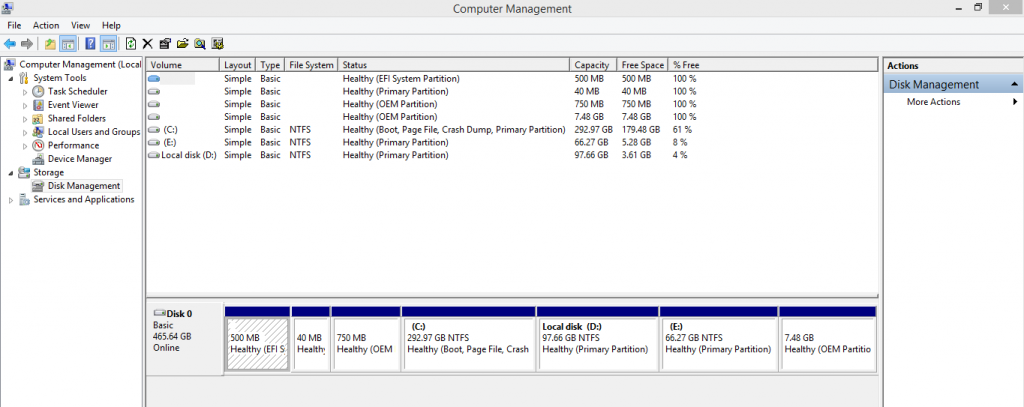
(2) Navigate to the OS (C) disk and right-click on it.
(3) Choose the Shrink Volume option to make some space for Linux. Make sure that the OS (C) is having at least 150 GB of free space.
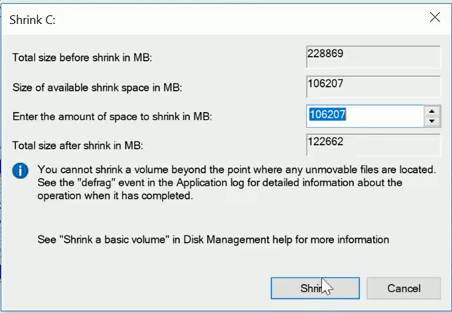
(4) Enter the amount of space you need for Linux. In most cases, 100 GB is more than enough. Enter 100 GB or more. You need to specify the MB count. So, 100 GB will be 100000 MB.
(5) After this, click on Shrink. Now, you will 100 GB of unallocated space. We are going to use this 100 GB unallocated space to run Linux on your system.
Part 3: Ready to Boot Linux
Now, you have created a Linux USB drive and space for Linux installation. It is time to boot Linux alongside Windows. It is important to know the function key that is required to open the Boot menu. For most PCs, it would be F10 or F12. But verify it from the official website. Don’t forget to insert the Linux USB drive.
(1) Close all your tab and restart your PC.
(2) When restarting, after the Windows logo, continuously press the Boot Key (F10 or F12) to enter the Boot menu.
(3) On the Boot Menu, choose the Linux USB drive. Your mouse won’t work here, use arrow keys and Enter key to select.
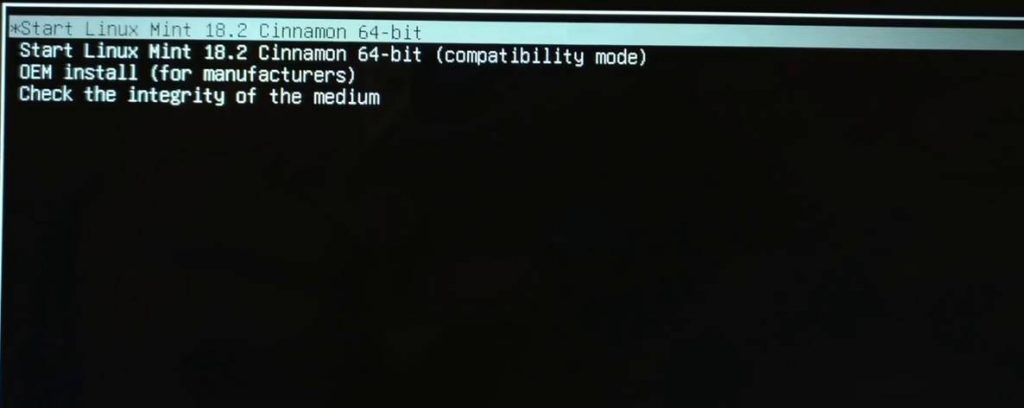
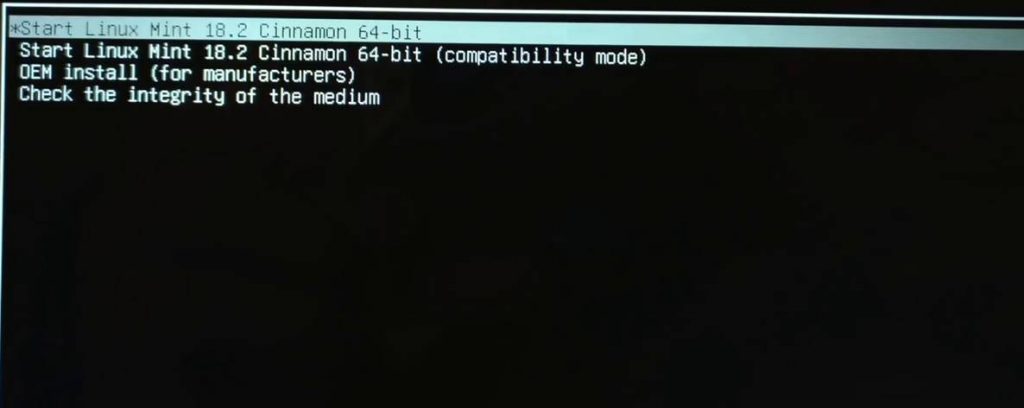
(4) Four options will appear. Choose the first option – Start Linux Mint 18.2 Cinamon 64-bit. The version number may differ according to the Linux version you have downloaded before. The second option – Start Linux Mint 18.2 Cinnamon 64-bit (compatibility mode) will be explained later. The rest two options are settings regarding the USB drive. You have nothing to do with these two options.
Part 4: Installing Linux on Windows PC
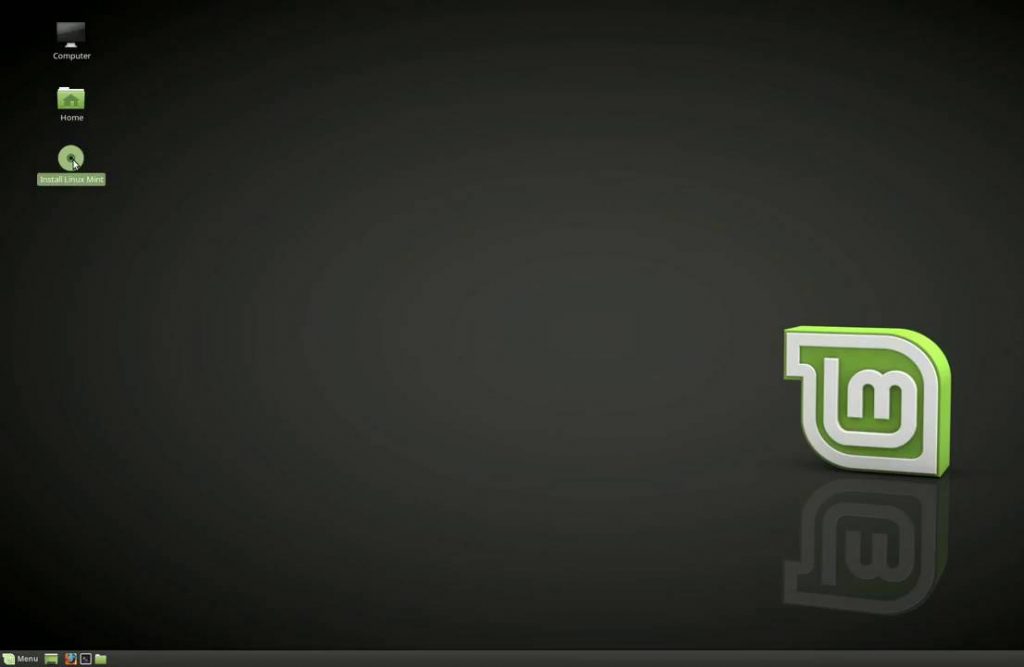
(1) After the booting, you will get three icon on the window. Run the Install Linux Mint icon.
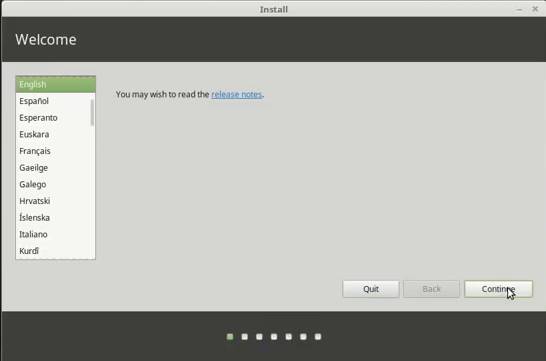
(2) Choose the language and click Continue.
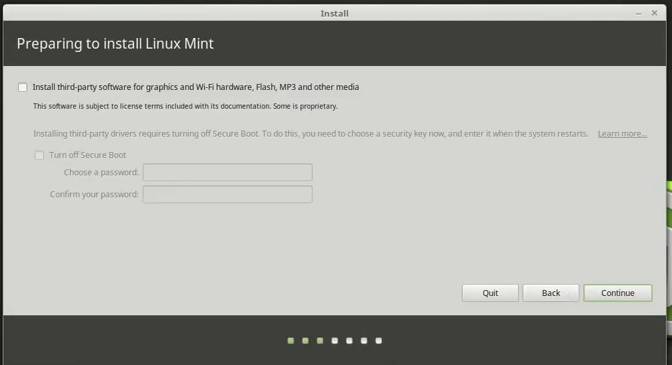
(3) If you want to play audio & video files on Linux, opt for Install third-party options and Continue. If you don’t want, simply click Continue.
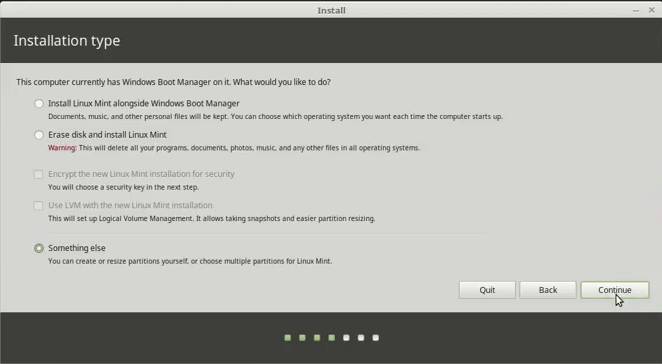
(4) Now, the Installation type window appears. Click Something else and tap on Continue.
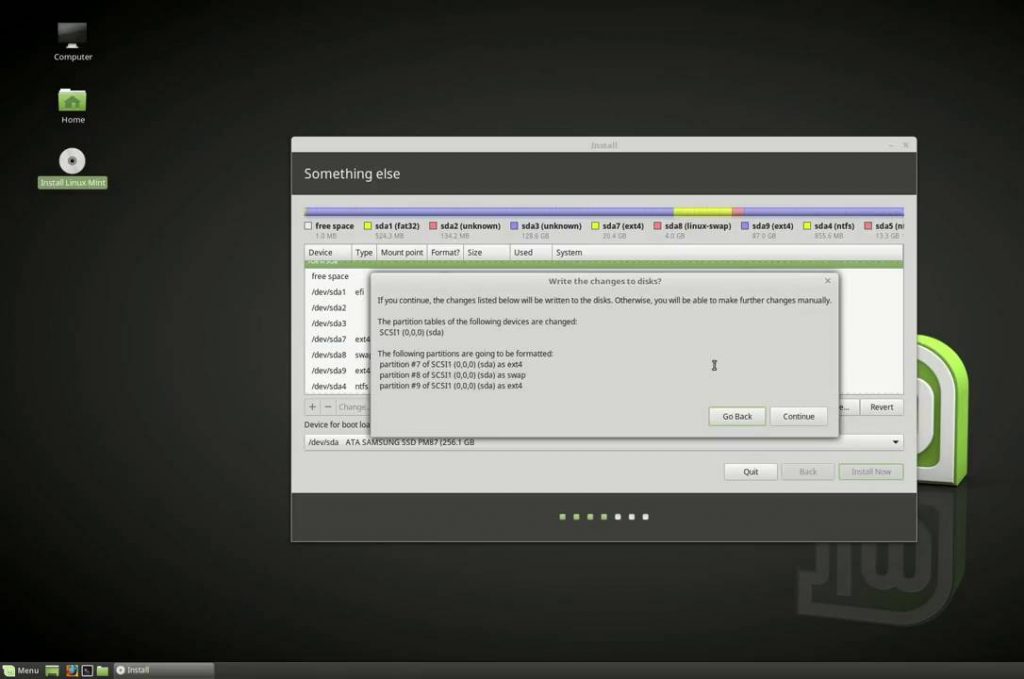
(5) Here, choose the disk you have created for Linux installation. (100 GB of unallocated space) and click the + symbol at the bottom to create a partition.
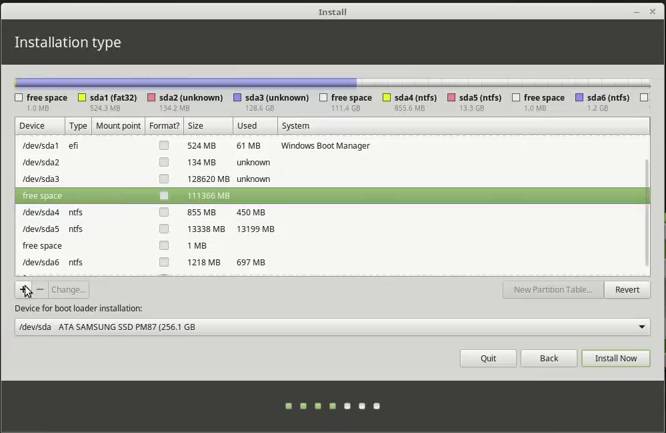
(6) You need to create two partitions. One for booting and another one for Swap. Booting requires 10-20 GB. Swap is not compulsory, if you are having low memory, skip it. Recommend size is 4-8 GB.
(7) Now, click Install Now. All the partition you have created will appear. Verify it and click Continue.
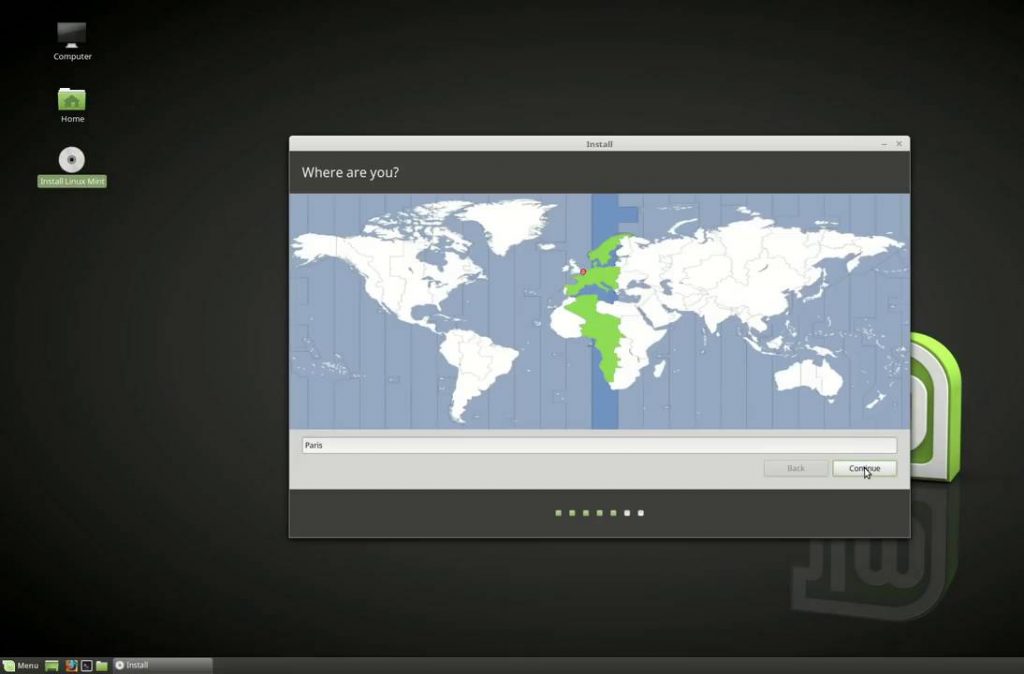
(8) In the Location window, specify your location and click Continue.
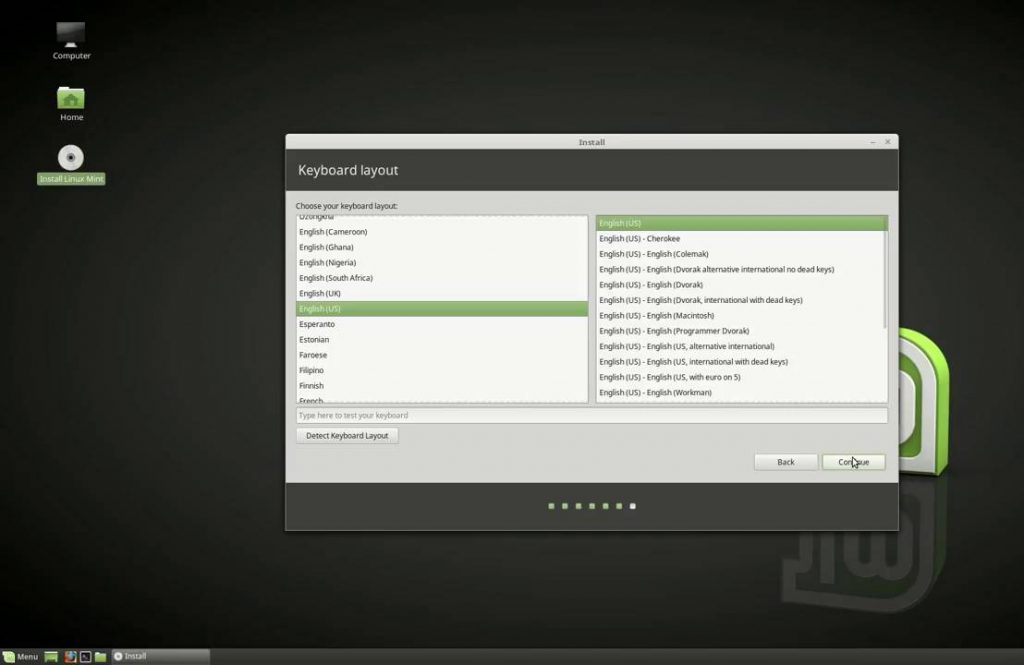
(9) In the Keyboard Layout, choose your preferred type and click Continue.
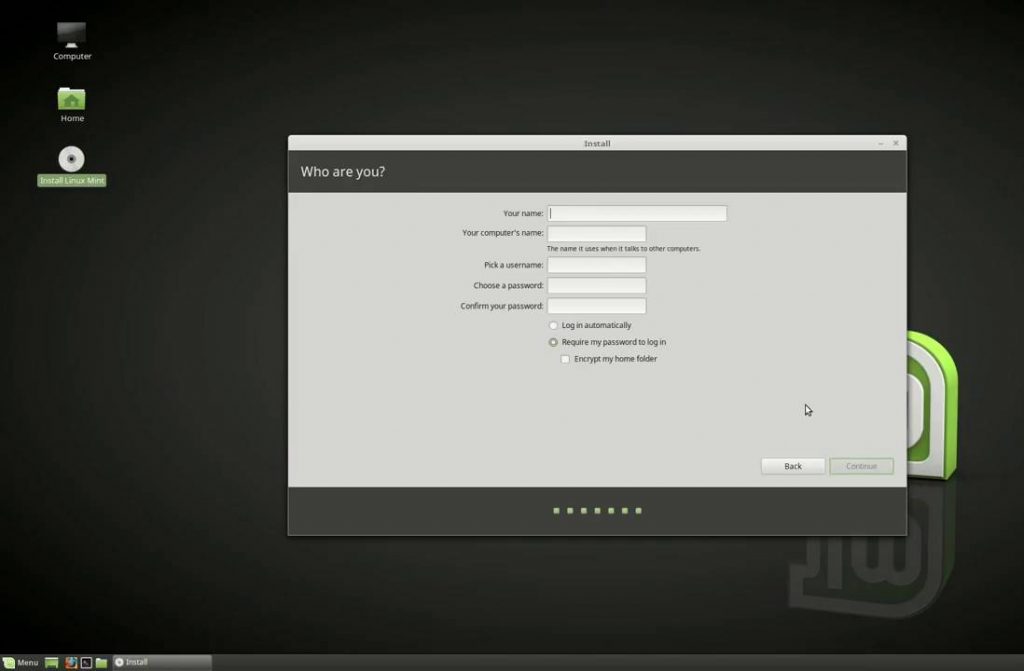
(10) Now, create your Username and Password for the Linux OS.
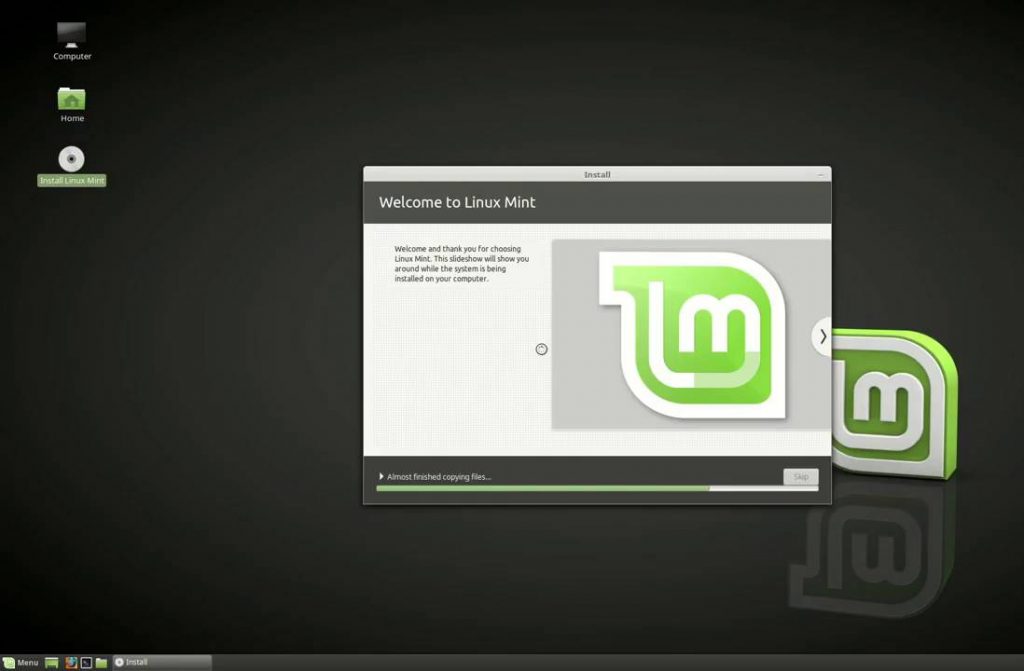
(11) Once you are done with, Welcome to Linux Mint window will appear and the installation will begin.
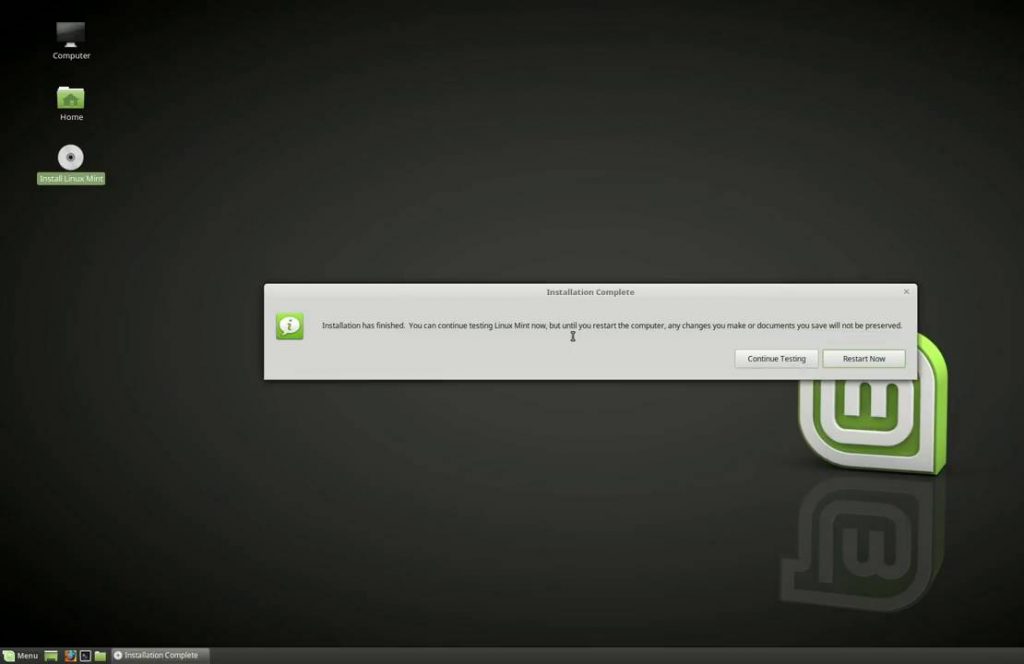
(12) When the installation is complete, click Restart Now or click Continue Testing if you are in a hurry.
(13) If you click Restart Now, you will get a screen similar to the one below. Four options will appear. Choosing Linux Mint 18.2 Cinnamon 64-bit will boot Linux OS and choosing Window Boot Manager will boot Windows OS.
And voila, you have created a Linux OS alongside your Windows OS. From now on, when you want to use Linux on your PC, just restart your system and choose Linux OS in the boot menu.
Learn how to install Ubuntu alongside Windows here.
Method 2: How to Dual Boot Windows and Linux using Live Linux Version?
Remember Step 4 in Part 3? If you choose the Start Linux Mint 18.2 Cinnamon 64-bit (compatibility mode), you will get to use the Linux instantly. But none of your work can be saved permanently. When you reboot your system or unplug the Linux USB drive, you no longer access the Linux. It is for one-time use.
If you want to see how Linux is working and how it is designed, you can go for this method. It is like getting a trial version of Linux, if you like it, you can install the Linux OS permanently. If you don’t, you can go back to Windows OS.
Method 3: How to Dual Boot Windows Linux using Virtual Machines?
Virtual Machines are software applications that can be used to have more than one OS on your PC. There are virtual machines available separately for Windows OS, Mac OS to run Linux OS. You can install those Virtual Machines on your system and run Linux OS with ease. But this will consume a lot of memory processing and may slow down your PC.
These software applications are like Android Emulators, where you can install an app on your PC to run smartphone apps. Virtual Box, Virtual PC are some of the best examples for Virtual Machines.
Here are the best Virtual Machines for Windows PCs.
You can follow the same steps for any Linux OS like Ubuntu 18.04, Linux Mint 18, Xubuntu, Kali Linux or other lower versions of Linux. For Windows 7, 8, 8.1 users, the process is almost the same. The disk partition process may vary. If you want you can upgrade your Windows OS to Windows 10.
These are three ways that you can dual boot Windows and Linux on your PC. Dual-booting is a real saviour for people working or studying in an IT field. You can switch to Linux in a minute. If you are using Virtual Machines, you can do the same in seconds. If you any other method, mention that in the comments section. Follow us on Facebook and Twitter for more updates.

