Cortana is Microsoft’s digital personal assistant on Windows 10 desktops and laptops. It helps you find anything on your computer. You can track your packages, create reminders for meetings, check weather conditions and many more. Sometimes, this inbuilt feature in Windows 10 may look annoying for some users. Along with that, it also records and stores your data. Hence it also has some privacy issues. If you don’t like Cortana or concerned about privacy issues, you can disable it/turn off with the help of in-built settings. Here is the guide on how to disable Cortana in Windows 10.
Contents
How to Temporarily Turn Off Cortana in Windows 10?
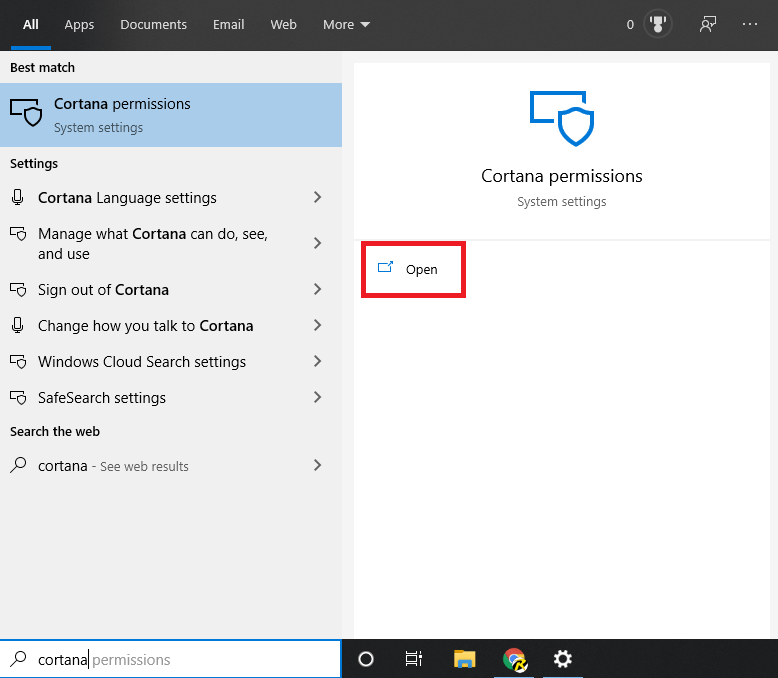
(1) Type Cortana in the Windows 10 search bar and Open Cortana permissions.
(2) Select Talk to Cortana.
(3) Make sure that “Hey Cortana” and “Keyboard Shortcut” function is turned off.
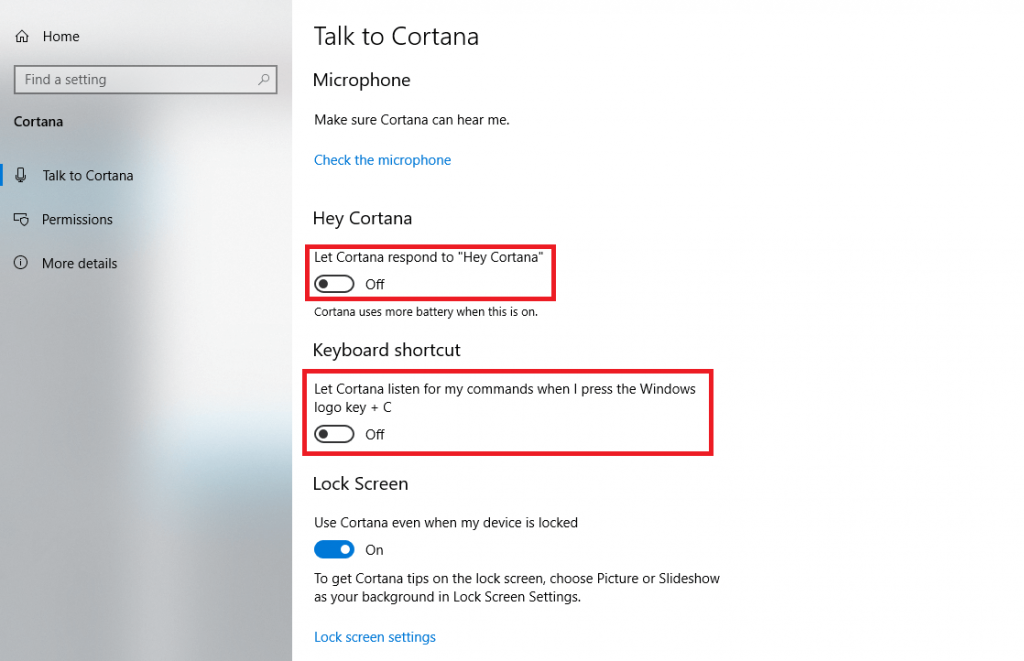
That’s it. You have successfully disabled the Cortana function temporarily. It will prevent Cortana from activating accidentally.
How to disable Cortana permanently in Windows 10 using Windows registry?
Once you decided to remove Cortana permanently, make sure to backup your Windows. It will help you to restore the important files when your disabling process is messed up.
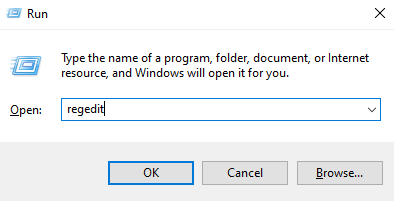
(1) Press Windows + R keys to open the command prompt.
(2) Type Regedit and click the OK button.
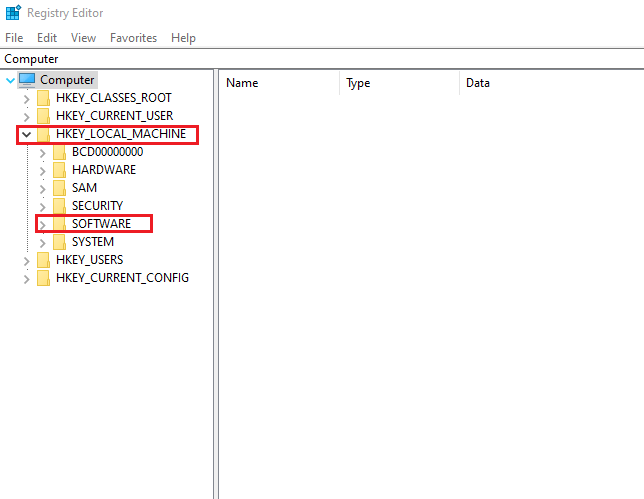
(3) Select the Software menu located under the HKEY_LOCAL_MACHINE folder.
(4) Scroll down to the Microsoft menu and right-click the Windows menu > select New > click Key.
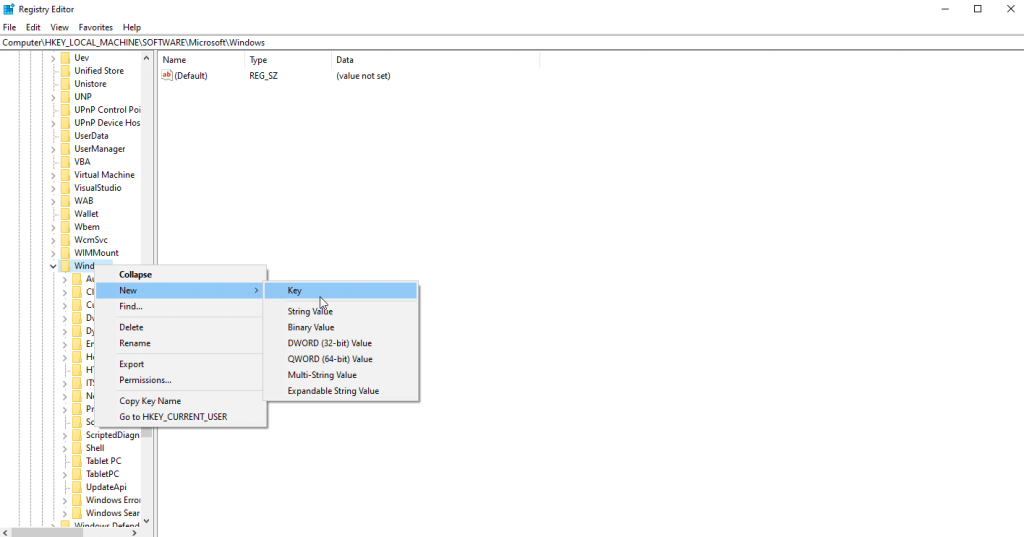
(5) Enter Windows Search as a name for the new folder.
(6) Now, right-click the Windows Search folder and select New and click DWORD (32-bit) Value.
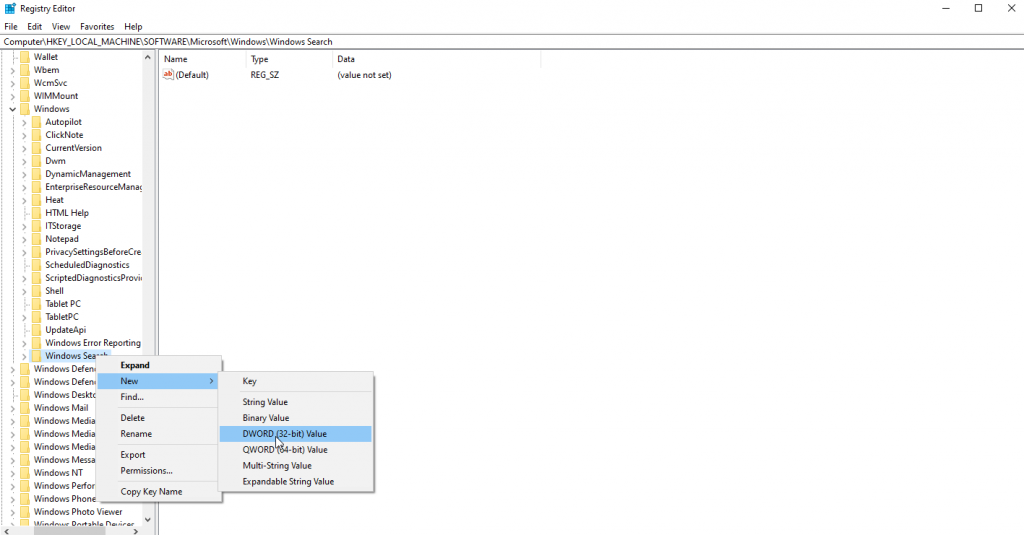
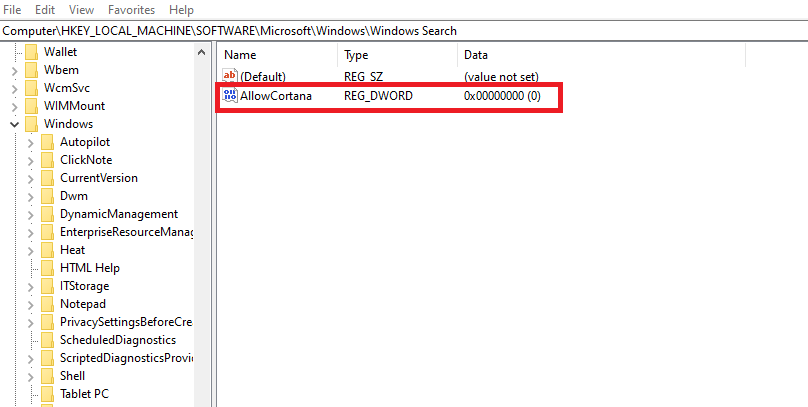
(7) Name the folder as AllowCortana.
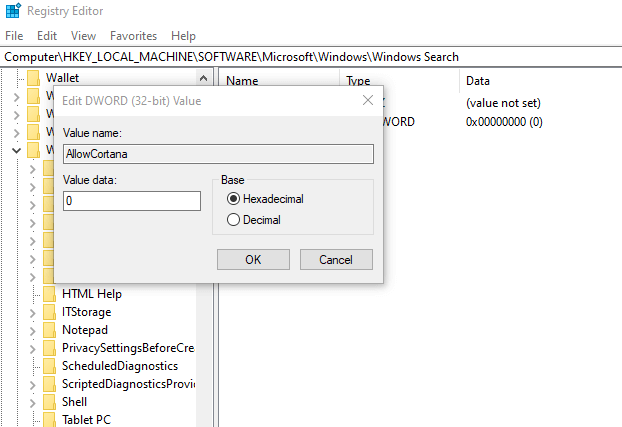
(8) Double-click the newly created folder and set the Value data as 0. Finally, click OK.
(9) Close the registry editor and restart your computer. After the restart, the Cortana will be removed permanently.
Note: If you want to turn on the Cortana, delete the registry file that you created.
How to disable Cortana permanently in Windows 10 using Group Policy Editor?
You can also disable/remove Cortana permanently with the help of group policy editor on Windows 10 machines.
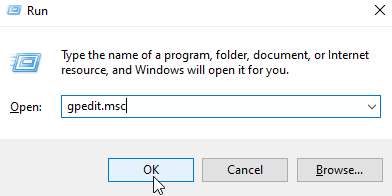
(1) Open Command Prompt by pressing the Windows + R keys.
(2) Type gpedit.msc and press the enter key.
(3) Click the Administrative Templates menu located under the Computer Configuration folder.
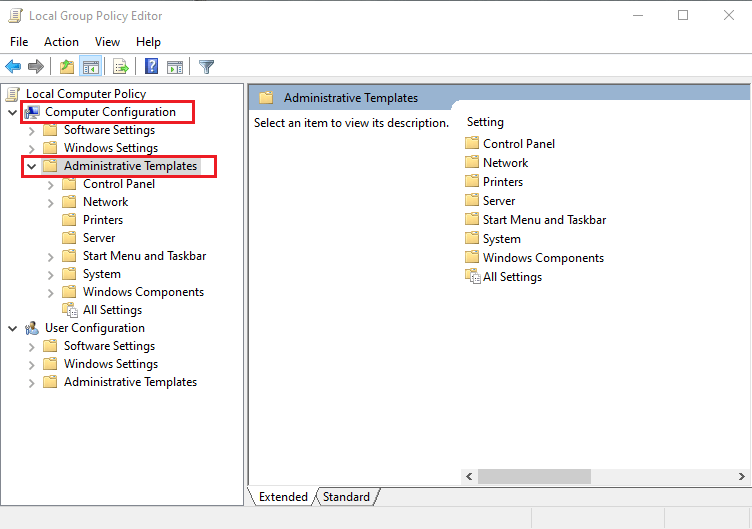
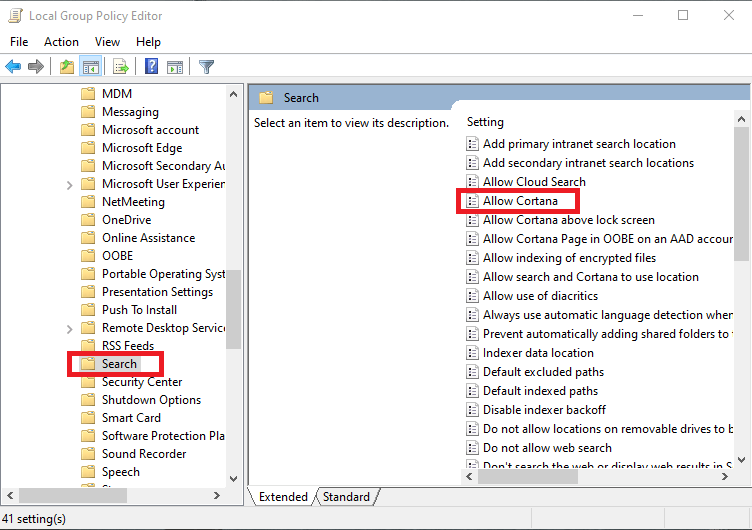
(4) Select the Windows Components folder and click the Search menu.
(5) Now, double-click the Allow Cortana file located in the right panel.
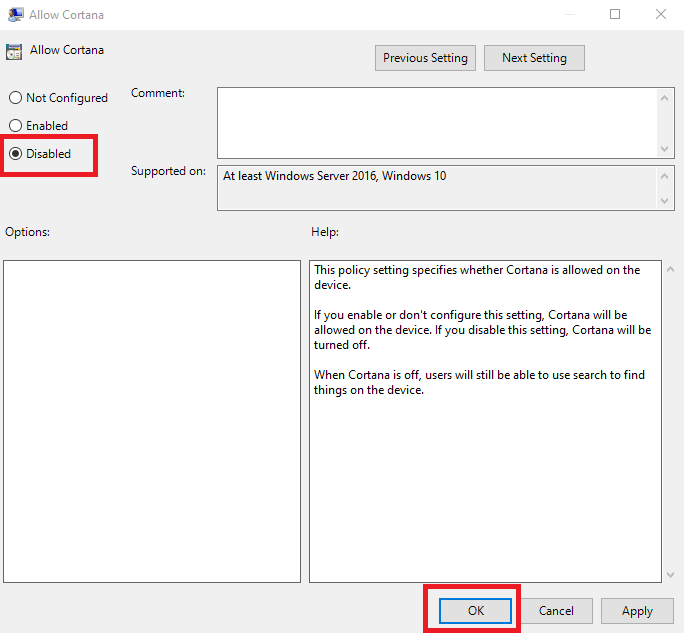
(6) Select the Disabled menu and click the OK menu to apply the changes.
(7) Close the editor and restart your Windows 10 computer to remove the Cortana.
Note: To turn on, follow the same steps and click the Enabled menu (step 6).
How to stop Cortana from saving your search history?
While using Cortana, Microsoft will keep record all of your searches in their cloud. To prevent Microsoft from recording your search history, follow these steps:
(1) Open Cortana settings page on your Windows 10 device.
(2) Select the Permissions menu on the right-hand panel.
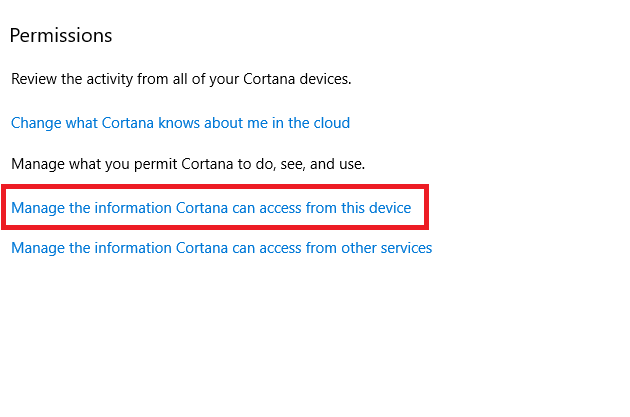
(3) Select Manage the information Cortana can access from this device.
(4) Make sure that all the options are turned off.
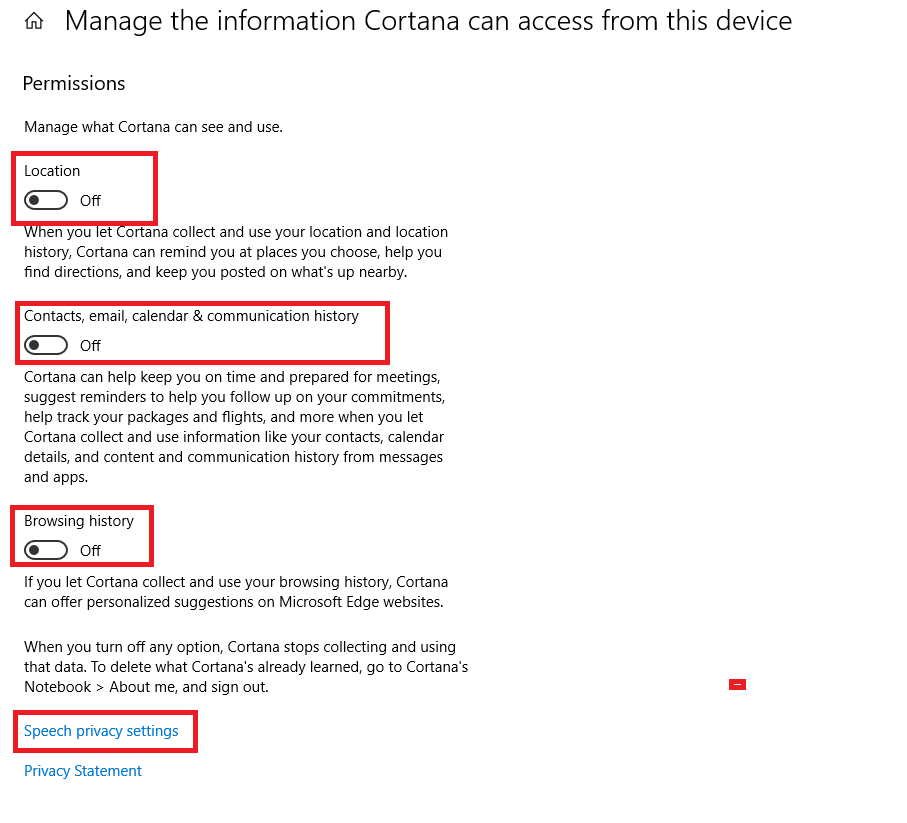
(5) Now, select Speech privacy settings.
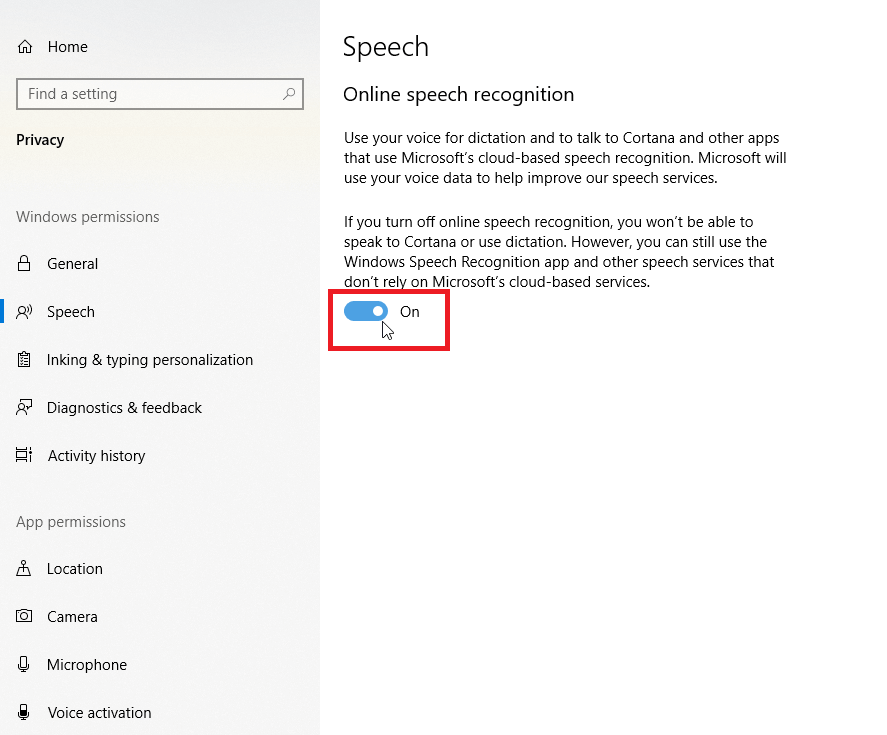
(6) Make sure that Online speech recognition is turned off.
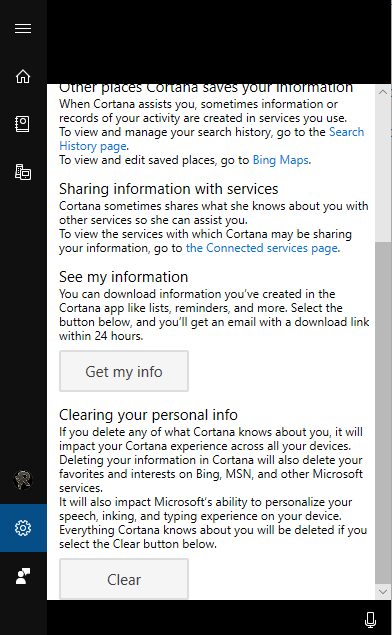
(7) Return to the Cortana settings page and click Change what Cortana knows about me in the Cloud.
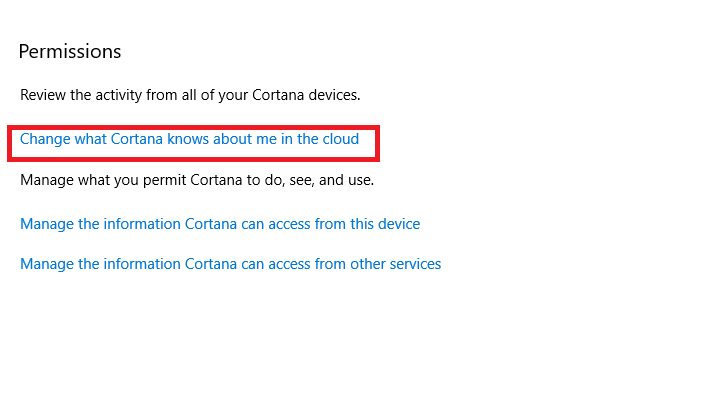
(8) Your personal info will appear on the screen. Scroll down and click Clear.
Note: The above-mentioned instructions will apply to all editions of Windows 10 including Home Edition, and Enterprise.
We hope the article has helped you to disable the personal assistant developed by Microsoft. If you like this article, share it on your Facebook and Twitter profiles.


