Just like Apple, Roku is the most secure streaming media player. It is one of the best cord-cutter available at an affordable price. Roku devices are classified into Roku streaming boxes, streaming sticks, and TV. It works on a dedicated operating system with a simple user interface. With a Roku account, anyone can download apps from the Roku Channel Store for an endless streaming experience. It is a cost-efficient option to watch free TV, live news and sports, movies, TV shows, etc. You require a WiFi connection to stream all such entertainment contents on your TV. Roku goes useless without the internet and you cannot take advantage of Roku streaming. So, make sure you have a strong internet connection to access Roku features to the fullest. Further, you may check this section to know how to connect Roku to WiFi.
Contents
How to Connect Roku to WiFi?
There are multiple occurrences in which one need to connect Roku to a Wi-Fi connection or a hotspot. We have classified such cases and provided the guidelines for each of them.
Steps to Connect Roku to WiFi During Setup
As soon as you power on your Roku device for the first time, you will get into the guided setup. When you get a prompt to connect Roku to the internet, you should follow the steps given below.
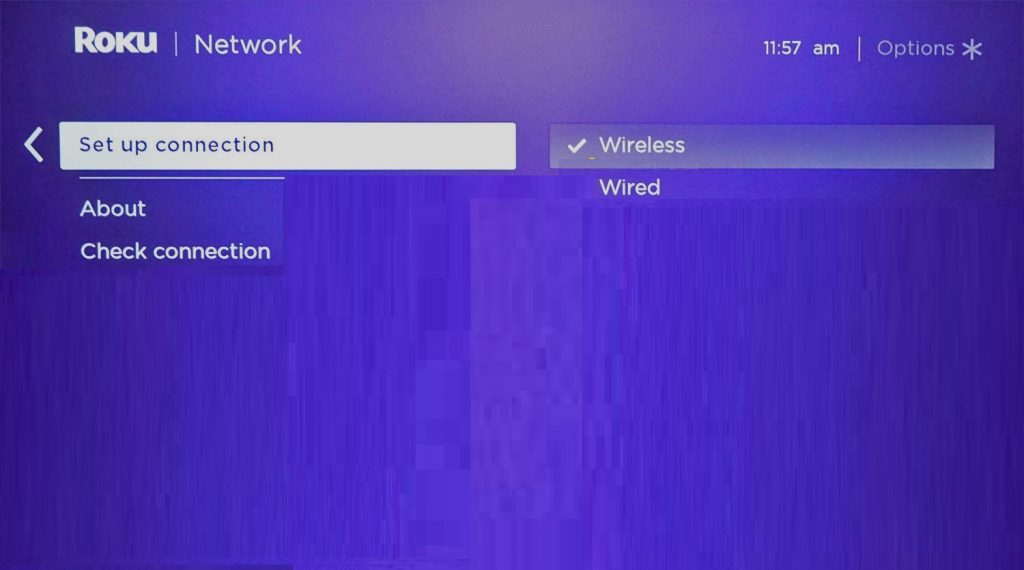
(1). During a guided setup on Set up connection screen, choose between Wired or Wireless.

Note: Wireless option is available only for Roku devices with an ethernet port. i.e., Wireless option is excluded for Roku Streaming Stick.
(2a). Connect Roku to your WiFi router using Ethernet cable if you have chosen Wired. Otherwise skip to the next step.
FYI! With wired connection, your Roku will connect to your home network automatically. You can further proceed with the setup procedure on Roku.
(or)
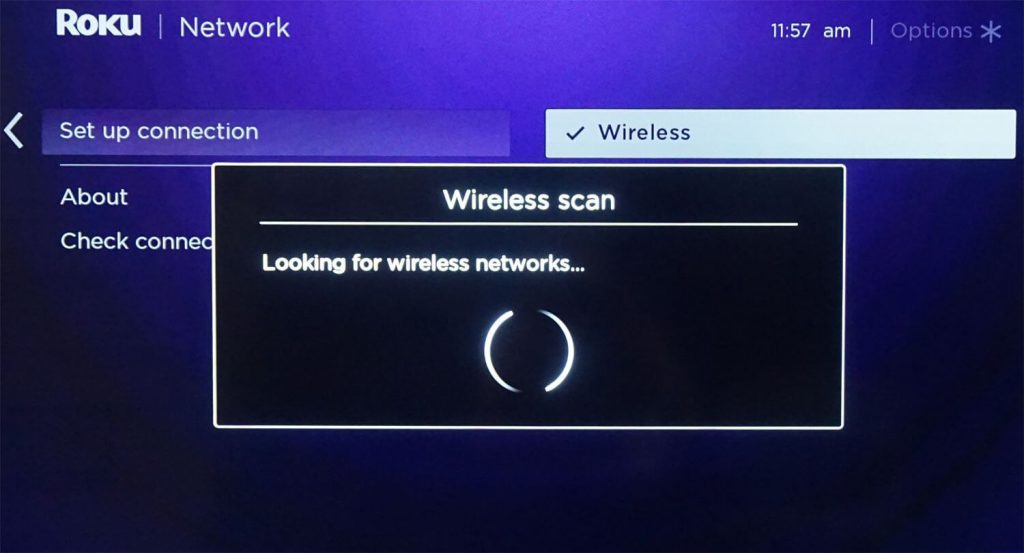
(2b). If you have chosen Wireless, then you should set up wireless connection. Wait for the scan to complete.

Note: Make sure your router isn’t too far from Roku. Else, you should use a wireless extender.
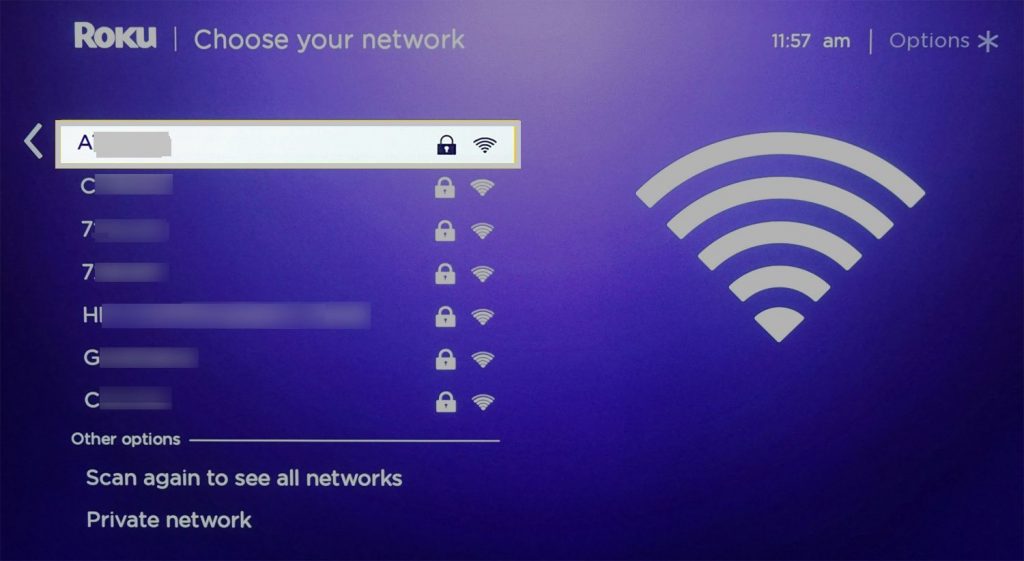
(3). From the list of connections, you should choose your Wireless network name.

Note: When your network isn’t available, select Scan again to see all the available networks.
(4). Provide the WiFi password and choose Connect. With this, your Roku will get connected to your home WiFi.
Tip! Select Show password to see the password as your type. Use the Shift button (up arrow) on the on-screen keyboard for a capital letter.
Steps to Connect Roku to WiFi After Connection Setup
The section below will let you connect Roku to the WiFi network or hotspot after the first-time setup.
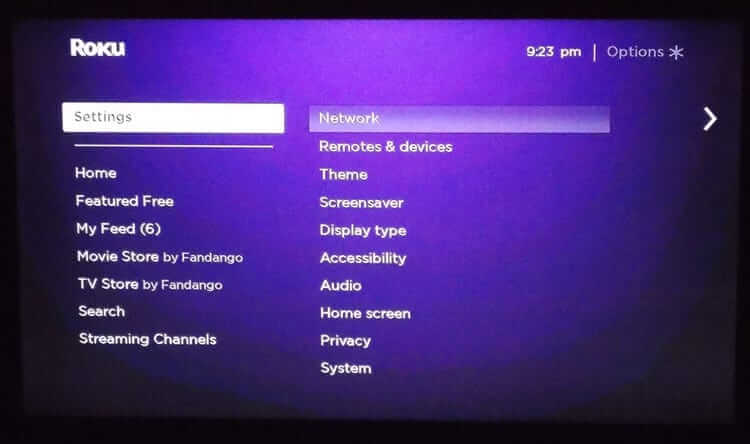
(1). On your Roku remote, press the Home button.
(2). Scroll to select Settings and thereby choose Network.

(3). On the next screen, choose Set Up Connection.
(4). Select Wired or Wireless.
Note: Make sure you have connected your Roku to the router using Ethernet port just before choosing Wired.
(5). If you have selected a Wireless option, then choose the wireless network from the available networks and provide username & password when prompted.
Note: When you don’t find your network, then select Scan again to see all networks.
FYI! Roku supports connecting to WiFi when in hotel or in a dorm.
- For this, you need to obtain the network password.
- After connecting the Roku to the TV, press the Home button.
- Then go to Settings > Network > Set Up Connection > Wireless.
- Choose I am at hotel or college dorm.
- With this, you will get several prompts for authentication purposes.
- Once the setup is complete, you can use Roku.
Our Opinion
Connecting any Roku device to the WiFi or the internet via hotspot is a must to watch the best Roku channels. Only then, you will be able to stream video or audio content. Keep your network password handy to instantly connect Roku stick or TV to the WiFi. Also, ensure you have the best WiFi signal to stream media without any limitations.
Did this article guide you better with connecting Roku player or TV to WiFi? Drop your views as comments. Get to know the latest articles updates by following us on Facebook and Twitter.


