Key Highlights
- To Check Windows Version Via Settings: Turn on your PC → Start Button → Search bar→ Seach for Winver → Get the Windows Version → OK.
- To Check Windows Version Via Keyboard Settings: Turn on your PC → Press Windows+ I button→ System Settings → Settings→ About → Find the Windows Version.
As you are all aware, Windows rolls out frequent updates with attractive features. It provides many features like a virtual keyboard, task view, fingerprint support, and much more. You can get all these features by updating your Windows OS. To check for the updated Windows OS, you need to check with the Windows Edition and Version.
In this article, you will get a brief explanation of the various ways to check the Windows version. If you are looking at the system type of your PC, you can refer to the below series of steps.
Contents
- How to Check Windows Version
- How to Check Windows Version Via Settings
- How to Check Windows Version Using Keyboard Shortcuts
- How to Check Windows Version Using Command
- How to Check Windows Version Using MyASUS App
- How to Check Version on Windows 7
- How to Check Version on Windows 8
- How to Check for Windows 11 Pro
- How to Check Whether Windows is 32- Bits or 64- Bits
- FAQ
How to Check Windows Version
Go through the following methods to know about the Windows version you are running.
- Through the Settings
- Through the Keyboard Shortcuts
- Through the CMD
- Through MyASUS App
How to Check Windows Version Via Settings
1. Open the Computer or laptop and click on the Start button from the home screen.
2. Move to the Search box and type Winver. You can even press the Windows button + R together to open the Run box on the Windows.
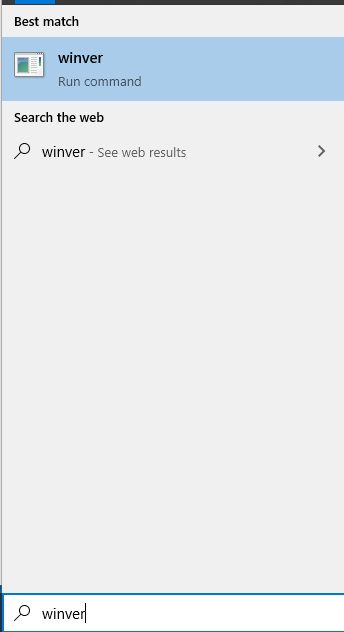
3. Click on the Winver from the search result.
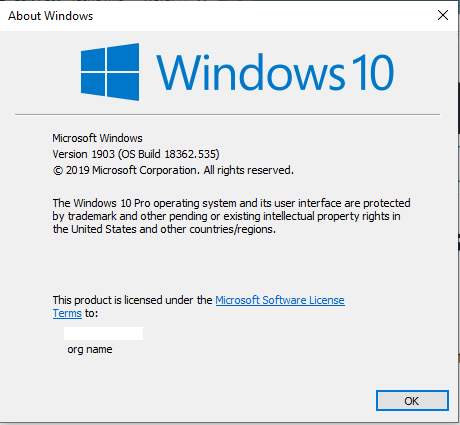
4. Now, a small window will appear on the screen with the Microsoft Windows version and other details.
How to Check Windows Version Using Keyboard Shortcuts
1. Turn on your Windows computer or laptop.
2. Press together the Windows + I keyboard keys. It will open the System Settings.
3. Select the System menu option.

4. Scroll down and select the About option. It will show the complete details of your device, including version number and system type.
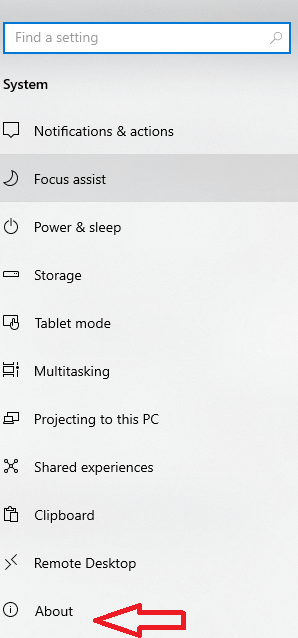
The below image shows the version number of your Windows.
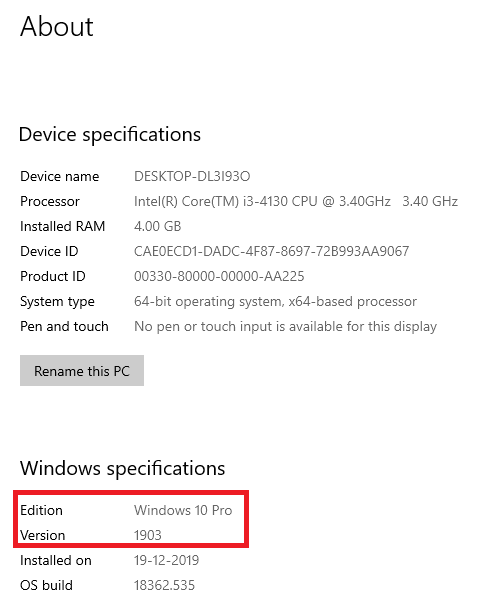
In case the above shortcut is not functioning properly, you have to use an alternative keyboard shortcut option.
Press the Windows key + Pause Key, and it will show all the Windows information.
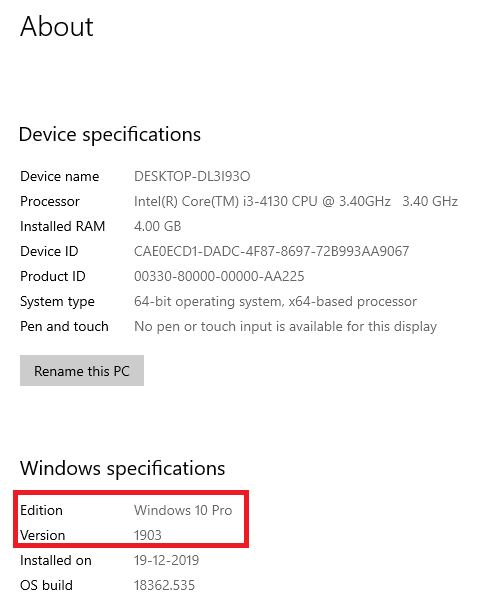
How to Check Windows Version Using Command
1. Press the Windows key + R on your Windows computer or Laptop. It will open the Run dialogue box on the screen.
2. Enter Cmd on the text box and click OK.
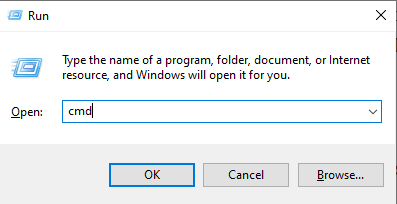
3. Type system info in the command line and press the Enter button.
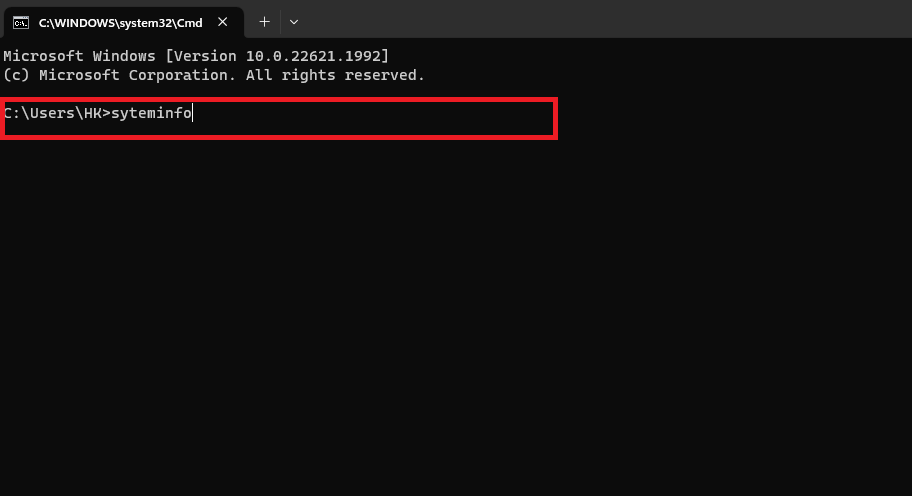
4. It will show all the details of your system in the terminal output. You can see the OS name, version number, build number, and many more.

The above methods are used to see the Operating System, Name, and Version Number on Windows 10. If you are using Windows 8 or 7 or earlier version, you can check the Windows version by following the below steps.
Techowns Tip: Check out how to do a Clean Install of Windows.
How to Check Windows Version Using MyASUS App
1. Power On your Asus PC or Laptop and head over to the home screen.
2. Click on the Search bar located at the bottom.
3. On the search bar, search for the MyASUS app.
4. Download the app or launch the app if it is installed already.
5. Your System Model Name and Serial Number will be displayed. Hit the System Info option.
6. Under the System Software tab, you will find the name of your operating system.
How to Check Version on Windows 7
1. Open the Windows computer and go to the home screen.
2. Right-click on the Start Menu.
3. Select the Properties option.
4. System type entry shows the Version of Windows (32-bit or 64-bit).
How to Check Version on Windows 8
1. Open the Windows computer and go to the start screen.
2. Click on the Start Window button and type About PC.
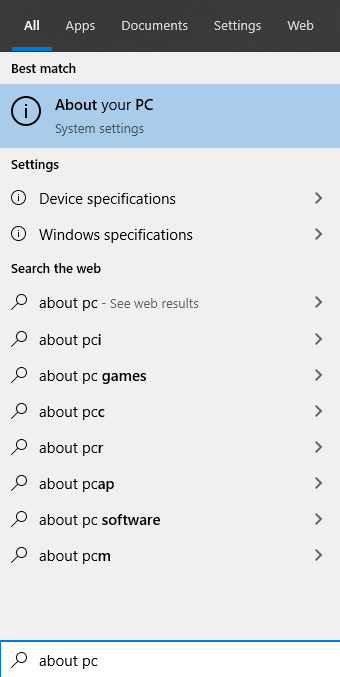
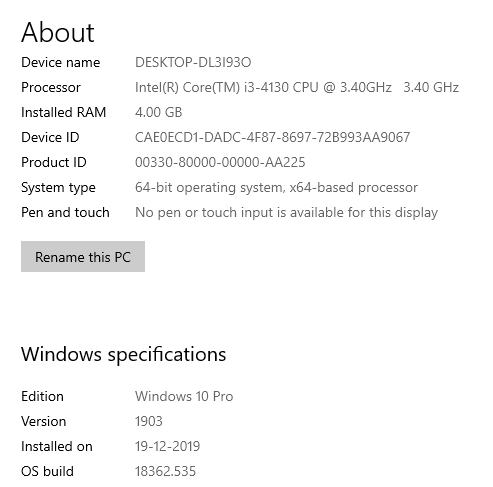
3. Click on the About PC search result. It will show all the system information. Also, look at how to access BIOS on your Windows PC.
How to Check for Windows 11 Pro
1. Turn On your PC or go to the home screen.
2. Hit the Windows icon and tap the Settings option.
3. Under the Settings option, scroll down and hit the About option.
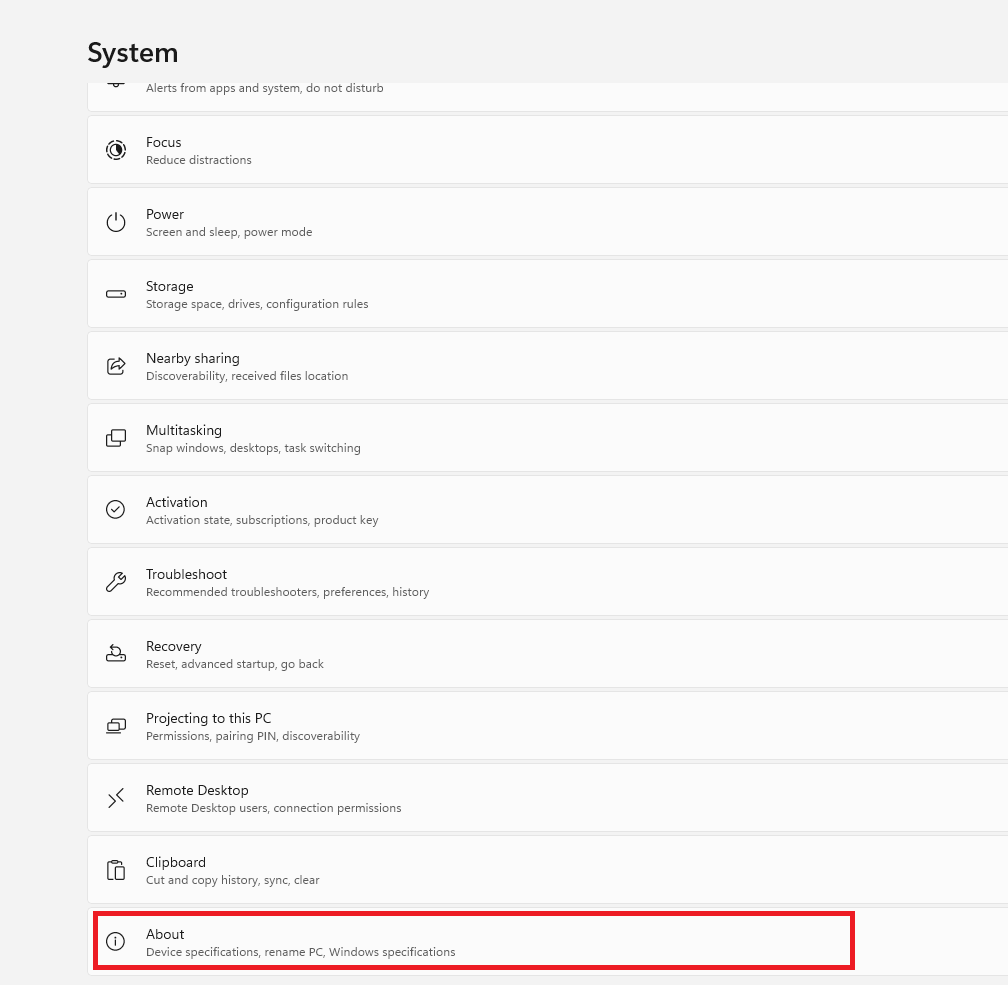
4. Under the Windows Specification option, you will find the Windows edition and version information for Windows 11 Pro.

How to Check Whether Windows is 32- Bits or 64- Bits
1. Launch the start screen of your PC.
2. Tap the Windows icon placed at the lower left corner of the taskbar.
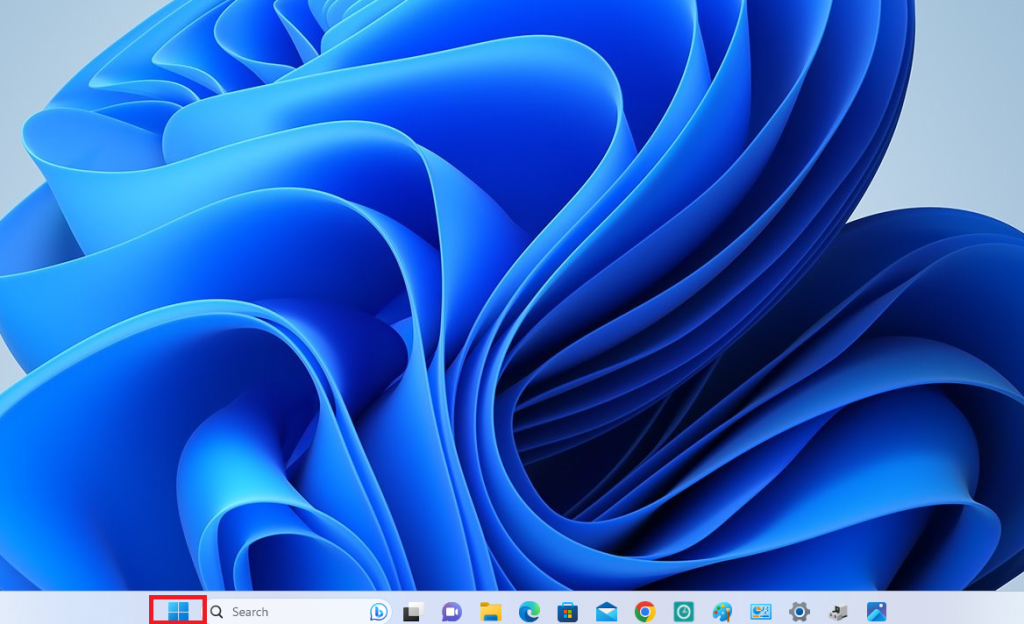
3. Hit the Settings icon and tap the About option.

4. Under the Device Specification, you can find the System Type.
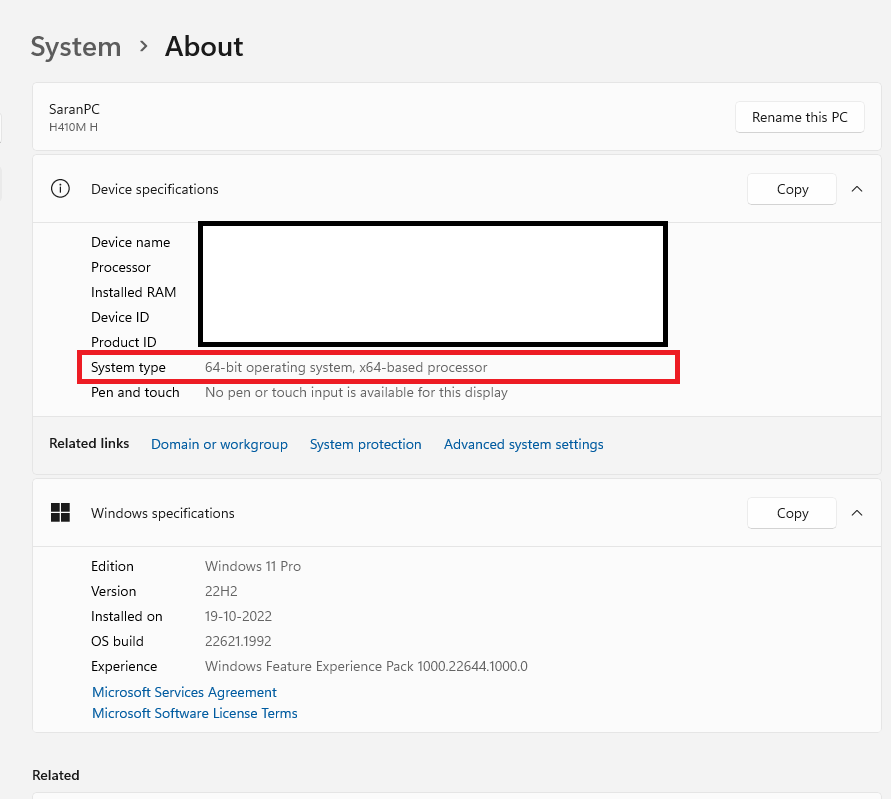
5. Here, you will find whether your Windows is 32 or 64 bit.
By checking the version number, you can update your system to the latest version. The version number is always useful because you can find common issues on that version by checking it online.
FAQ
To open the command prompt on your Windows, press the Windows button and R button on your keyboard.
To check the PC version on Powershell, type [systeminfo | findstr /B /C:”OS Name” /B /C:”OS Version”]. It will provide information regarding the Windows version and edition.


