Google’s word document editor called Google Docs lets anyone create impressive documents. It supports creating, editing viewing and collaborating the docs with ease. Google Docs incorporated with smart editing and styling tools. It supports adding images, drawings, links, and more. You can even get started with the built-in templates when it comes to resume, reports and pre-made documents. There are a number of editing options Google Docs support. Changing margin in Google Docs is one notable thing and we deal with the same here. If you ever want to alter or change the margin on Docs, then it is simple and similar to any other word processors. For more details, get into the below section to know How to Change Margins In Google Docs.
Contents
How to Change Margins In Google Docs?
It is possible to adjust the margin while using Google Docs. There are two methods in which you can change the margin style in Docs. Know them from here.
How to Change Margins In Google Docs using Ruler?
The ruler is the handy option to change the margin on Google Docs.
(1) Launch Google Docs at first on your device.
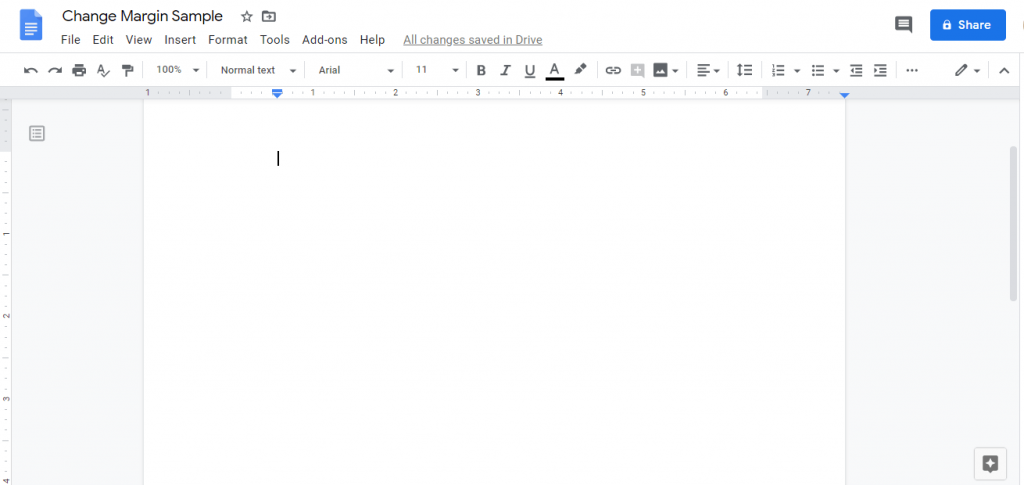
(2) Open an existing document in which you want to change the margin. Else, create a new Google Docs.
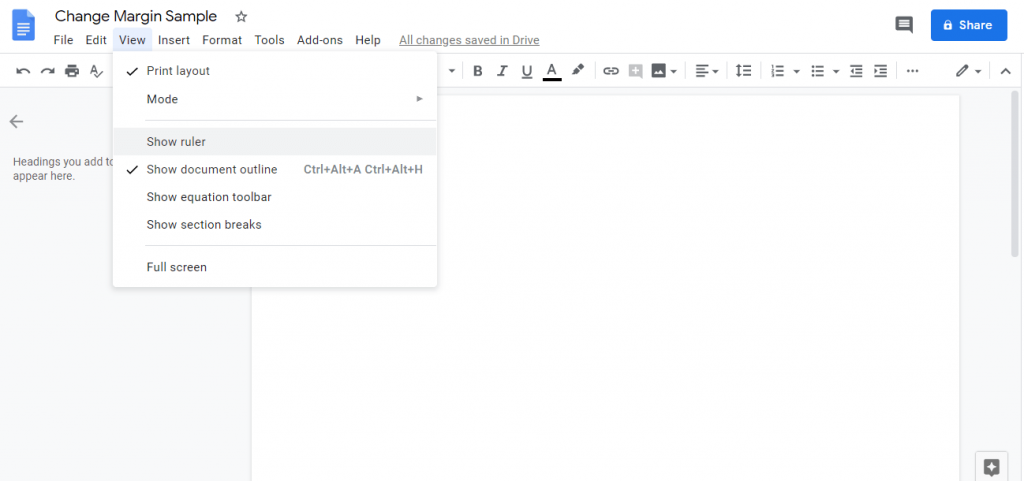
Tip! If you don’t find the ruler on the screen, then go to View > select Show Ruler.
(3) Now, locate the ruler (rectangular box and downward-facing triangle on the left and downward-facing triangle on right) from the top of your document.
(4) To start with changing the margin, place your mouse pointer over the grey area at the top (starting portion of the ruler on the top left or ending portion of the ruler on the top right). Now the pointer changes into a two-directional arrow.
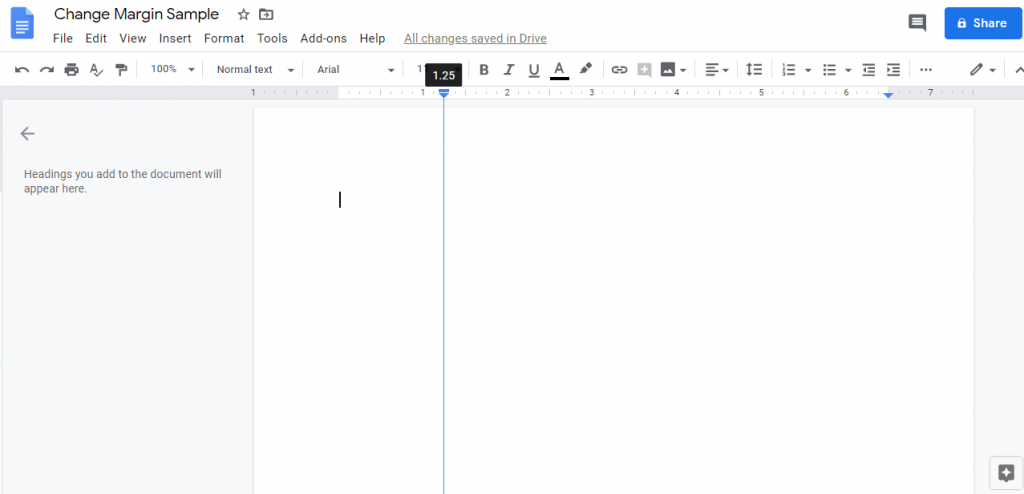
(5) To change the left margin,
Just click on the ruler (rectangular box and downward facing triangle) and drag it from grey area to the right to make the left margin larger. Drag it from right to make the left margin smaller.
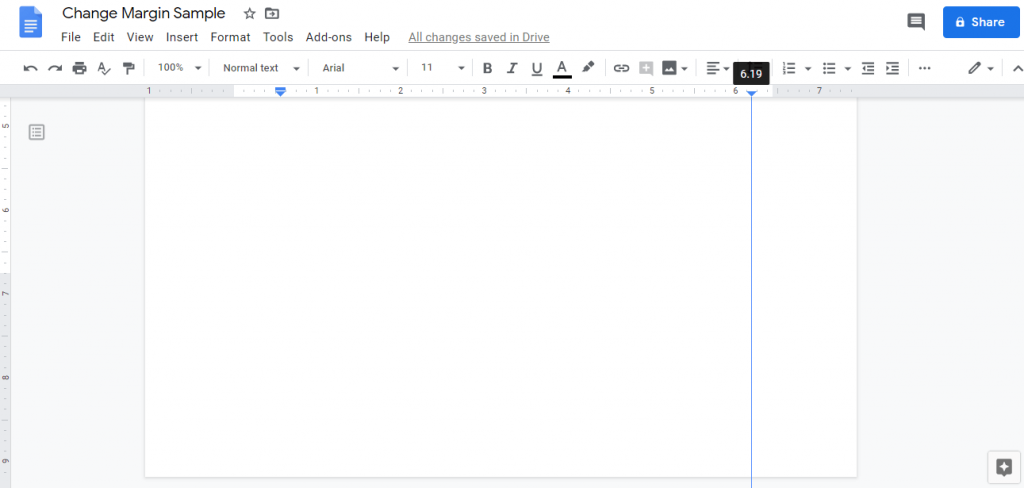
(6) To change the right margin,
Click and drag the ruler (downward triangular arrow) on the right end to the left to make margin larger or move it on the right to get the smaller right margin.
(7) To change the top margin,
Make a click on the grey area on the ruler shown vertically on the left side and drag it up to lower space on the top margin or scroll down to get larger margin space.
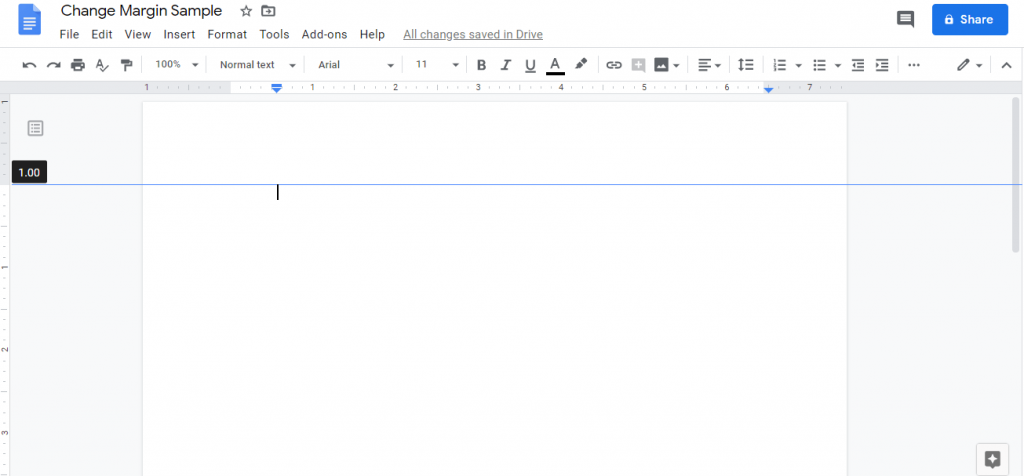
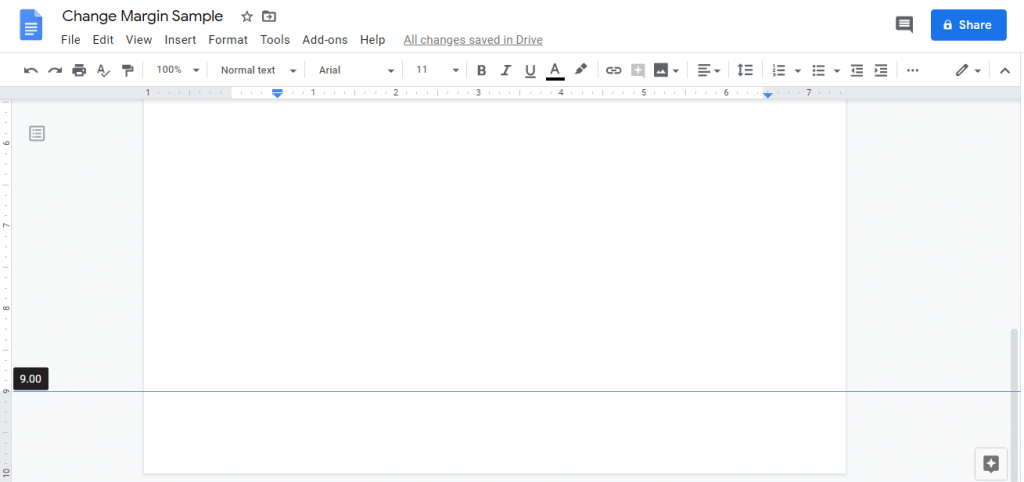
(8) To change the bottom margin,
Scroll down the cursor till the end of the Docs. Then, click and drag over the grey area on the vertical ruler. Drag it up to get more space on the bottom or drag it up to lower the space on bottom.
Learn How to Superscript and Subscript In Google Docs as well.
How to Change Margins In Google Docs using Page Setup?
If you can set margin in inches, then you can follow the steps given below.
(1) Open the Google Docs on your device.
(2) Create a new document or open an existing document.
(3) Select File option from the top.
(4) Scroll down to choose Page setup.
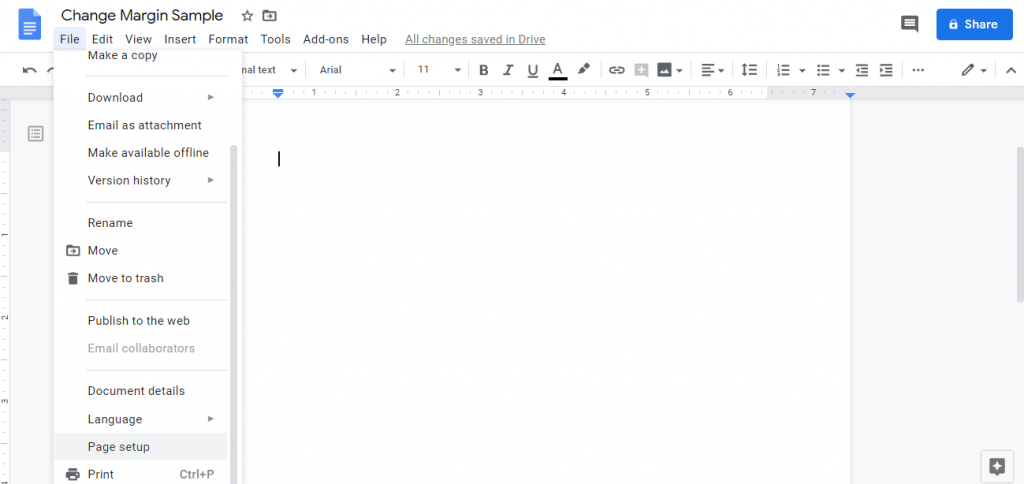
(5) On the Page Setup dialogue box, use backspace to clear the number and type in the margin for top, bottom left and right in inches.
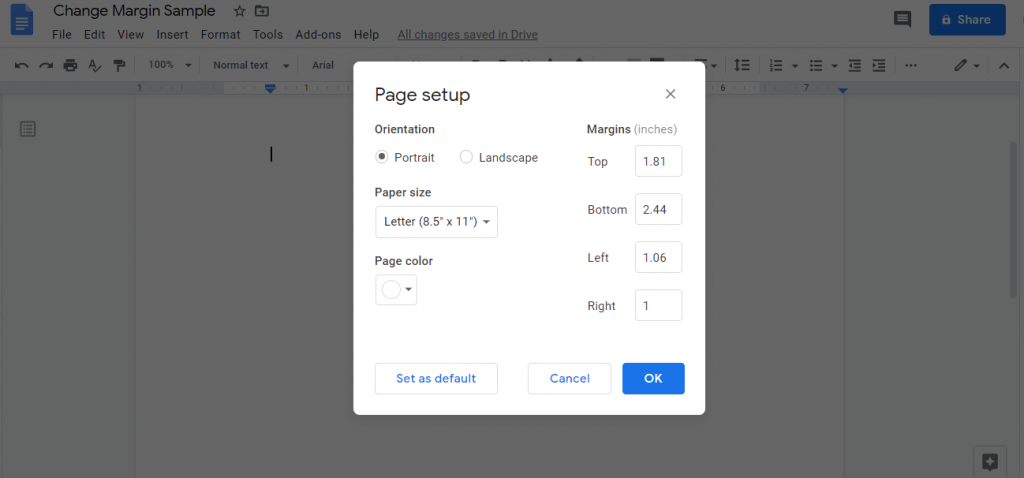
Note: You can even set this as default by clicking on Set as default button.
(6) Click on OK button to save the settings.
That’s all. Setting or changing margin on Google Docs is that simple and easy. You can choose either of the methods to make adjust margin settings as per your preference.
Does this article help you out with changing margin on Google Docs? Then share your views as comments. For the latest articles, follow us on Facebook and Twitter.


