Most often, the IP address will be assigned to the Windows PC by Dynamic Host Configuration Protocol (DHCP). It takes place automatically by the router and thus the device takes less time to connect to the network. With this, the need for configuring IP address is eliminated and any new device will connect to the network instantly. However, with the automatic IP address, the IP address of the device will keep on changing. In order to end this, it is essential to change the IP address manually. If you are worried about how to change the IP address on Windows, then this section is just for your reference. Also, changing the IP address on Windows PC will give you better security and privacy. We have discussed two methods of changing the IP address on PC here.
- Changing Public IP
- Changing Private IP
To Change Public IP Address
(1) Firstly, you should unplug the router and modem.
(2) Disconnect Wi-Fi connection on Windows PC.
(3) You should wait for ISP to assign a new IP address.
Note: It may take a few minutes to hours at times. So, don’t unplug the router.
(4) Now, plug in the router back on to the LAN.
(5) Turn on the WiFi connection on your Windows PC.
(6) After the connection gets established, check if the IP address is changed lastly.
Note: If this doesn’t change the IP address, then ask for a static IP address from ISP. Alternatively, you may get a VPN as it will change the IP address of PC.
To Change Private IP Address
This method deals with changing IP address using Command line on command prompt. If you don’t want to deal with it, then skip to the next section.
(1) On your Windows PC, click the Windows key or click on the icon from the left bottom corner of the screen.
(2) Type as Command prompt on the Search box.
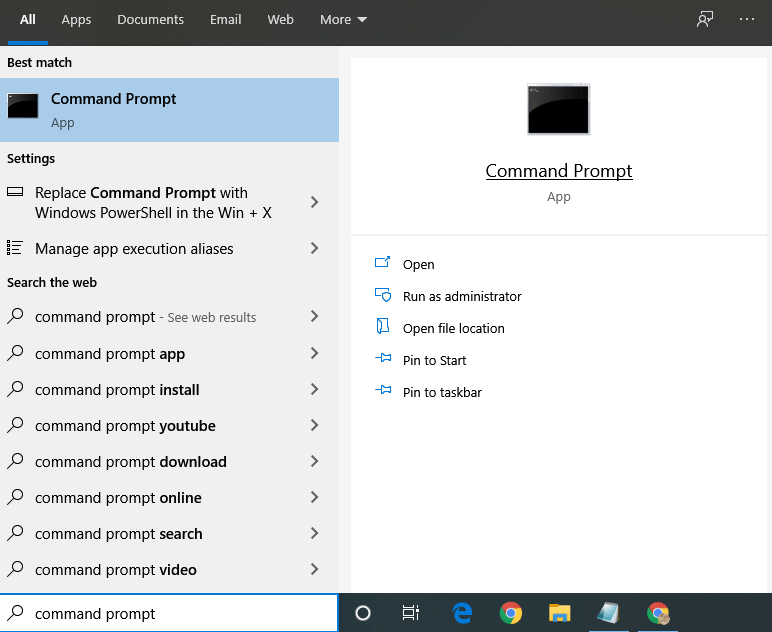
(3) You should now right-click near the Command Prompt to select Run as administrator option. Alternatively, choose the same option just beneath Command Prompt as shown.
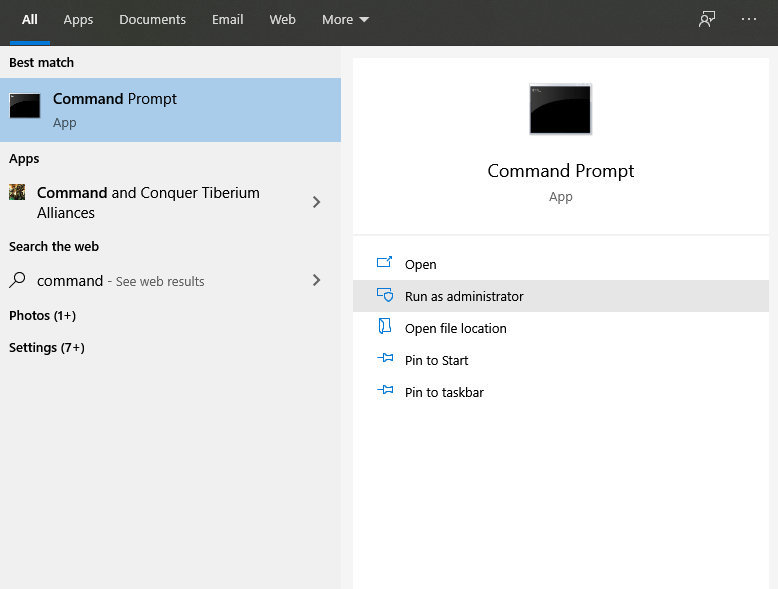
Note: If you don’t find Run as administrator, then it means you cannot change the IP address of your PC.
(4) When prompted, click on Yes option to open Command Prompt.
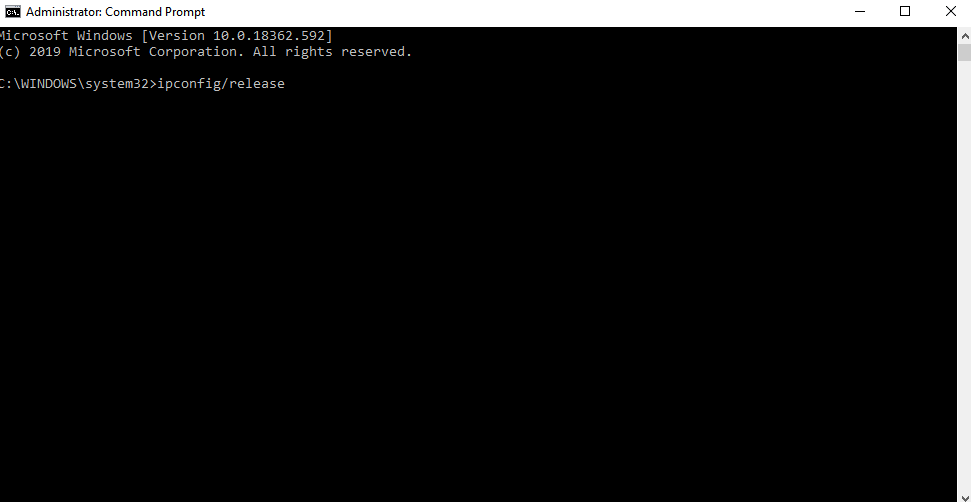
(5) You should type as “ipconfig/release” and tap the Enter button.
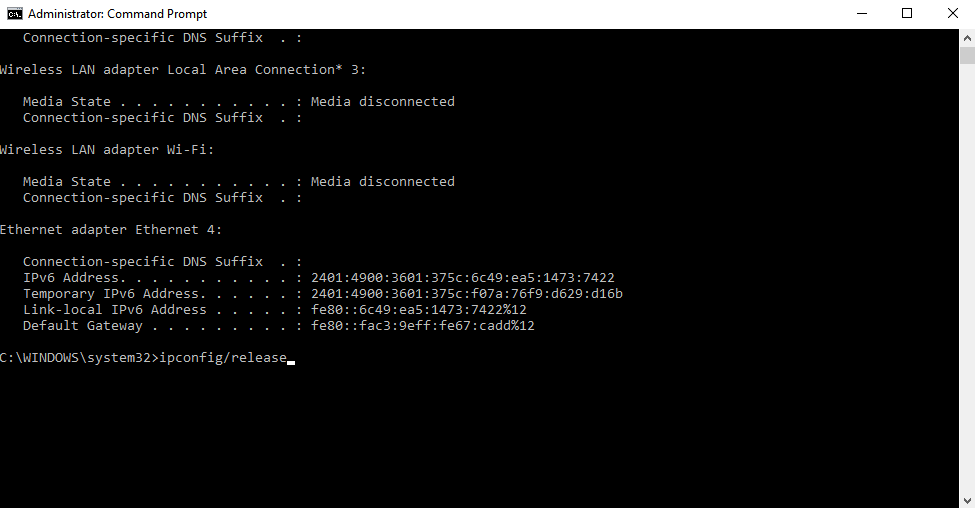
(6) After that, type as “ipconfig/renew” and press Enter.
(7) Go to Settings by clicking on Windows Key.
(8) Choose the Network & Internet option.
(9) Check if the Status section is selected.
(10) Tap on Change connection properties links option.
(11) Under the IP assignment, click on Edit option and then choose the Manual option.
(12) Turn on IPv4. Enter the IP address, subnet mask, default gateway address, preferred DNS server and alternate DNS server on the text box.
(13) Click on Save option to save the new IP address.
Techowns Tip: How to access BIOS on Windows?
Try the Alternative!
You can follow the steps given below to change the IP address on Windows 7/8/10.
(1) Firstly, press Windows key+R to open the Run command.
(2) Type as ncpa.cpl and press OK button.
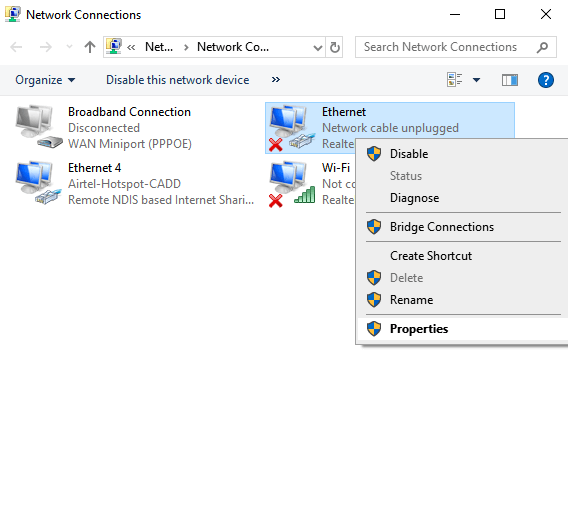
(3) On the Network Connections window, select Ethernet and right-click to select Properties.
(4) On the Ethernet Properties pop-up, select Internet Protocol Version 4 (TCP/IPv4).
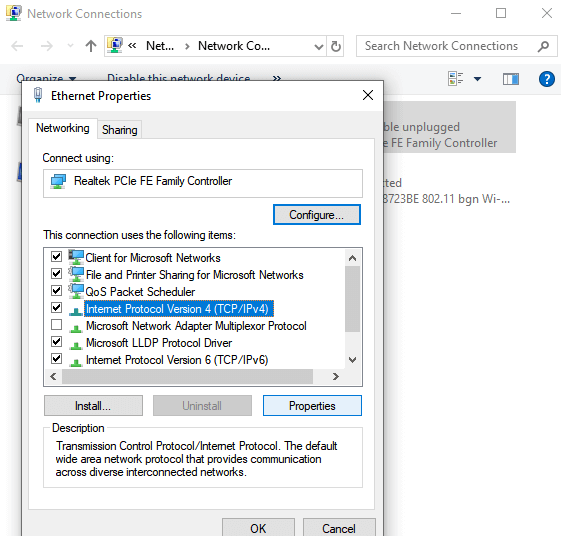
(5) Click on Properties button and select Use the following IP address button. Then press OK.
(6) On Ethernet Properties window, click on OK.
With this, Windows PC will run the network diagnostics and verify the connection.
Techowns Tip: How to Check Windows Version?
Our Opinion
Here comes the end. Changing the IP address on Windows PC is that simple and easy. You can choose any of the possible ways to manually assign an IP address.
Did you face any difficulties while changing the IP address on Windows? Then let us know it. Visit our Twitter and Facebook page for instant notification about the latest articles.


