Sharing ideas in meetings is very important for business organizations. Therefore, communication plays a big role in the development of an organization. Conducting meetings on time is hard in today’s scenario. To conduct and improve the meetings, Calendly comes in handy. Calendly is an app that helps schedule meetings within and outside the company grounds. You can use Calendly on your smartphone and PC as well. Calendly helps to increase efficiency and productivity in the workflows. Moreover, Calendly is available as an extension for Chrome, Edge, and Firefox browsers.
Contents
Calendly Pricing
Calendly offers five subscription plans to users. Unlike other communication platforms, Calendly plans are based on the no. of seats.
- Basic – Free
- Essentials – $10 per seat/mon
- Professional – $15 per seat/mon
- Teams – $20 per seat/mon
- Enterprise – Team count more than 30+.
You can get a free trial of 14 days while signing up for any of the Calendly premium plans first time.
Features of Calendly
- You can schedule meetings by using email, which reduces the hassle.
- It offers more customization options for scheduling meetings, such as timezone detection, start time increments, etc.
- You can get instant notifications by integrating Calendly with browsers, CRMs, payments, and more.
- Can manage and access easily with advanced security features.
- Calendly can be used in various organizational domains, such as sales, recruiting, customer support, and even for developers.
- Moreover, the tool can be used by students and teachers as well.
How to Enable Calendly Chrome Extension
Before installing the extension, update your Chrome browser to the latest version.
1. On your PC, open Chrome and visit the Chrome Web Store.
2. Type Calendly on the search bar, and select it from the search results.

3. Click Add to Chrome → Add Extension.
4. Once added, click Extension (puzzle icon) to open extensions and click the PIN icon to instantly access the extension on the browser.
5. Next, click the Calendly extension icon on the top right. It will prompt you to Sign Up for free.
6. After signing up, fill in the necessary details such as Calendly URL, time zone, availability, etc.
Finally, you can start using the Calendly extension on your Chrome browser.
Note: Alternatively, you can install the Calendly extension on Chrome by clicking on Account → Apps → Calendly for Chrome.
Tips! You can install Speechify Chrome extension to read all the web pages you visit on your PC/laptop.
How to Use Calendly on Chrome
By using Calendly, you can create a new event and share it with the respective persons.
Create New Event
1. Click the Calendly extension icon, which will take you to the home page.
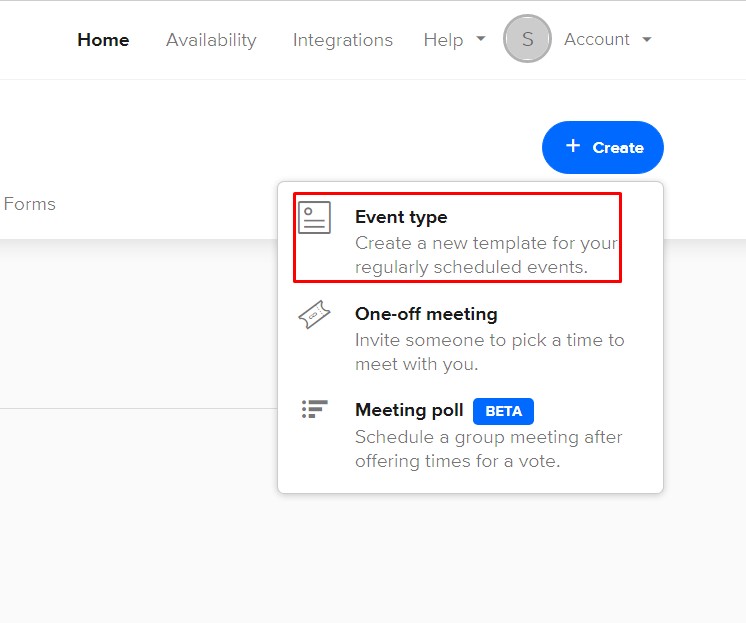
2. Click Create on the right.

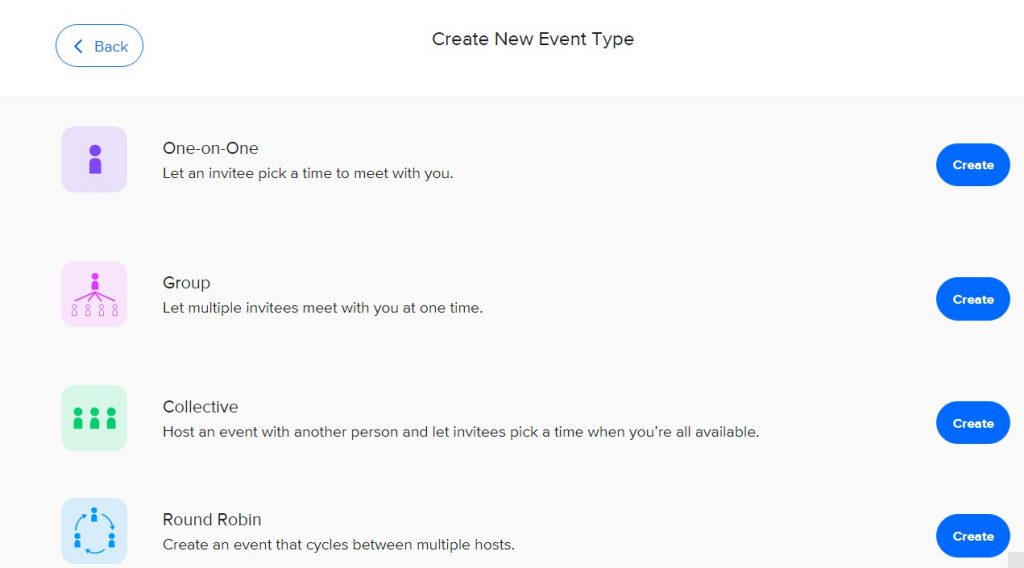
3. Click on Event Type, choose the preferred meeting, such as One-on-one, Round Robin, etc., and click Create.

4. Fill in the event name, location, description, event link, and click Next.
5. Further schedule the time, duration, and date. Click Next to continue.
The event will be created. Go back to the home page and edit the event if needed.
Tips! You can add a Dualless Chrome extension to the browser to split the tabs and complete the work efficiently.
Sharing Links
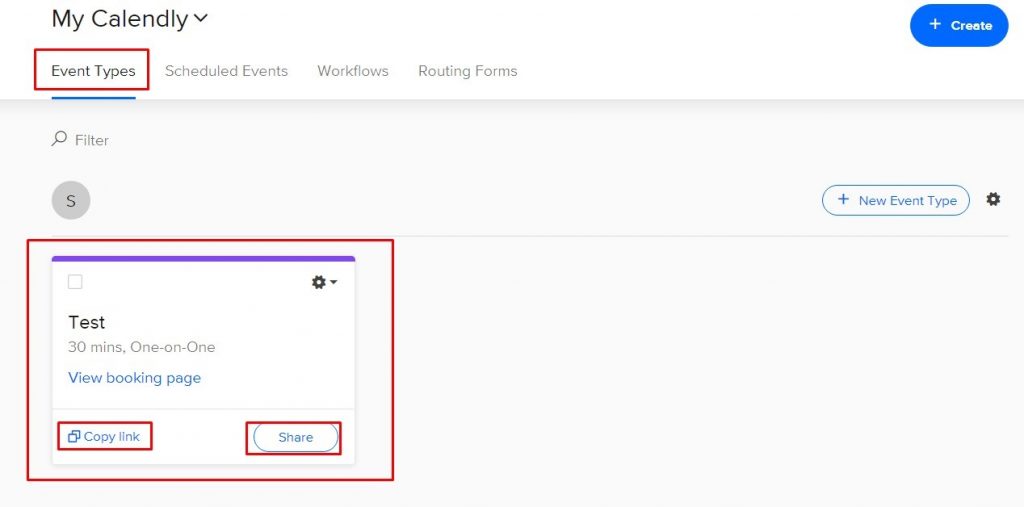
1. Under Event Types, you can see the created events.
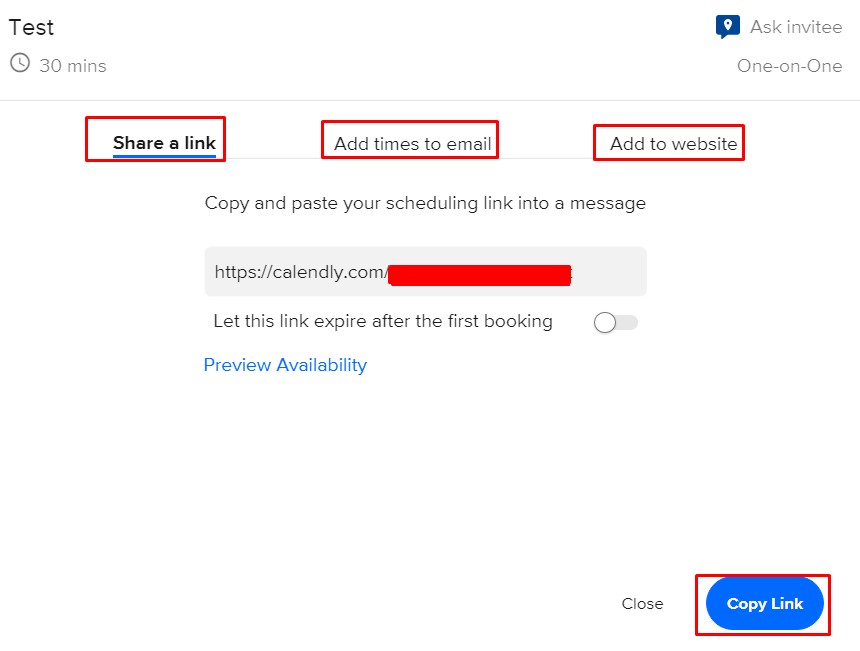
2. Click Copy link on the event to paste it to the desired place or click Share. A new window will open.

Copy single-use link – You can share this link with your invitee to book the meeting slot. The link gets expires once the invitee books it.
Add times to email – This link is to share with the selected days. You can select upto 3 days and share this link with your invitee. The invitee has the option to choose the time within the specific dates. Once you click on it, click Finish and Share and copy the link to send.

Add to the website – By clicking any of the given options, such as Inline Embed, Popup Widget, and Popup Text, the members can see the meeting on the website.
Frequently Asked Questions
Yes. Calendly can be easily integrated with Google Calendar. When you’ve signed up using your Google account, Calendly will be connected to Google Calendar.


