Claiming a website on Pinterest means website verification, which helps to optimize your profile and drive more traffic to your blog or website. Once you claim the website, your profile picture on Pinterest will be shown with all your pins from your site, prompting users to visit your page. You can claim more than one website per Pinterest account. You have to use a computer or laptop to claim your website.
There are two ways to verify your website on Pinterest:
- By adding HTML tag
- By uploading HTML file
Contents
How to Claim A Website on Pinterest by Adding HTML Tag
Step1: Go to your Pinterest profile and click three vertical dots at the top right corner.

Step2: Select Edit settings and click Claim.
Step3: Click the Confirm website button.
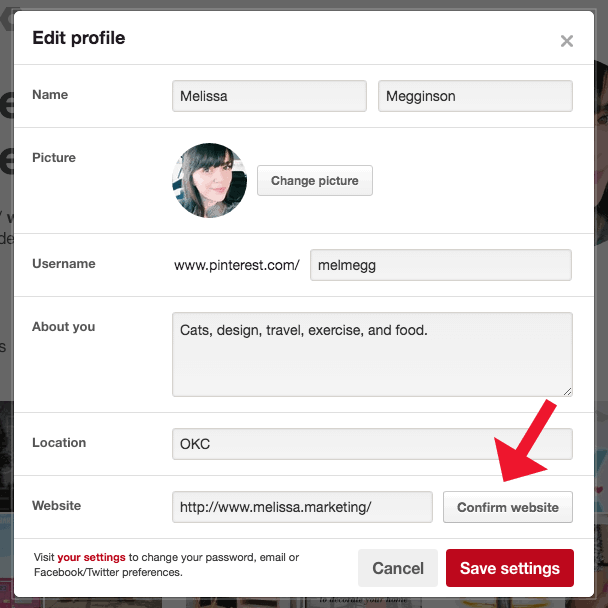
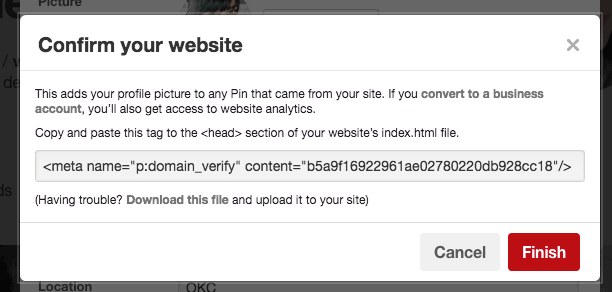
Step4: Copy the code.
Step5: Paste the copied tag in between <head> and </head> tags in your blog theme.

Step6: Click Finish to complete the process.
Related – How to Join Group Boards on Pinterest
How to Claim Website on Pinterest by Uploading HTML File
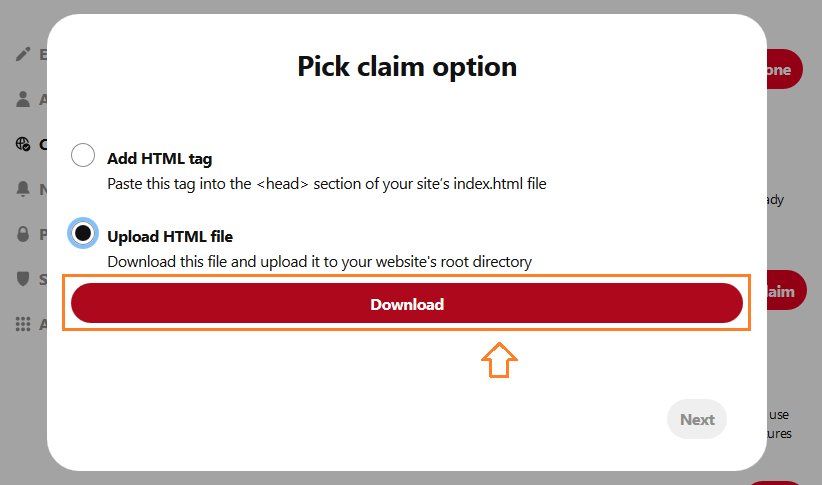
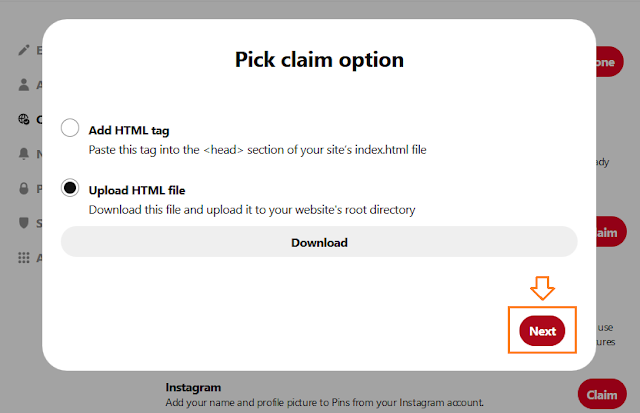
Step1: Click Edit profile and choose Upload HTML file.
Step2: Click Download.
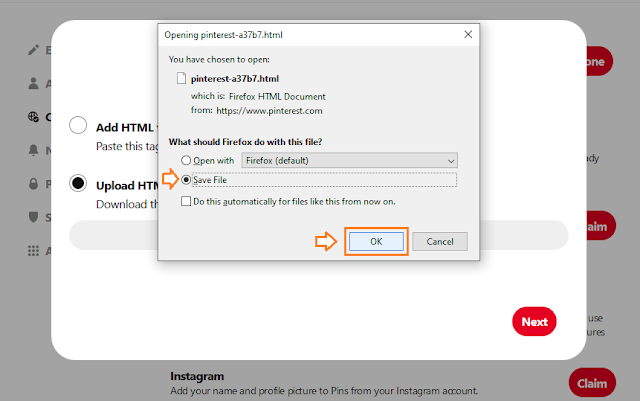
Step3: Choose Save File on the popup box.
Step4: Click OK. The file will be saved on your computer.
Step5: Click Next.
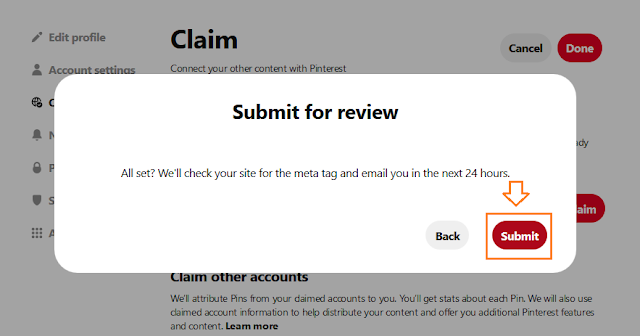
Step3: Upload your HTML file to the root server like public_html, www, or wwwroot.
Step4: Once you have uploaded the file, get back to Submit for review step and click Submit.
How to Upload to Popular Site
You can verify the Pinterest website easily through many hosts. There are 19 hosts available, and here we will see how to add an HTML tag on Blogger and Tumblr.
Blogger:
Step1: Copy the HTML tag from Pinterest using the above method.
Step2: Sign in to Blogger -> go to Template -> select “Edit HTML.”
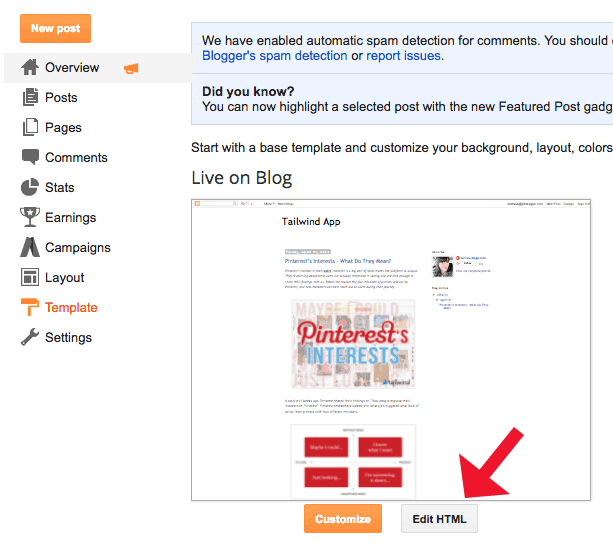
Step3: Paste the HTML tag into the head.

Step4: Click Finish back on Pinterest.
Tumblr
Step1: Copy the HTML tag from Pinterest using the above method.
Step2: Sign in to Tumblr and go to Settings. Find your blog listed on the right rail.
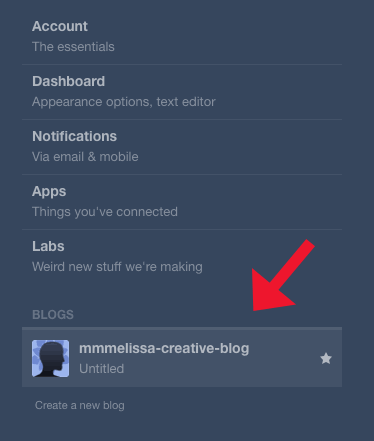
Step3: Scroll to Edit Theme and click on Edit HTML.

Step4: Now paste metadata into the head and save.

Step5: Click Finish back on Pinterest.
Related – How to Delete Pins on Pinterest
Frequently Asked Questions
After choosing the Add HTML tag option, open your WordPress site in a new tab. Go to My Site -> Tools -> Marketing -> Traffic. Scroll down to the Site Verification Services section and paste the HTML tag you copied. Click on the Save Changes options. Get back to the Pinterest tab and tap the Submit for Review option.


