Twitch is the hub for all gamers. On Twitch, you can find videos related to all the popular games like PUBG, Fortnite, Clash of Clans, Call of Duty, and more. It is the go-to guide platform for all gamers to live-stream their gameplay. In 2014, Twitch came up with a new update called Host Mode. By using that mode, you can host other Twitch channels. By hosting on Twitch, your channel will remain online even when you are offline.
Contents
What is Host Mode on Twitch
Generally, your Twitch channel viewers will leave the channel once the live streaming is completed. You can’t live-stream your gameplay 24/7 to keep your viewers intact. For this, Twitch have introduced the Host Mode. By using that, you can keep your channel active by allowing other channel’s gameplay on your Twitch channel. So, your channel will be online most of the time.
In Host Mode, you will have the ability to host other channel’s live video. There are no restrictions and limitations to hosting the channel. All you need to know the exact name of the Twitch channel that you want to host.
How to Turn on Host Mode on Twitch
The Host Mode can be turned on or off from the website and from the smartphone app.
(1) Go to Twitch website and sign in with your Twitch account, if asked.
(2) On the Chat screen, type /host CHANNEL NAME. Replace the CHANNEL NAME with the name of the Twitch channel that you want to host.
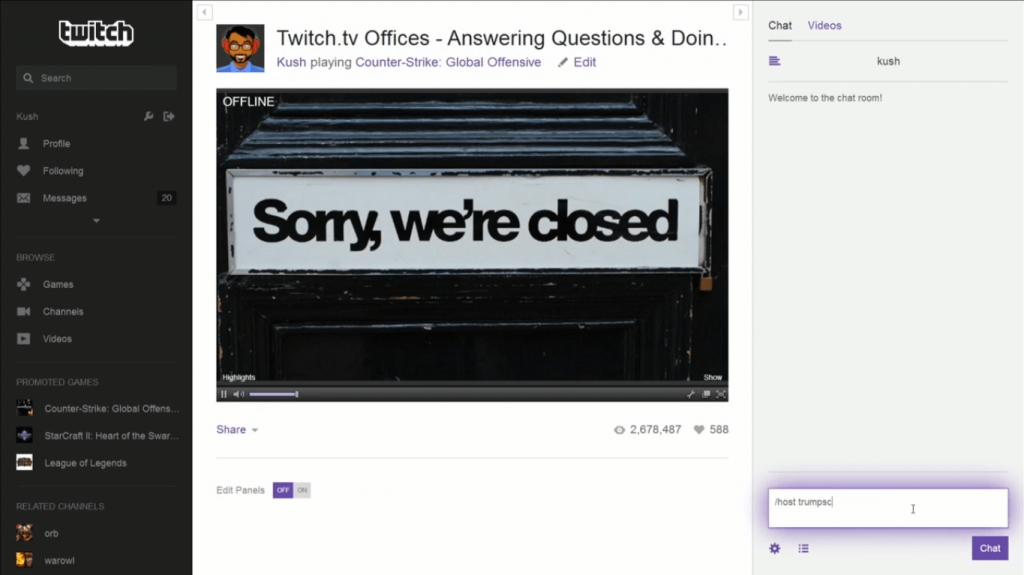
(3) Now, you (your channel) will be hosting the live video that is streaming on the mentioned Twitch channel.
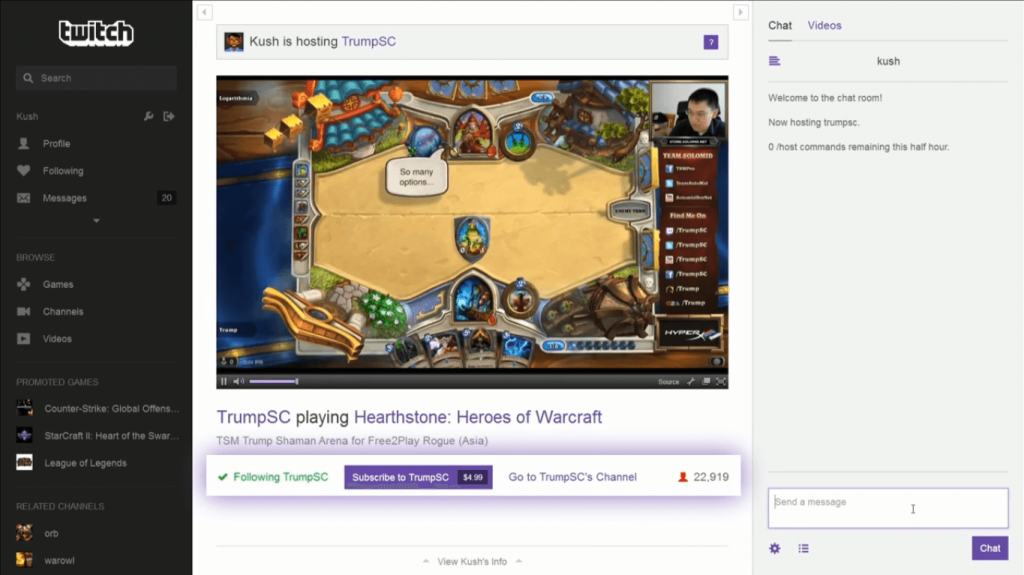
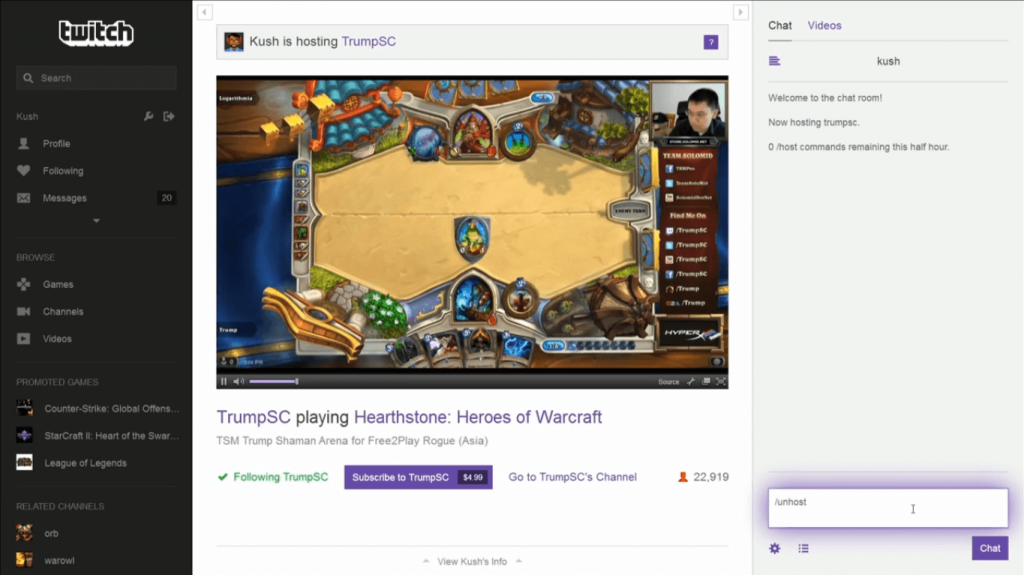
(4) To un host the channel, type /unhost on the chat screen.
How to Turn on Host Mode on Twitch from the Smartphone app
You can do the hosting in your smartphone app. But the Host mode is available only on the iOS app, the feature is yet to be released on Android smartphones.
(1) Open the Twitch app and go to the Chat option.
(2) Type the command /host CHANNEL NAME, replace the CHANNEL NAME to the Twitch channel that you want to host.
(3) To unhost, type \unhost.
There is a way to host from the Android smartphone app. Go to the Twitch channel that you want to host. Click the Settings icon and choose the Host option.
Note: You can use only three host commands in one hour. If you host and un host a channel, you will be left with one host command. After one hour, the count will be reset.
Techowns Tips – Steps to Change Account Password on Twitch
How to Setup Auto Host on Twitch
The above method is the manual method, where you have to type the channel name and host the specified channel manually. You can also setup Auto-Host channels. It will host the live videos on the specified channels if you are offline.
(1) Go to your Twitch account and click the Profile icon on the top right of the screen. Choose the Settings option

(2) On the Settings page, click Channels and Videos option.

(3) Scroll down and you will see the Auto Hosting option.
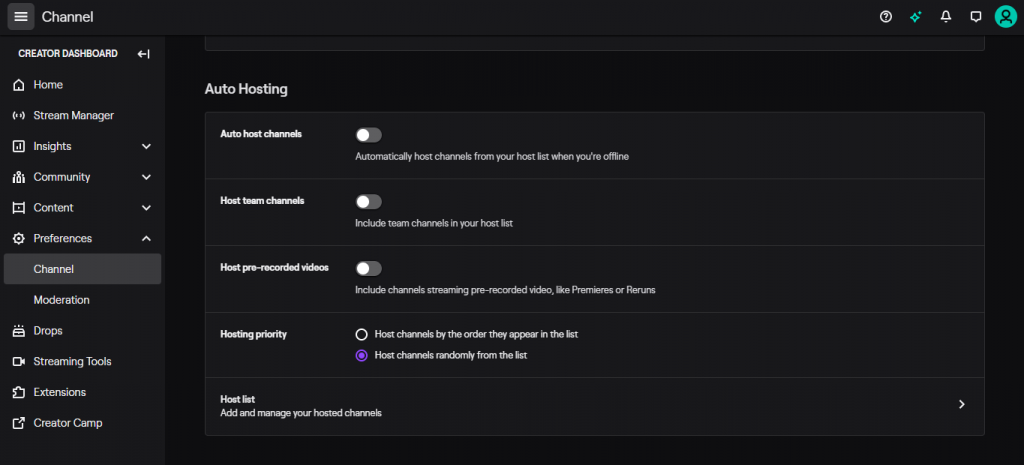
(4) Turn on the Auto host channels toggle. If you have team channels, turn on Host team channels.
Note: If a Team channel is active, it will be streamed over other host channels.
(5) Change the Hosting priority if you want. Click the Host list to add channels that you want host when you are offline.
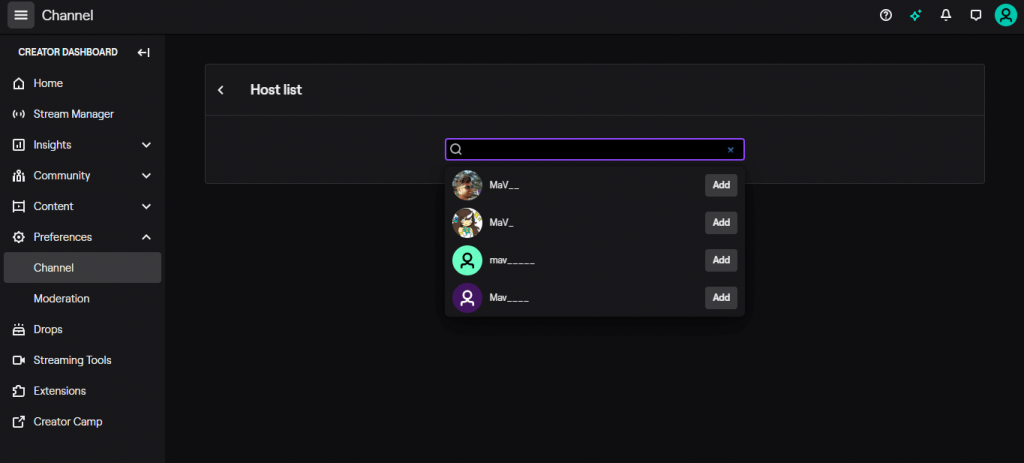
(6) Enter the name of the channel that you want to host.
(7) After editing all the hosting option, click the Save Changes button.
The mentioned channel will be hosted if you are offline. The Auto-Host will be activated after three minutes of inactivity.
These are the ways to turn on and off the host mode on Twitch. Use the Auto host mode to keep your channel active when you are offline. If you have any doubts, tell us in the comments section.
Follow our social media profile, Facebook and Twitter to get more updates about Twitch.


