Key Highlights
- Update your Windows 11 PC to the 22H2 version or above to get the New Tab feature on File Explorer.
- You can also use the ViveTool to get the New Tab feature.
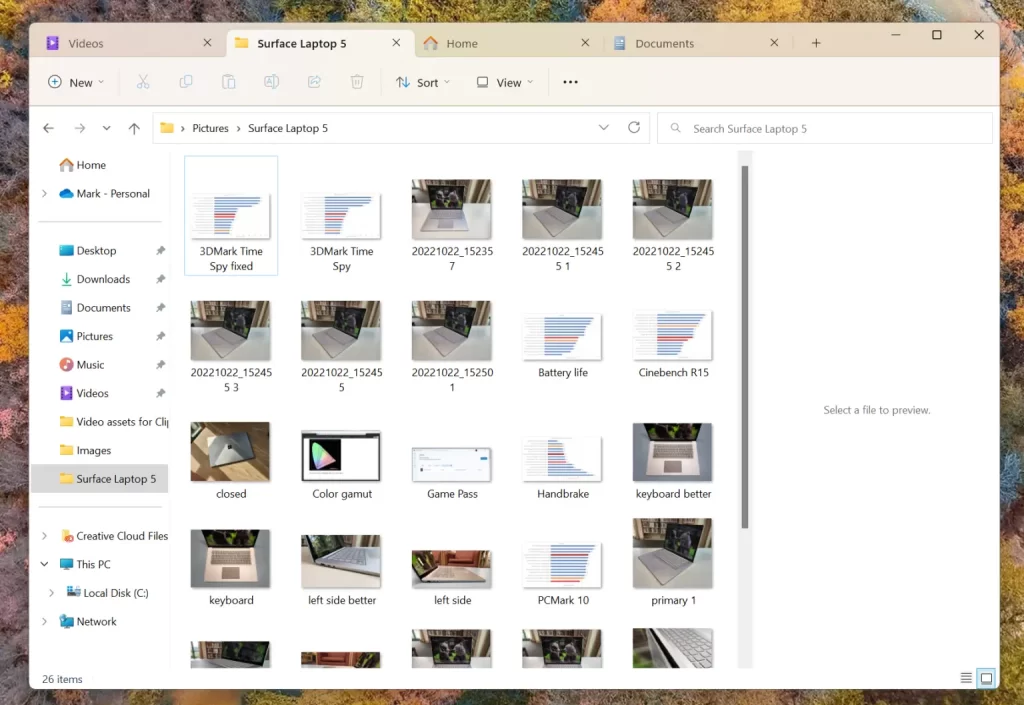
Recently Microsoft rolled out a new feature called Tabs in File Explorer with Windows 11 22H2 update. With this update, you can enable multiple tabs for each section on the built-in File Explorer. It allows users to create new tabs, manage multiple tabs, and more. When you are copy-pasting files on your PC, the Tab feature will help you a lot. To get this feature, you need to get the recent version of Windows 11. If not, you need to install the third-party tool called ViveTool to add tabs in File Explorer.
Contents
How to Enable Tabs in File Explorer With Windows 11 22H2 Update
[1]. Turn on your PC, then navigate to Settings, or press Windows + I on your keyboard to open the Settings window.
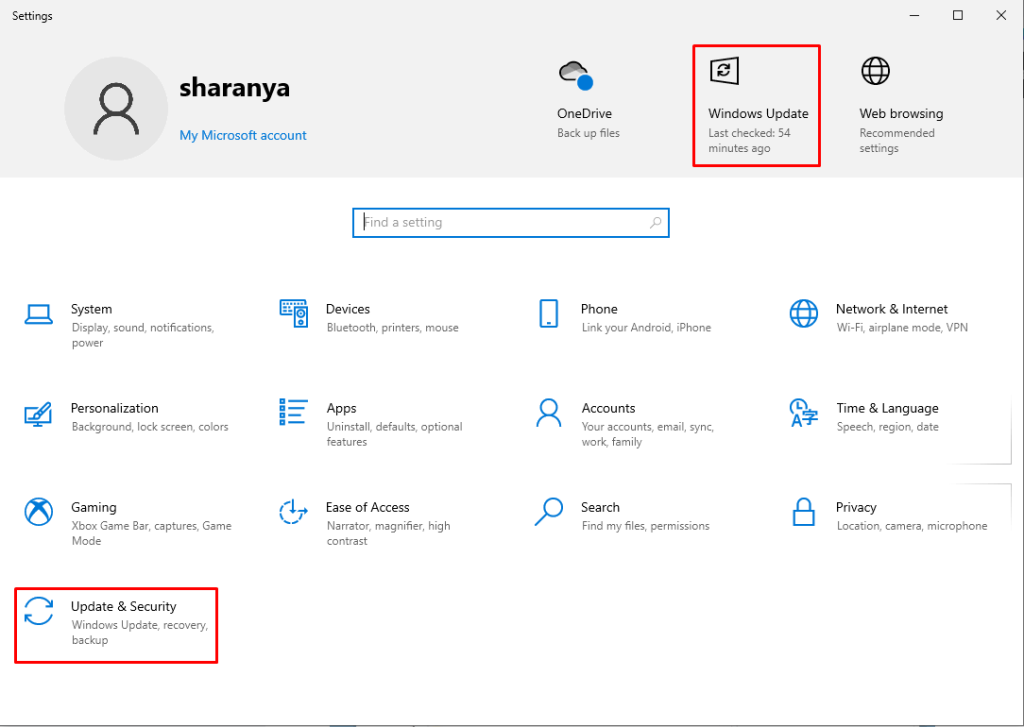
[2]. On the top right corner, click on the Windows Update tab.
- If you can’t find the tab, select the Update & Security tab and then select the Windows Update option on the left side panel.
[3]. Then, click the Check for updates button on the right.
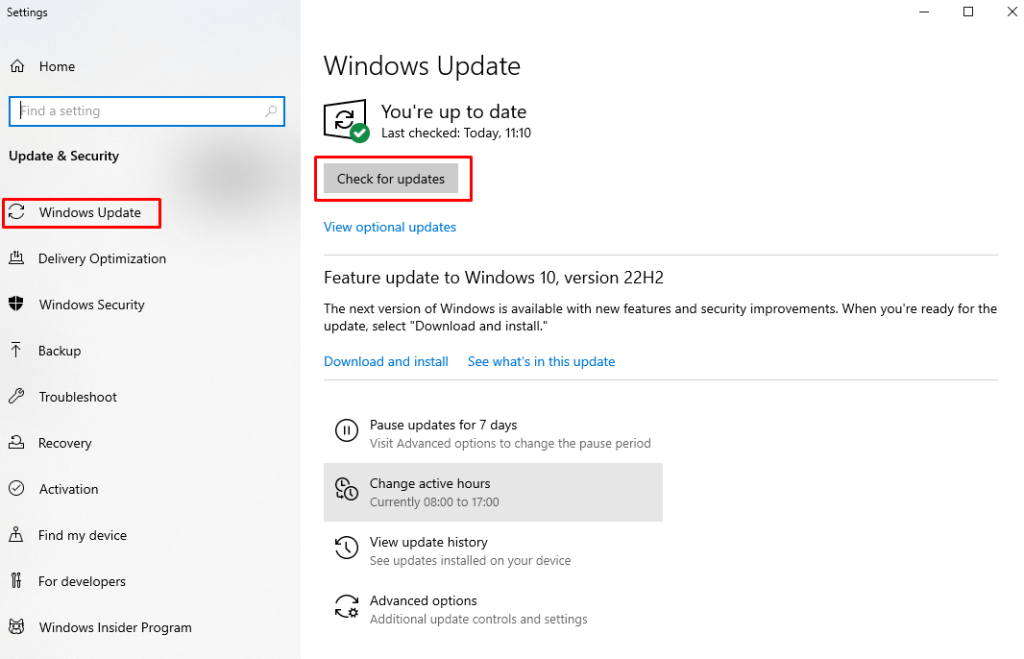
[4]. If the download is available, click on the Download and install button to get the latest version.
Tip: Check our detailed guide on how to download Windows 11 on your PC.
[5]. Once the installation is completed, your PC will restart.
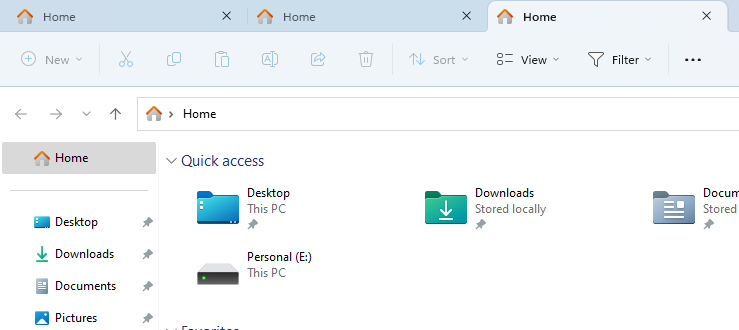
[6]. After the restart, you will get the New Tab feature on the File Explorer.
[7]. If you don’t get the New Tab feature, contact the Help in Windows 11 to fix the issue.
How to Enable Tabs in File Explorer Windows 11 using ViveTool
Before you start, check that you have updated your PC to the latest version of Windows 11.
[1]. On your PC, open the web browser and head to the GitHub website.
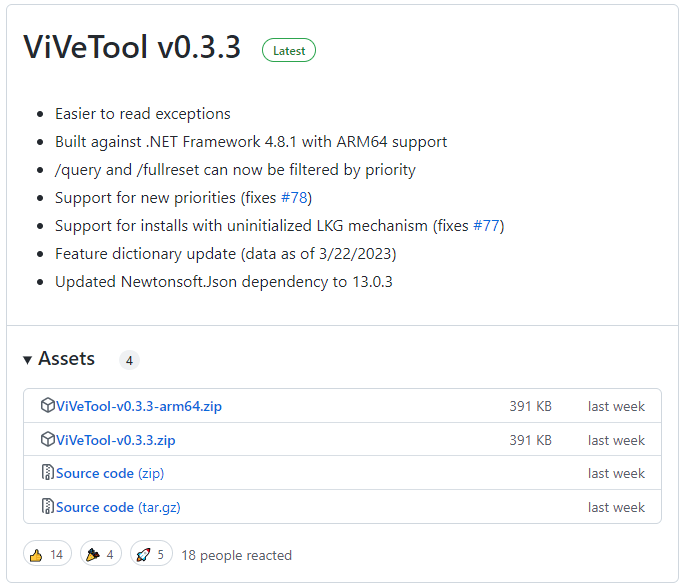
[2]. After that, download the ViveTool v0.3.3 zip file on your device.
[3]. Find the downloaded ViveTool zip file and right-click on it.
[4]. Then, select the Extract All option from the menu list.
[5]. Now, right-click on the extracted folder and click on the Copy as path option from the context menu.
[6]. On the Windows search bar, type CMD to launch the Command Prompt. Select the Run as administrator option on the right panel.
[7]. Type cd in the Command Prompt window and paste the path that you copied. The file path varies depending on your PC. For instance, it will look like,
cd “C:\Users\The HK Online\Downloads\ViVeTool-v0.3.3-arm64”
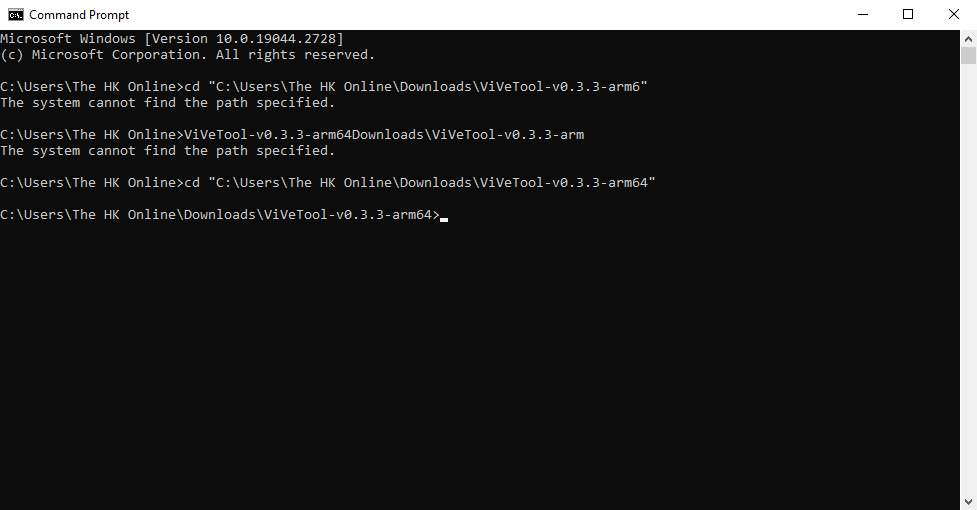
[8]. Next, type the command given below and press Enter to enable the tab on File Explorer.
Vivetool /enable /id: 36354489
[9]. Run the command given below to enable the new Navigation pane (SV2Navpane) in your File Explorer folder.
Vivetool /enable /id: 37634385
Vivetool /enable /id: 39145991
[10]. Now, restart your PC to get the tabs in File Explorer.
How to Disable Tabs in File Explorer Windows 11
If you would like to disable the File Explorer tabs on Windows 11 PC, run the commands one after another given below.
Vivetool /disable /id: 36354489
Vivetool /disable /id: 37634385
Vivetool /disable /id: 39145991
Once done, restart your computer to disable the feature.
Shortcuts for Tabs in File Explorer
Similar to Chrome keyboard shortcuts, you can use the shortcuts to manage tabs in File Explorer.
| Shortcut Key | Operation |
|---|---|
| Ctrl + T | Opens a new tab |
| Ctrl + Tab | Switch the tab to the left |
| Ctrl + Shift + Tab | Switch tab to the left |
| Ctrl + W | Switch the tab to the right |
| Ctrl + E | To search on the tab |
| Ctrl + L | To go to the Path directory |
| Ctrl + R | Refresh the tab (only in the Home tab) |
Tip: If you are not satisfied with the tabs in built-in File Explorer, check our guide on the best alternatives for File Explorer on Windows PC.
Frequently Asked Questions
There may be some issues with the 22H2 update. Reinstall the update to fix the issue.


