Chromebook is a smart device like the smartphone but that runs on a separate OS called Chrome OS. Devices like laptop and tablet come with ChromeOS. The UI of the Chrome OS is very similar to Android OS and all the Google apps are pre-installed. You can add extensions as you add them on the Chrome browser and many more. Like other smart devices and computers, you can take a screenshot on Google Chromebook as well. If you are wondering, how to screenshot on Chromebook, follow this article to find out the answer.
Contents
- How to Take a Screenshot on Chromebook?
- How to Take a Screenshot on Chromebook using the built-in keyboard?
- How to Take a Screenshot on Chromebook using the External Keyboard?
- How to Take a Screenshot on Chromebook using the buttons?
- How to Screenshot on Chromebook using the Stylus?
- How to Screenshot on Chromebook using the Extensions?
- Where do the screenshots get stored on your Chromebook?
- Our Opinion
How to Take a Screenshot on Chromebook?
In Chromebook, there are five different ways to take a screenshot.
- Built-in Keyboard
- External Keyboard
- Using the buttons
- Using the Stylus
- Extensions
How to Take a Screenshot on Chromebook using the built-in keyboard?
With the built-in keyboard, you can take two types of screenshots. You can either take a full screen or cropped screen.
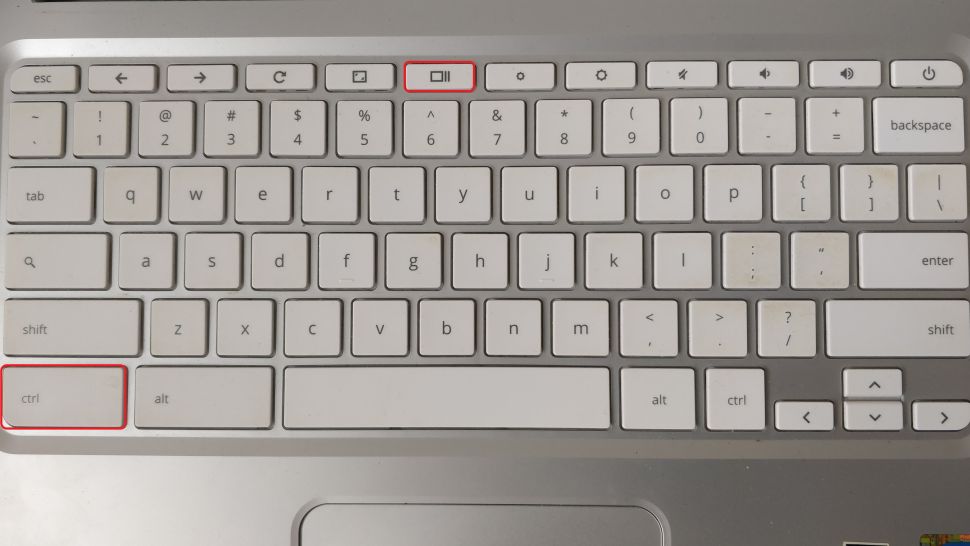
(1) To take the screenshot of the present screen on your Chromebook, press the Ctrl key and Window Switch Key simultaneously. Window Switch Key is located between the Full-screen button and the Brightness down button.
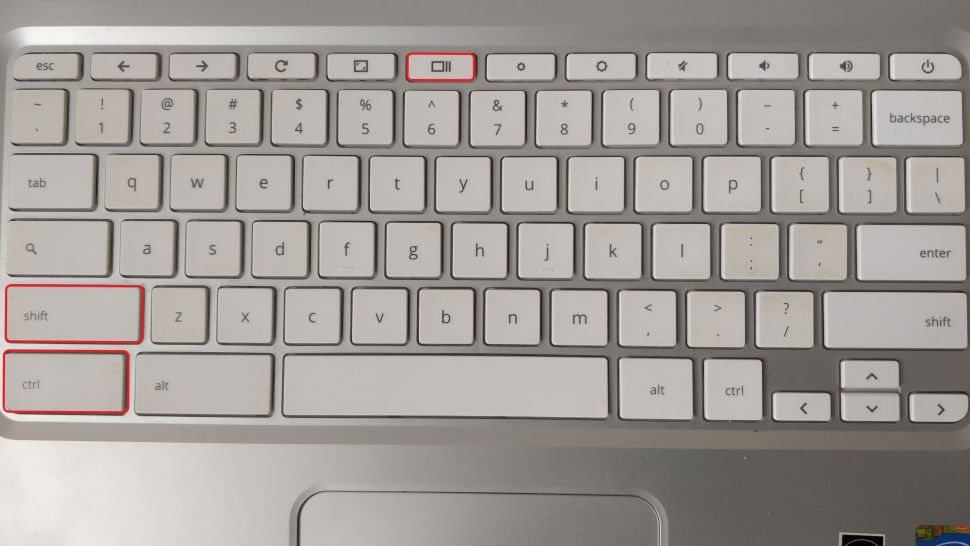
(2) If you press Ctrl + Shift + Windows Switch Key, the cursor will be converted into the Target icon. Click and drag the mouse cursor to select the portion of the screen.
How to Take a Screenshot on Chromebook using the External Keyboard?
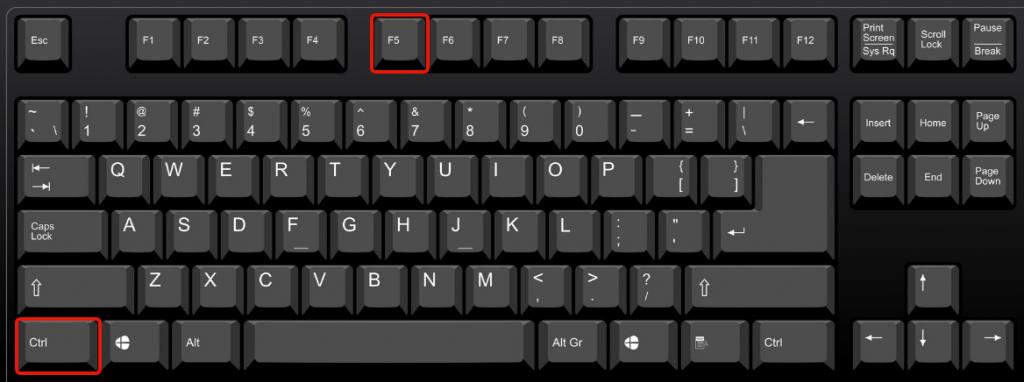
(1) If you are using an external keyboard for your Chromebook, press the Ctrl +F5 button. This combination work in some specified brands of Chromebook, not all the brands.
Unlike Windows, the Print Screen button doesn’t work on Google Chromecast. Taking a screenshot on Windows is completely a different procedure.
This method is similar to taking a screenshot on Android smartphones.
(1) Press the Power and Volume Down buttons at the same time. If it doesn’t work, press and hold the buttons for 3-5 seconds.
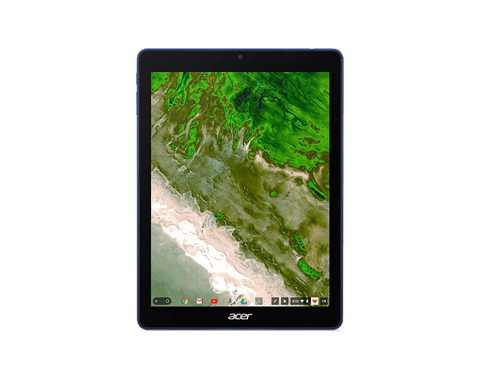
Note: This method works on a touch screen Chromebook like Acer Chromebook models with the power button and volume buttons.
You can also use Android apps on Chromecast to capture the screen as well.
How to Screenshot on Chromebook using the Stylus?
(1) If your Chromebook has a Stylus, tap the Stylus menu on the bottom right side.
(2) A pop-up will appear. Click on the Capture screen to take a screenshot.
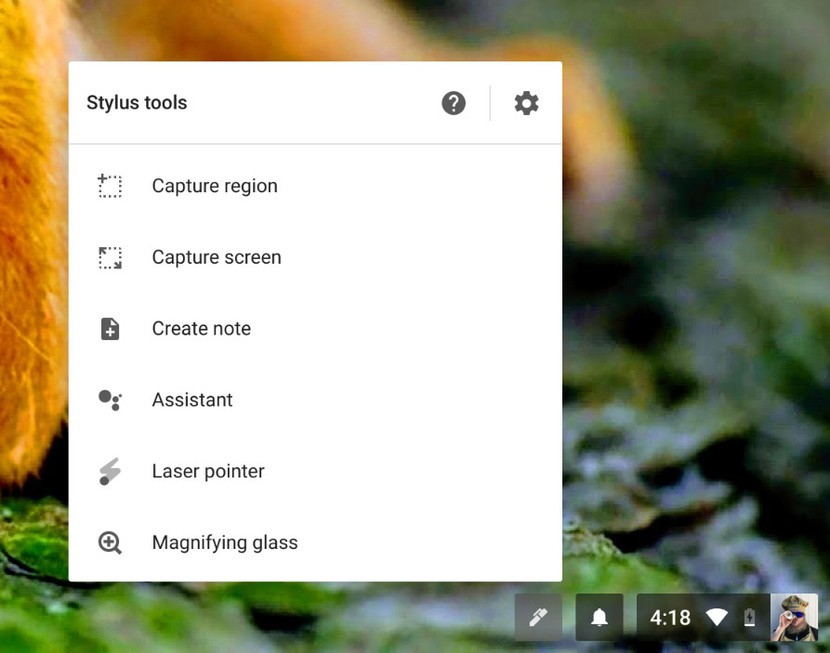
Chromebook models like Pixelbook and Samsung model users can use this method.
How to Screenshot on Chromebook using the Extensions?
Other than the above methods, you can also use extensions to take a screenshot. There are hundreds of extensions are available on the Chrome Web Store. Extensions like Lightshot, Greenshot, Fireshot can take a screenshot effortlessly on your device.

Where do the screenshots get stored on your Chromebook?
When you take a screenshot, a pop-up will be displayed o the bottom left side. Click Copy to Clipboard to store the image on the clipboard so that you can paste wherever you want. By default, all the screenshot you have taken on your Chromebook will be saved on the Downloads folder. In some extensions, you can specify the download the path too.
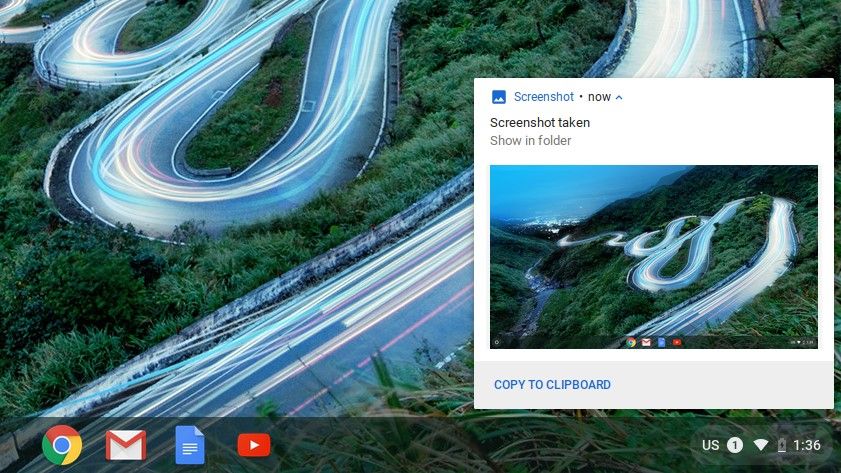
Note: The screenshots that you took will be saved in the PNG format.
Our Opinion
These are five ways to take a screenshot on Chromebook. Capturing the screen will help you in many ways. Booking an online ticket or sharing a QR code are some of the situations where screenshots are helpful. If you know any other way to take a screenshot, tell that in the comments section below.
Stay connected with us on Facebook and Twitter for more updates.


